
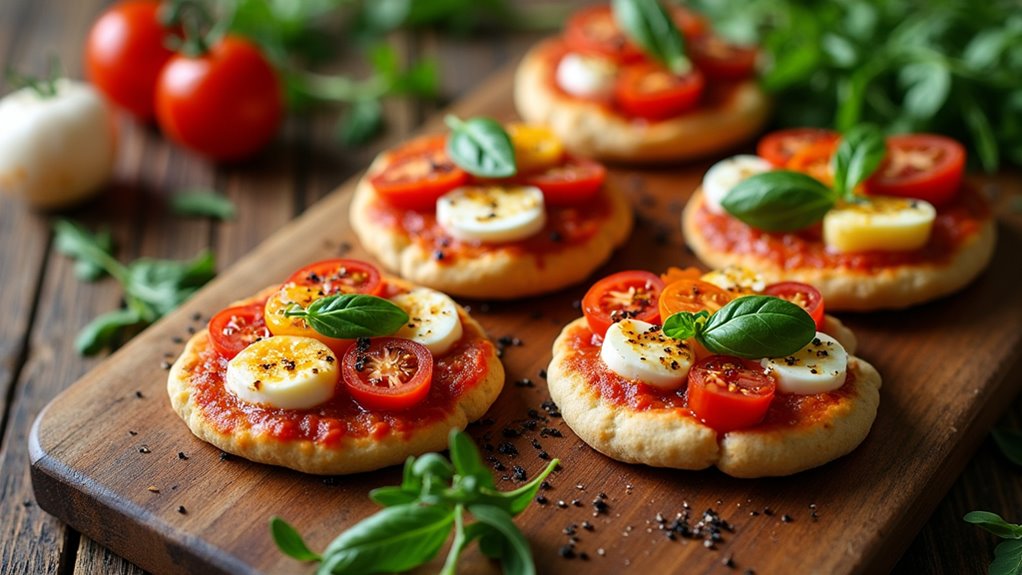
Have you ever craved a quick appetizer that’s not just easy to make but impresses everyone at the gathering? I know I have. That’s where these Mini Caprese Pizzas come in. Trust me, with just a few simple ingredients, you can whip up these delightful bites in no time. Plus, they’re downright gorgeous on a platter. Want to know how to make them? Keep on with me to uncover the step-by-step magic.
Why You’ll Love This Recipe
You’re going to love these Mini Caprese Pizzas for a bunch of reasons. First off, they’re super simple to whip up, perfect for a last-minute snack or impressing friends!
Seriously, who doesn’t love melted cheese with fresh basil and juicy tomatoes? They’re like little flavor bombs that take hardly any time to bake.
Plus, you can customize them—you want extra cheese? Go for it! These mini caprese pizzas are also great for parties; they disappear faster than I can count how many I’ve eaten.
And let’s be honest, my counting skills are pretty questionable. Just imagine pulling a tray of these golden beauties out of the oven.
Your taste buds are gonna dance. I mean, what’s not to love?
Equipment List
When it comes to whipping up Mini Caprese Pizzas, having the right equipment can make all the difference. You’ll need a baking sheet—preferably one that doesn’t warp when it gets hot (trust me, I’ve learned the hard way).
A spatula comes in handy to slide those cheesy bites off without a mess. If you’ve got parchment paper, use it! It keeps everything from sticking, and who wants to clean a pan?
Oh, and don’t forget a good knife for slicing those cherry tomatoes. A pair of kitchen shears can also be incredibly useful for snipping fresh basil right into your pizza mix. A mixing bowl makes it easier to toss in the ingredients, too. Additionally, using an electric griddle with large capacity can simplify the cooking process by allowing you to prepare multiple pizzas at once.
See? Nothing fancy here, just the basics to keep it fun and simple. Cooking should never feel like rocket science, right?
Our Ingredients
Let’s talk about the ingredients you’ll need for crafting those delicious Mini Caprese Pizzas. Honestly, it’s not a long list, and most of these items are probably hanging out in your kitchen already. You know, the kind of things that make you feel like a gourmet chef when really, you matched some fresh ingredients with a bit of cheese and bread.
It’s all about combining simple flavors that give you a taste of Italy without the need for an expensive plane ticket. So, let’s gather our goodies!
- 6 mini naan rounds
- ½ cup pizza sauce or marinara
- ½ cup shredded mozzarella
- ¼ cup cherry tomatoes, halved
- 3-4 fresh basil leaves
- ¼ cup arugula (optional)
- 1 tablespoon balsamic glaze
- Black pepper, to taste
Now, when it comes to the choices we make for our ingredients, just a quick reminder—quality matters! If you can snag some fresh basil instead of dried, go for it. The smell alone will sweep you off your feet.
And those cherry tomatoes? Find the juiciest ones you can, because that’s what’s really going to take your pizza from a mere snack to a mouthwatering bite. Also, the balsamic glaze—yeah, don’t skip that. It adds a sweet tang that makes everything sing!
And if you plan to make these for a crowd, consider doubling up on the ingredients—you know everyone will want seconds.
Step-by-Step Instructions
Making Mini Caprese Pizzas isn’t only fun, but it’s a quick and easy way to impress anyone with your kitchen skills—seriously, you’ll feel like a culinary genius. Trust me; no one needs to know how simple this really is. Ready? Let’s jump into the steps that’ll get your little pizzas crisp and cheesy in no time!
- Preheat the oven: Start by cranking up your oven to 400°F (200°C). This is essential for getting that perfect, bubbly cheese and golden crust. No one likes a soggy pizza, right? Using premium baking equipment can help ensure even heat distribution.
- Assemble the base: Grab your 6 mini naan rounds and place them on a baking sheet. Spread a delightful ½ cup of pizza sauce or marinara evenly over each naan. It’s like giving each little pizza a warm, inviting blanket of flavor.
- Cheese it up: Sprinkle ½ cup of shredded mozzarella generously on top of the sauce. Don’t hold back—this is the best part! Watch as that cheese starts to melt and dance around in the oven later.
- Add the toppings: Now it’s time for the stars of the show. Scatter ¼ cup of halved cherry tomatoes and 3-4 fresh basil leaves across the top of your cheesy bases. If you’re feeling fancy, you can even arrange them in a pattern. Presentation matters, folks; why not wow them visually too?
- Bake the pizzas: Slip the baking sheet into the oven and let those little beauties bake for 12-15 minutes. Keep an eye on them; you’ll know they’re ready when the cheese is beautifully melted and the edges of the naan are golden brown. Don’t be too impatient.
- Finish with flair: When they’re done baking, take them out (you can do it!). If you opted for arugula, toss on ¼ cup now for an extra punch of flavor. Finally, drizzle with 1 tablespoon of balsamic glaze and season with some black pepper to taste. Just like that, you’ve got a masterpiece!
And there you have it, folks! Your Mini Caprese Pizzas are ready to hypnotize everyone with their irresistible appeal. Feel free to steal a bite—after all, you deserve a taste test, right?
Plus, these little snacks are definitely going to disappear fast, and you want to make sure you enjoy the fruits of your labor. Don’t forget, using tools like a garlic press can elevate your flavor game even further.
Tips & Variations
There are countless ways to make your Mini Caprese Pizzas even more delightful, so let’s plunge into some tips and variations that can really elevate your dish.
For a crispy crust, try pre-baking the naan for a few minutes before adding toppings. I’ve tried using pesto instead of pizza sauce, and wow, what a flavor bomb!
Want a kick? Toss some red pepper flakes on top. If you’re feeling adventurous, throw in some sliced olives or prosciutto. Fresh mozzarella adds a nice touch, but honestly, any cheese you have will work.
Don’t forget, assembling just before baking keeps everything fresh. Trust me, last-minute assembly is my secret weapon—and it minimizes my kitchen chaos. Happy pizzamaking!
How to Serve?
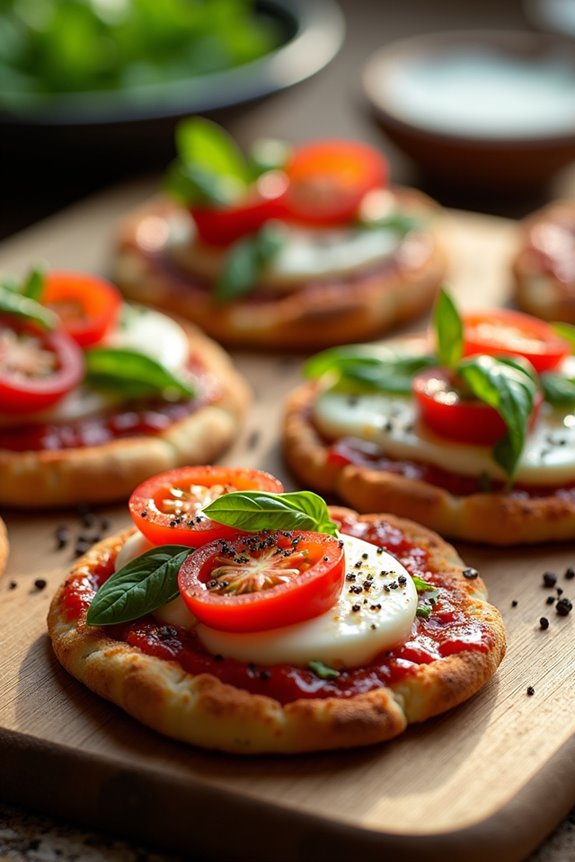
When it comes to serving Mini Caprese Pizzas, timing is everything. You want them hot and melty, inviting everyone to dive right in.
I usually pull those golden-brown beauties out of the oven and let them sit for just a minute—burning my mouth isn’t on my to-do list.
Arrange them on a colorful platter, maybe add a little basil garnish for flair—who doesn’t love a good pop of green?
I like to drizzle that balsamic glaze right before serving; it looks fancy but takes no effort. Don’t forget a sprinkle of black pepper for an extra kick.
If you’re feeling adventurous, set out some extra toppings for guests to create their own perfect bite. How fun is that?
Storage & Reheating Guide
To keep those delicious Mini Caprese Pizzas fresh for later, I’ve stumbled upon a few tricks—because let’s be honest, no one wants to waste a glorious bite of cheesy goodness.
First, I seal them in an airtight container, which preserves their flavor and crunch. If I’m feeling fancy, I add a paper towel inside to absorb extra moisture.
When it’s time to indulge again, I preheat my oven to 375°F (190°C) and bake the pizzas for about 8-10 minutes until they’re heated through. Don’t microwave them; trust me, that’s a recipe for sogginess.
You want that crispy crust back, right? With this method, you’ll feel like a culinary genius, enjoying every cheesy bite as if they were fresh out of the oven. Additionally, using a Lazy Susan Organizer can help you store your pizza supplies neatly and accessibly, making your pizza-making process even more enjoyable.
Final Thoughts
As you savor your Mini Caprese Pizzas, it’s hard not to feel a sense of pride in crafting such a delightful dish. Seriously, these little bites pack a punch of flavor and joy. They’re perfect for gatherings, right?
I often find myself making them for friends, and there’s never a crumb left behind. The fresh ingredients really shine; who knew these simple toppings could create such happiness?
And let’s be real—balsamic glaze is basically magic. When they’re out of the oven, you’ll want to show them off. Just don’t burn your fingers like I did that one time; lesson learned!