
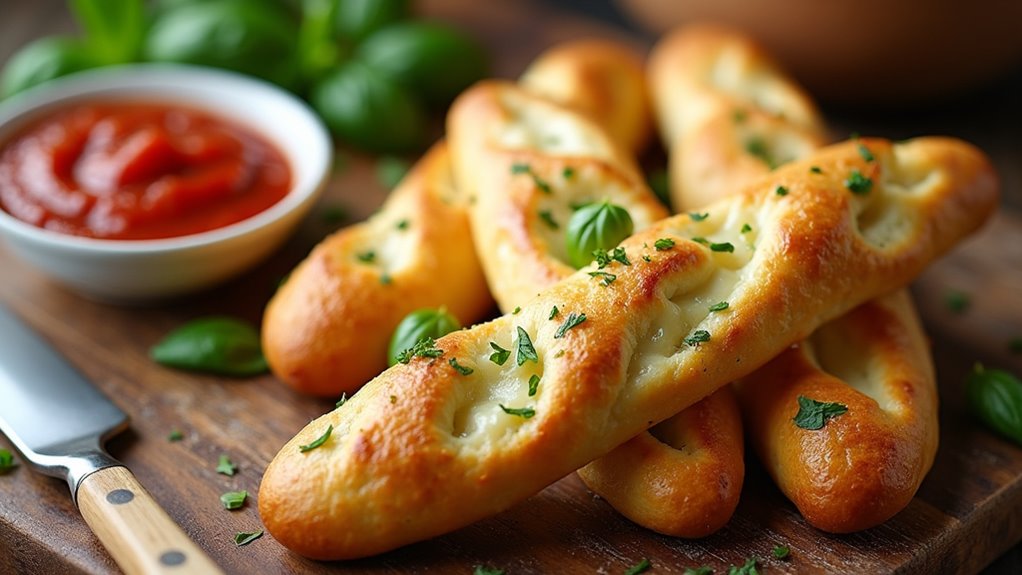
I’ve got to confess—there’s something magical about pulling cheesy garlic breadsticks from the oven. They’re warm, gooey, and oh-so-flavorful with that rich marinara dip on the side. It’s the perfect match, right? I can’t help but think, how can a few simple ingredients create such a heavenly snack? I might have even burned a batch or two in the past—fresh out of the oven, they’re just too tempting. So, let’s get into how you can whip up your own!
Why You’ll Love This Recipe
If there’s one thing I can guarantee, it’s that these cheesy garlic breadsticks will quickly become your go-to snack or side dish—trust me, you’ll be making them every week.
Imagine this: a warm, crispy breadstick fresh from the oven, slathered in that buttery garlic goodness, and dipped into rich marinara sauce. You’ll be hooked. I mean, who wouldn’t want to indulge in their favorite comfort food?
Plus, they’re perfect for movie nights or cozy dinners. I found myself snacking on the leftovers for breakfast once (please don’t judge).
Seriously, these cheesy garlic breadsticks with marinara are so easy to whip up. You just mix a few simple ingredients and let the magic happen.
Who knew life could be this delicious?
Equipment List
Now that you’re dreaming of those cheesy garlic breadsticks, let’s talk about the tools you’ll need to make this deliciousness happen.
First up, you’ll need a large mixing bowl for combining ingredients—don’t worry, it won’t bite.
A rolling pin comes in handy for shaping that glorious dough. You’ll also want a baking sheet, preferably lined with parchment for easy cleanup.
A pastry brush is great for applying the garlic butter, making you feel like a pro. A garlic press will also be invaluable for mincing your garlic effortlessly, ensuring even distribution of flavor.
And, if you’ve got a sharp knife or pizza cutter, it’ll make slicing those breadsticks a breeze.
Finally, don’t forget an oven, unless you’re planning to make them in a campfire—though, I admire your adventurous spirit!
For mixing and spreading, consider using an Essential Silicone Spatula Set that can handle a variety of kitchen tasks.
Our Ingredients
To whip up a batch of cheesy garlic breadsticks that’ll make your taste buds dance, you need to gather a handful of simple yet flavorful ingredients. Trust me, once you see how easy it’s to make these delicious morsels, you’ll wonder why you haven’t tried this before.
When you take that first bite of warm, buttery, cheesy goodness, you’ll feel like a hero in your own kitchen. So, let’s check out what you’ll need to create this snack masterpiece together.
Ingredients:
- 3 cups all-purpose flour
- 1/4 tsp active dry yeast
- 1 1/2 tsp salt
- 1 1/4 cups room temperature water
- 3 garlic cloves, minced
- 2 tbsp butter, softened
- 1/4 tsp dried oregano
- 1/2 cup shredded mozzarella cheese
- 1 tbsp olive oil
- 1 small onion, finely chopped
- 2 cloves garlic, minced
- 400 g canned tomatoes
- 1 tbsp red wine (optional)
- 3-4 fresh basil leaves, chopped
- Salt, pepper, and sugar to taste
Now, when it comes to gathering these ingredients, it’s all about freshness and quality. Using fresh garlic, for example, will give your breadsticks that zingy, aromatic flavor that’s just so irresistible.
And if you have access to it, try to snag some fresh basil instead of dried; it can really elevate the sauce, bringing a pop of color and freshness that shines.
Don’t sweat the small stuff—if you run out of something, improvisation is key in cooking. Substituting a different type of cheese or even omitting the red wine can still lead to some mouthwatering results.
Cooking is about creativity, so have fun with it!
Step-by-Step Instructions
Making cheesy garlic breadsticks is as simple as it’s rewarding—the aroma that wafts through your kitchen while they bake will have everyone running to the table! Follow these easy steps, and you’ll have a delicious snack that pairs perfectly with marinara sauce.
1. First things first, let’s create the dough! In a large bowl, mix together 3 cups of all-purpose flour, 1/4 teaspoon of active dry yeast, and 1 1/2 teaspoons of salt. Slowly pour in 1 1/4 cups of room temperature water to form a dough. Don’t worry if it looks a little shaggy—this is the start of something delicious.
Once mixed, cover the bowl with a damp kitchen towel and let it rise for about 1 hour. (You’ll know it’s ready when it doubles in size, like my aspirations every time I make a recipe.) A high end cookware set can enhance your baking experience significantly!
2. While the dough is rising, let’s make that heavenly marinara sauce. Start by heating 1 tablespoon of olive oil in a medium-sized saucepan over medium heat. Toss in 1 small onion, finely chopped, and 2 cloves of minced garlic. Sauté until the onions turn translucent and aromatic, about 5 minutes.
3. Now we’re getting to the good part! Add a 400 g can of tomatoes, 1 tablespoon of red wine (if you’re feeling fancy), and 3–4 chopped fresh basil leaves. Season with salt, pepper, and a pinch of sugar to taste, and let it all simmer for about 15 minutes.
(You might find yourself sneaking a taste, just to verify it’s up to par—go ahead, I won’t tell anyone.)
4. Back to our dough—once it has puffed up nicely, it’s time to give it some personality. Roll the dough out on a floured surface into a rectangle shape.
Now, in a small bowl, combine 3 minced garlic cloves, 2 tablespoons of softened butter, and 1/4 teaspoon of dried oregano. Brush this delightful garlic butter mixture all over the rolled dough. Just imagine the flavor; it’s going to be good.
5. Now sprinkle 1/2 cup of shredded mozzarella cheese across the top of your dough, making sure to cover it well. The more cheese, the better, right? (I mean, who doesn’t love gooey cheese?)
6. Preheat your oven to 425°F (220°C). Carefully transfer your dough onto a lined baking sheet. Bake the breadsticks for 15-17 minutes, or until they turn golden brown.
The smell will practically pull you into the kitchen—it’s impossible to resist.
7. Once they’ve baked to perfection, you can even brush a little extra garlic butter on top for that extra oomph in flavor.
Cut them into sticks, serve with your lovely marinara sauce, and watch them disappear!
Enjoy every cheesy bite, and remember, you’re now a hero in the kitchen. Who knew making breadsticks could feel this satisfying? Check out essential kitchen equipment for creating even more delicious recipes. Happy dipping!
Tips & Variations
While you’re waiting for those cheesy garlic breadsticks to bake, let me share some tips and variations that can take your snack to the next level.
First off, using fresh mozzarella is a game-changer—it really ups the gooey factor. Want to kick it up a notch? Brush on some extra garlic butter right after taking them out of the oven. Trust me, your kitchen will smell heavenly!
If you’re feeling adventurous, try adding herbs like rosemary or thyme for a unique twist. You could even toss in some crushed red pepper flakes if you like it spicy.
Speaking from experience, my friends always rave about these little tweaks. So, go ahead, have fun experimenting! You won’t regret it.
How to Serve?
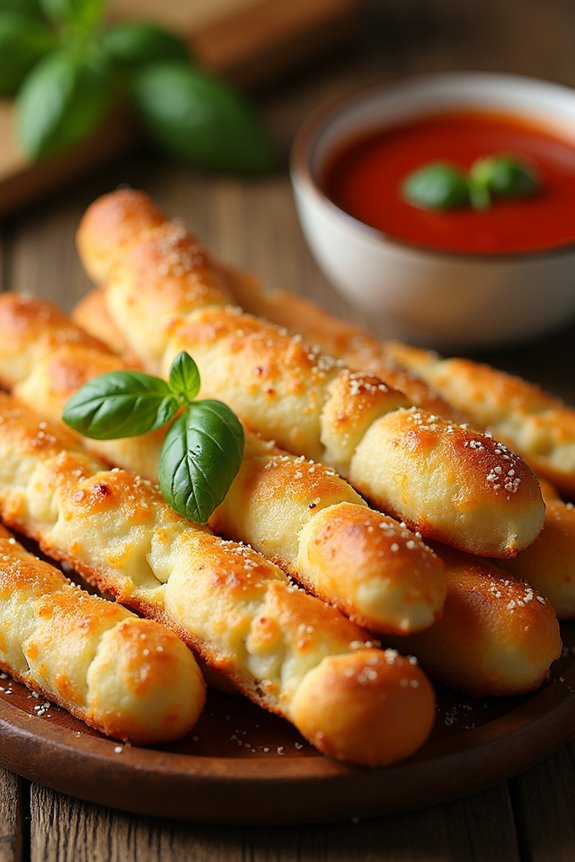
Serving up cheesy garlic breadsticks is where the magic really happens. When they come out of the oven, golden and fragrant, I can hardly wait.
I grab a stack of these tasty sticks and arrange them on a plate—presentation counts, right? Then, I pour the warm marinara sauce into a little bowl for dipping. Let’s be honest, who doesn’t love a nice, gooey pull with that cheesy goodness?
I can’t resist adding a sprig of fresh basil on top for a pop of color. As friends and family gather around, I laugh, remembering the last time I burned the batch.
But hey, that’s part of the fun, isn’t it? Now, let’s dig in and enjoy every bite together.
Storage & Reheating Guide
Storing cheesy garlic breadsticks doesn’t have to be a guessing game. First, let ’em cool completely—no one wants soggy breadsticks.
Once they’re cool, wrap them tightly in plastic wrap or toss them in an airtight container. They’ll happily chill in the fridge for up to four days.
When it comes to reheating, I usually pop them in the oven at 350°F (175°C) for about 10 minutes. That way, they get nice and crispy again.
Microwaving? Well, I’d advise against it unless you enjoy chewy breadsticks. But hey, if you’re in a pinch and need a quick bite, go for it.
Just remember to keep an eye on them, so they don’t turn into rubbery little discs—trust me, I’ve been there! Using a silicone muffin pan can really help in baking the perfect breadsticks by ensuring even cooking.
Final Thoughts
After whipping up these cheesy garlic breadsticks, I can’t help but feel a sense of triumph. Seriously, who doesn’t love the smell of garlic wafting through the kitchen? It’s like a cozy hug for your taste buds.
Dipping these golden, cheesy delights in marinara? Pure bliss. Honestly, it’s hard not to eat them all in one sitting. But hey, I’m definitely not judging if you do.
Plus, making them is way easier than I thought—especially if you’re like me, who can burn water. Just remember, fresh cheese really makes a difference. So, don’t skimp on ingredients.
It’s a versatile dish perfect for snacks, parties, or an easy dinner side. Trust me, you’ll want to keep this recipe handy.