
I’ve got to tell you about these Lemon Coconut Bliss Bars. They’re like a sunshine-filled hug on a plate, and trust me, they’re easier to whip up than you might think. I mean, who doesn’t love a buttery crust topped with creamy lemon goodness and a sprinkling of coconut? When I first made them, my family practically devoured the whole batch in one sitting. Want to learn how to make this mouthwatering treat? Let’s get started.
Why You’ll Love This Recipe
When you take a bite of these Lemon Coconut Bliss Bars, it’s like a little burst of sunshine on your tastebuds. I can’t help but love how the tangy lemon pairs perfectly with the sweet coconut.
Seriously, it’s a match made in dessert heaven. These lemon coconut bars aren’t just delicious; they’re super easy to whip up, too. I mean, who doesn’t love a sweet treat that requires minimal fuss?
And the smell wafting through your kitchen while they bake? Pure bliss. Plus, you can share them—or not. No judgment here if you decide to keep them all to yourself.
Trust me; once you try these bars, you’ll be hooked and ready to spread the sunshine.
Equipment List
Gathering your equipment before diving into the world of Lemon Coconut Bliss Bars can make the process smoother and more enjoyable. You’ll need a 9×13 inch baking dish, which is perfect for creating just the right thickness. Additionally, having a premium slow cooker can provide a versatile option for making other delicious desserts or meals efficiently.
A sturdy mixing bowl is essential; I seem to go through a ton of bowls when I bake. A whisk is also a must for blending those eggs and sugar smoothly—trust me, you’ll appreciate the fluffy texture.
You might find a food processor handy to mix the crust ingredients, but a simple fork can work if you’re feeling adventurous.
Don’t forget measuring cups and spoons; accurate measurements guarantee blissful bars.
Oh, and grab your favorite spatula; it’s going to be your best friend in this process. Additionally, consider using a gourmet cheese making kit to explore creative flavor pairing options with your bars.
Our Ingredients
When it comes to whipping up a batch of Lemon Coconut Bliss Bars, the ingredients are where the magic begins. Combining bright lemon flavors with the dreamy texture of coconut creates an irresistible treat.
Plus, gathering your ingredients is a delightful prelude to cooking, almost like a culinary warm-up. So, let’s dive right into what you’ll need to create these sweet little squares of happiness.
Here’s the list of ingredients you’ll want to round up:
- 1 1/2 cups all-purpose flour
- 1/2 cup powdered sugar
- 1/2 cup butter (cold or softened)
- 4 large eggs
- 1 1/2 cups granulated sugar
- 1/2 cup fresh lemon juice
- 1 teaspoon baking powder
- 3/4 cup shredded or flaked coconut (toasted for optional depth)
- Pinch of salt
As you gather your ingredients, keep in mind that freshness is key—especially with the lemon juice.
I once made a batch using aged lemon juice, and let’s just say my bars needed a little more pizzazz than they delivered.
Oh, and if you can, go for the toasted coconut; it’s like giving your bars a sumptuous dress-up.
Plus, don’t forget to check your butter situation—whether it’s cold or softened will affect how crumbly that crust gets.
Step-by-Step Instructions

Making the Lemon Coconut Bliss Bars is an adventure in the kitchen you won’t want to miss. Mixing the batter is quick and simple—just follow these easy steps, and soon you’ll be savoring these tangy-sweet squares. Ready to get started? Let’s do this!
1. Preheat your oven: Start by preheating your oven to 350°F (177°C). This step is essential because no one likes a bar that’s half-baked, right? Investing in high-end kitchen appliances can ensure consistent heating for perfect results.
While the oven warms up, grab your 9×13 inch baking dish and lightly butter it to keep those bars from sticking.
2. Make the crust: In a mixing bowl or using a food processor, combine 1 1/2 cups all-purpose flour, 1/2 cup powdered sugar, and a pinch of salt.
Next, add in 1/2 cup butter (cold or softened). Mix until it resembles coarse crumbs. You want something that looks a little like sand but not too dry.
Press this mixture evenly into the bottom of your prepared baking dish. Bake for 15 minutes, just enough time to get a nice golden base.
3. Prepare the filling: While your crust is baking, it’s time to whip up the filling. Grab a large mixing bowl and beat together 4 large eggs and 1 1/2 cups granulated sugar until smooth and creamy.
It’s like turning a frothy sunset into a lemony dream. Once it’s smooth, mix in 1/2 cup fresh lemon juice and 1 teaspoon baking powder. Make sure it’s well combined; this is where the magic happens.
4. Combine filling and crust: Once your crust comes out of the oven, carefully pour the lemony egg mixture over it.
It’s okay if it’s a little hot; it’ll add an extra layer of flavor. Just be careful not to splash your kitchen—trust me, lemon juice stains.
5. Add the coconut: Now for the fun part! Sprinkle 3/4 cup of shredded or flaked coconut evenly over the top of the mixture.
If you want to take it up a notch, feel free to use toasted coconut here—it adds depth and a lovely crunch. You’ll get that irresistible aroma wafting through the kitchen!
6. Bake it all together: Pop the dish back into the oven and let it bake for about 20 to 25 minutes.
Keep an eye on it—you’ll know it’s done when the top is set and turns a delightful golden color.
7. Cool and slice: When the baking time is up, remove your bliss bars from the oven and let them cool completely in the baking dish.
This step might feel like the longest wait ever, but trust me, it’s worth it. Once cool, slice them into squares and voilà, your Lemon Coconut Bliss Bars are ready to enjoy!
Enjoy each bite full of bright and tangy goodness. And remember, even if they don’t come out looking perfect, your friends and family will still love them—because every batch is made with a little love (and a lot of lemony goodness). Happy baking!
Plus, having the right kitchen appliances can significantly enhance your breakfast cooking experience!
Tips & Variations
Sometimes, a little creativity in the kitchen can lead to delightful surprises, and that’s exactly what you’ll find with these Lemon Coconut Bliss Bars. If you’re feeling adventurous, try toasting the coconut before sprinkling it on top—it really amps up the flavor. Trust me, once you taste it, you’ll be hooked.
You can even swap the lemon juice for lime for a zestier twist, or add a dash of lemon zest into the batter for an extra burst of citrus goodness. Want to make ’em a bit fancier? Dust with powdered sugar right before serving. And if you’re feeling bold, think about adding a handful of white chocolate chips for a sweet contrast. Cooking should be fun, right?
How to Serve?
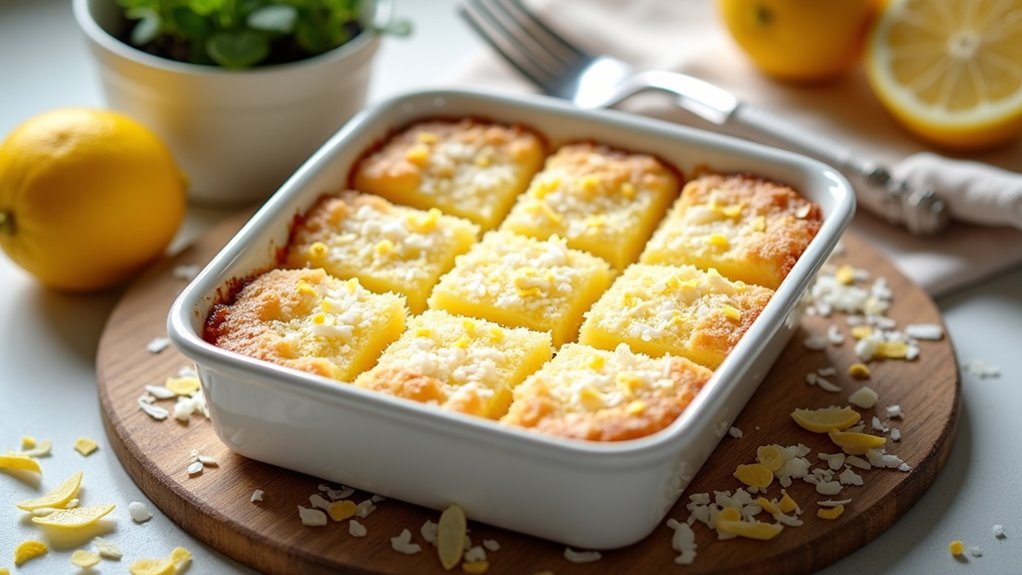
Serving up those Lemon Coconut Bliss Bars? You’re in for a treat.
I like to start by cutting them into squares—nice, even pieces make for a prettier presentation. Once they’re sliced, I dust a little powdered sugar on top. It’s like giving them a delicate touch, right?
Then, I usually plate them up with a wedge of lemon or a sprinkle of toasted coconut for some flair. Trust me, everyone loves that little extra something. Serve ‘em at room temperature; they hold their shape perfectly.
Oh, and I always have a fork handy. Let’s be real—these bars are way too delicious to eat with your fingers, unless you’re feeling a bit cheeky. Enjoy!
Storage & Reheating Guide
While it might be tempting to devour all your Lemon Coconut Bliss Bars in one sitting, you’ll definitely want to think about how to store them properly instead.
First off, let them cool completely before moving them to an airtight container. I usually layer parchment paper between the bars to prevent sticking—because, trust me, no one wants a sticky catastrophe.
If you store them in the fridge, they’ll stay fresh for about a week. For longer storage, just pop them in the freezer; they can last up to three months! Additionally, using soup freezer containers can help keep your bars organized in the freezer.
When you’re ready to enjoy, let them thaw in the fridge, or for a warm treat, microwave them for about 10-15 seconds. You’ll thank yourself later.
Final Thoughts
Once those Lemon Coconut Bliss Bars are properly stored, it’s easy to find yourself daydreaming about that perfect balance of zesty lemon and sweet coconut.
Seriously, every bite is like a mini tropical vacation. I mean, who wouldn’t love having a taste of sunshine whenever the mood strikes?
But here’s the kicker: they’re not just sweet treats; they’re a conversation starter, too.
Picture sharing them at a gathering and watching faces light up with joy. They’re that good.
And as someone who’s tried a few baking flops, I assure you, this one’s a winner.
So go ahead, embrace the bliss, and don’t be surprised if you find yourself making these again—and again.
Your taste buds will thank you.