
I’ve got to say, there’s something magical about the smell of pumpkin pie wafting through the house, isn’t there? It reminds me of family gatherings and those bittersweet moments when everyone’s just a little too stuffed but can’t resist one more slice. This recipe, with its buttery graham cracker crust, makes even the most inexperienced bakers look like pros. Ready to learn how to whip up this fall favorite that never fails to spark joy around the table? Let’s get started.
Why You’ll Love This Recipe
You know, when the leaves start to turn and that crispness fills the air, there’s just something about pumpkin pie that pulls at my heartstrings—or maybe it’s my sweet tooth.
This pumpkin pie with graham cracker crust is a game changer, seriously. The buttery sweetness of the graham cracker crust perfectly complements the creamy, spiced pumpkin filling.
Honestly, who needs a fancy crust when you can have this deliciousness? Baking it fills my kitchen with a warm, inviting aroma that’s like a hug in the fall.
Plus, it’s pretty easy. I just whisk ingredients together, pour, and let the oven do the magic.
Trust me, when you taste it, you’ll understand why it’s my favorite fall treat.
Equipment List
When you decide to whip up this delightful pumpkin pie, having the right equipment on hand makes all the difference.
You’ll need a springform pan lined with foil—trust me, it prevents leaks that could ruin your day. A large mixing bowl is essential for combining all those lovely ingredients, and a whisk works wonders, too. Choosing the right tart pan size can significantly affect the final outcome of your pie.
I like to use a spatula to scrape every final drop of that filling into the crust. Don’t forget measuring cups and spoons; precise measurements are key.
Ultimately, an oven mitt—because, let’s be honest, no one enjoys burnt fingers when removing that gorgeous pie from the oven.
With this gear, you’re set up for pumpkin pie success. Additionally, incorporating a meat tenderizer can enhance the flavor of your pie crust by creating a more even texture. Is there anything sweeter?
Our Ingredients
When it comes to making pumpkin pie, the magic truly lies in its ingredients. Each one plays an essential role in creating that rich, creamy filling and the wonderfully crunchy graham cracker crust. I mean, who can resist a slice of luscious pumpkin pie?
If you’ve ever had a slice that was just too bland or too sweet, you know how important it’s to strike the perfect balance with your ingredients. Plus, you probably already have some of them hanging out in your kitchen, just waiting to come together in this iconic dessert.
Let’s take a look at what you’ll need for this pumpkin pie masterpiece.
- 2 cups graham cracker crumbs
- 6 tbsp melted butter
- 3 tbsp granulated sugar
- 3 large eggs
- 1 ½ cups pumpkin purée (canned)
- 1 cup heavy cream
- ¾ cup brown sugar
- 1 tsp vanilla extract
- 1 tsp cinnamon
- ½ tsp ground ginger
- ½ tsp salt
- ¼ tsp nutmeg
- ¼ tsp cloves
Now, a little note about some of these ingredients. You may want to get the best pumpkin purée you can find since it’s the star of the show here.
If you’re feeling adventurous and want to go the extra mile, you can roast a pumpkin and make your own purée, but let’s be honest—not all of us have that kind of time, right?
And while fresh spices can elevate the flavor, the ground spices you find in your cupboard will work just fine, too. Just remember to give everything a good mix, so you don’t have a surprise pocket of cinnamon in one bite and none in the next. Your taste buds deserve better than that.
Happy baking!
Step-by-Step Instructions
Making your own pumpkin pie is both delightful and surprisingly simple. Mixing the batter is quick and straightforward—just follow these easy steps, and you’ll have a creamy, spiced filling paired with a crunchy graham cracker crust. Let’s get baking!
1. Preheat your oven to 350°F. Grab a springform pan and line it with foil on a baking sheet. Trust me, this is a game changer when it comes to avoiding spills. You don’t want a messy oven situation emerging while your pie bakes.
2. Mix together 2 cups of graham cracker crumbs, 6 tablespoons of melted butter, and 3 tablespoons of granulated sugar in a bowl. Use a fork or your hands to combine until it looks like wet sand. Consider using top-notch premium kitchen appliances here for the best mixing experience.
Now, press this mixture firmly into the bottom and up the sides of your prepared pan. A little elbow grease goes a long way here!
3. Bake your crust in the oven for about 10 minutes—just until it’s slightly golden and fragrant. Once done, take it out and let it cool. You want it to be sturdy for that luscious filling, after all.
4. While the crust cools, it’s time to make the filling. Whisk together 3 large eggs in a large bowl until they’re well beaten. Then, add in 1 ½ cups of pumpkin purée, 1 cup of heavy cream, ¾ cup of brown sugar, and 1 teaspoon of vanilla extract. It’s about to get creamy, folks!
5. Now comes the spice of life! Sprinkle in 1 teaspoon of cinnamon, ½ teaspoon of ground ginger, ½ teaspoon of salt, ¼ teaspoon nutmeg, and ¼ teaspoon of cloves. It should smell heavenly at this point.
Mix everything together until you achieve a smooth and velvety texture—no lumps allowed.
6. Pour the filling into your cooled graham cracker crust. Here’s your moment to shine. As you’re pouring, just imagine how delicious this will be, and try not to spill (though a little spill just means there’s more to taste later, right?).
7. Bake the pie for 45 to 50 minutes. Look for the edges to be set while the center remains a bit wobbly. If you over-bake it, you’ll lose that amazing silky texture. You’ll thank yourself later when you slice into it.
8. After baking, let your masterpiece cool on a rack for at least 2 hours before popping it in the fridge. This helps the flavors meld beautifully and gives you the chance to control your impatience before digging in. Don’t forget that using high-quality premium kitchen cookware can enhance your baking experience even more!
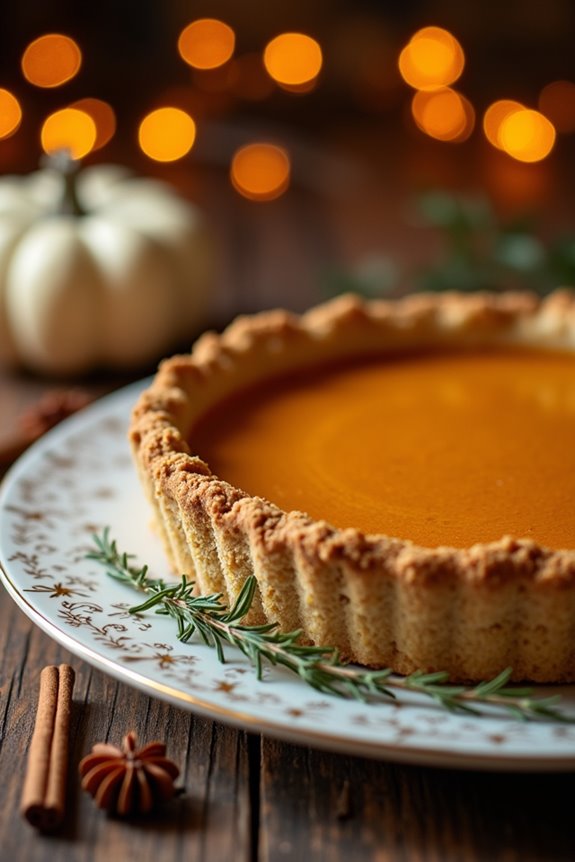
And there you have it! A decadent pumpkin pie with a graham cracker crust that’s sure to impress friends and family at any gathering.
Just remember to enjoy the process, and don’t worry if things get a little messy. After all, you’re creating a moment of pure deliciousness. Happy baking!
Tips & Variations
Have you ever wondered how to take your pumpkin pie to the next level? One tip I love is using a foil-lined springform pan. Trust me, it’ll save you from a soggy disaster.
I’ve learned that the hardest part is knowing when to pull the pie out of the oven. If it wobbles just slightly in the center, it’s perfect. Don’t bake it too much; no one wants pumpkin pie that could double as a hockey puck.
If you’re feeling adventurous, why not add some chocolate chips or crushed nuts to the filling? I tried it once, and let’s just say, I didn’t have any leftovers.
Experimentation makes it fun, and who doesn’t want a delicious twist on a classic?
How to Serve?
Now that you’ve perfected your pumpkin pie with that shiny, beautiful crust, let’s talk about how to serve it up right.
First, slice that pie into generous pieces—nothing sadder than a tiny slice when you can have a big, luscious one.
I like to warm each slice slightly in the microwave; it brings out all those cozy flavors.
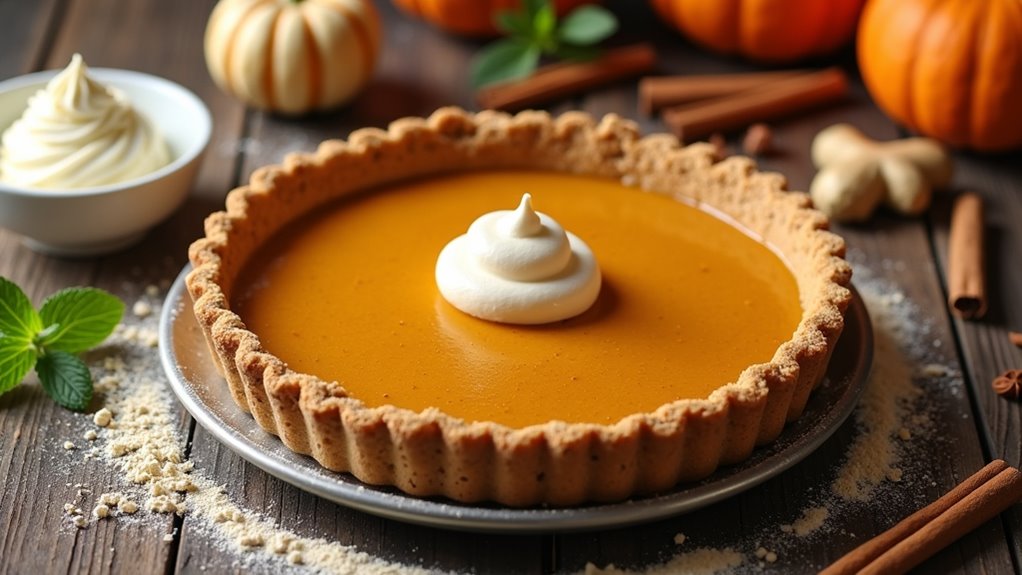
Don’t forget the whipped cream—maybe a dollop or two?
I sometimes sprinkle a pinch of cinnamon on top for a festive touch.
And if you’re feeling adventurous, how about a scoop of vanilla ice cream alongside? Trust me, it’s divine.
Just remember, serve it with a smile. After all, that’s the secret ingredient to any great dessert.
Enjoy!
Storage & Reheating Guide
When it comes to storing that delicious pumpkin pie you just whipped up, you want to make sure it stays as scrumptious as the moment you pulled it out of the oven.
First, let it cool completely on a rack—trust me, resist the urge to indulge right away. Once it’s cool, cover it tightly with plastic wrap or foil and pop it in the fridge. It’ll keep well for about four days.
For reheating, slice off a piece (or two), and warm it in the microwave for about 30 seconds. You might want to top it with whipped cream, which I always do—just a little extra joy.
Also, ensure to store it in an airtight container, as this helps maintain its overall freshness and flavor.
Who can resist a warm slice of pumpkin pie, right?
Final Thoughts
While it might seem like just another pie, pumpkin pie holds a special place in my heart. Every time I bake it, I’m reminded of cozy family gatherings and the smell of spices wafting through the house. Trust me, you won’t find a more comforting dessert—especially with that crunchy graham cracker crust. It’s easy to whip up, and the taste? Heavenly. I’ve made my fair share of baking blunders, but this pie always turns out just right. So, whether you’re hosting Thanksgiving or just need a sweet treat, give this recipe a shot. Pour a dollop of whipped cream on top and get ready to bask in the delight of this classic dessert. Happy baking, my friends!