
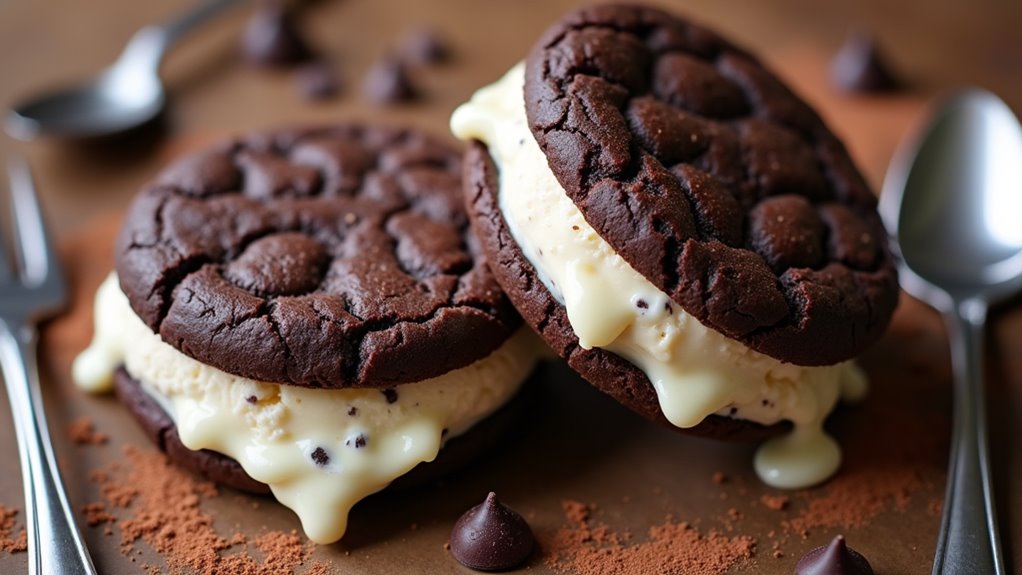
I’ve got to tell you about these Decadent Vanilla Bean Ice Cream Sandwiches. You’ll love how easy they are, even if baking isn’t your forte—trust me, I’ve burned my share of cookies. Picture soft, chewy cookies hugging creamy vanilla bean ice cream. What can be better? You can even jazz them up with chocolate chips or nuts if you’re feeling fancy. Curious about making your own? Let’s get into the details and whip these up together.
Why You’ll Love This Recipe
If you’ve ever thought about the perfect summer treat, let me tell you, these homemade vanilla bean ice cream sandwiches hit the spot.
Imagine biting into a soft, chewy cookie, then—bam—creamy vanilla bean ice cream in the middle. It’s like a flavor explosion. What’s not to love? I mean, who doesn’t want cookies and ice cream in every bite?
This recipe’s super easy too, and you won’t need fancy kitchen gadgets—just basic stuff.
I’ve had my fair share of kitchen disasters, yet these vanilla bean ice cream sandwiches always turn out right. Plus, you can impress friends and family without breaking a sweat.
Equipment List
When you’re ready to whip up these delectable vanilla bean ice cream sandwiches, having the right tools on hand makes all the difference. Trust me, I learned that the hard way.
First, you’ll need baking sheets—don’t skimp on those. A mixing bowl’s a must, too. I once tried mixing in a plastic one; it didn’t end well. An electric mixer or a trusty whisk helps get that cookie dough just right.
Oh, and don’t forget a cookie scoop—it’s not just for fancy bakers. A spatula for spreading the ice cream is handy, and some wax paper can keep things neat while you freeze your creations.
Up for the challenge? Let’s gear up and get started.
Our Ingredients
When it comes to making homemade vanilla bean ice cream sandwiches, you want to make sure you have all the right ingredients ready to go. Trust me, there’s nothing worse than discovering you’re out of flour when you’re in the middle of a sweet adventure.
Picture it: a mixing bowl in one hand and a spoon in the other, only to find the flour jar empty. It’s like cooking in an episode of a reality show where the contestant has been sabotaged.
So, let’s gather these delightful ingredients for a scrumptious treat that’ll make your taste buds dance. Are you ready? Let’s jump in.
- 2¾ cups all-purpose flour
- ½ cup cocoa powder
- 2½ tsp baking powder
- ¼ tsp salt
- 12 tbsp unsalted butter, room temperature
- 1½ tsp vanilla extract
- 1½ cups sugar
- 2 large eggs
- 1 tbsp whole milk
- 2 pints vanilla bean ice cream (softened)
- 1 whole vanilla bean, split and scraped (for ice cream)
As you gather these ingredients, it’s a good time to reflect on a few things. Using high-quality vanilla bean ice cream, preferably with actual bean specks, can really amp up that rich flavor. Nobody wants a bland ice cream sandwich, right?
Also, if you’re feeling adventurous, try using a little additional vanilla extract or even the tiny seeds from the split vanilla bean to really punch up the vanilla flavor. I mean, who wouldn’t appreciate an extra dose of vanilla happiness in their life?
Step-by-Step Instructions

Making homemade vanilla bean ice cream sandwiches is a delightful adventure that will surely impress everyone! Mixing the batter is quick and simple—just follow these easy steps, and you’ll be well on your way to a delicious treat that may even become a family favorite.
1. Preheat your oven to 350°F (175°C). This is the golden temperature for baking cookies, guaranteeing they come out fluffy and delicious.
2. Mix together 2¾ cups of all-purpose flour, ½ cup of cocoa powder, 2½ tsp of baking powder, and ¼ tsp of salt in a medium bowl. Whisking these dry ingredients together helps guarantee that the baking powder gets evenly distributed—don’t skip this step!
3. In a large bowl, cream together 12 tbsp of unsalted butter (make sure it’s at room temperature), 1½ cups of sugar, and 1½ tsp of vanilla extract until it’s light and fluffy. This might take a couple of minutes. The goal is to create that dreamy texture and flavor that will make your cookies unforgettable.
4. Add in 2 large eggs, one at a time, mixing well after each addition. Go ahead and channel your inner baker while you do this—just don’t drop any eggshells in there. That’s a no-no. Then, slowly mix in the flour mixture until combined, followed by 1 tbsp of whole milk. This brings it all together into a smooth dough. (Don’t overmix; it’s totally fine if the dough is a bit thick and sturdy.)
5. Drop spoonfuls of dough onto a baking sheet lined with parchment paper, guaranteeing they’re spaced about 2 inches apart. Use a cookie scoop if you have one, or just a tablespoon—it doesn’t have to be perfect. Using a professional baking pan will enhance the evenness of your cookies as they bake.
Bake for 10-14 minutes, or until the edges are firm and the tops look set but maybe a little soft in the center. They’ll firm up as they cool, so just trust the process.
6. Once baked, remove the cookies from the oven and let them cool completely**** on a wire rack. This is an important step, as piping hot cookies and cold ice cream should never meet unless you want a gooey mess.
7. While your cookies are cooling, prepare 2 pints of vanilla bean ice cream. Make sure it’s softened, so it’s easy to work with. For an extra flavor boost, you can stir the seeds from a split vanilla bean into the softened ice cream—who doesn’t love a little extra luxury in their dessert?
8. Spread a generous scoop**** of the softened vanilla bean ice cream between two cookies, and gently press them together. You want the ice cream to peek out just a bit. Don’t be shy about the ice cream; after all, this is the star of the sandwich!
9. Once assembled, freeze the sandwiches for at least 1 hour before serving. This helps them hold their shape and guarantees that every bite is perfectly chilled.
And there you have it—your homemade vanilla bean ice cream sandwiches! Just imagine biting into one, the combination of the rich chocolate cookie and creamy vanilla ice cream mingling in perfect harmony. Yum! So, grab a sandwich (or two) and enjoy the sweet rewards of your baking skills.
Additionally, investing in quality premium baking equipment can make your baking experience even more enjoyable and efficient.
Tips & Variations
Even if you’re already excited about making those delightful ice cream sandwiches, there’s always room for a little extra creativity.
For a richer flavor, why not stir some vanilla bean seeds into your softened ice cream before spreading it? I’ve done this, and trust me, it elevates the whole experience.
You can also switch things up with different cookie bases—chocolate chip, peanut butter, or even oatmeal raisin can be deliciously surprising.
Want to take it a step further? Roll the edges in mini chocolate chips or crushed nuts for a fancy touch. The possibilities are endless, really.
Just remember—experimenting can lead to accidents, but hey, that’s part of the fun, right? Happy sandwich making!
How to Serve?
Serving homemade vanilla bean ice cream sandwiches is where the magic truly happens. Imagine this: you’ve just pulled these perfect, fluffy cookies from the freezer, and your friends are staring, waiting for the first bite.
I like to arrange them on a colorful platter, maybe with a sprinkling of chocolate chips or crushed nuts for flair. It looks fancy but really, it’s just fun.
When I serve them, I love to watch the anticipation on everyone’s faces—who doesn’t get excited over ice cream? Just remind everyone to take a big bite; the laughter that follows a drippy mess is worth it.
Storage & Reheating Guide
Once you’ve wowed your friends with those delicious vanilla bean ice cream sandwiches, think about how to keep that sweet moment alive.
I usually wrap each sandwich in plastic wrap and pop them in an airtight container. This way, they stay fresh and won’t turn into a melty mess in the freezer. Proper containment is crucial, especially when using soup freezer containers, which can help keep items preserved for longer periods.
Trust me, they can last up to two weeks—if you can resist them that long. When you’re ready to eat one, just pull it out and let it sit for a few minutes. You want that perfect soft-cookie surprise!
Avoid the microwave; it turns into a soggy disaster. Honestly, I’ve learned the hard way. So, grab a sandwich and enjoy those creamy, dreamy bites whenever the craving hits. Using glass meal prep containers can also help ensure they remain intact and fresh longer.
Final Thoughts
While it might seem challenging to make your own ice cream sandwiches, I promise it’s easier than you think. Seriously, if I can do it without burning down the kitchen, anyone can! You just need a little patience and some love for the process.
These decadent treats are perfect for summer gatherings or a cozy night in. Once you try them, you might just become the ice cream sandwich hero of your friend group. Remember, those cookies should be soft—nobody wants a jaw workout when enjoying ice cream.
And the vanilla bean? Oh, it takes this dessert to a whole new level. So, go ahead, channel your inner chef, and give these a whirl. You won’t regret it.