
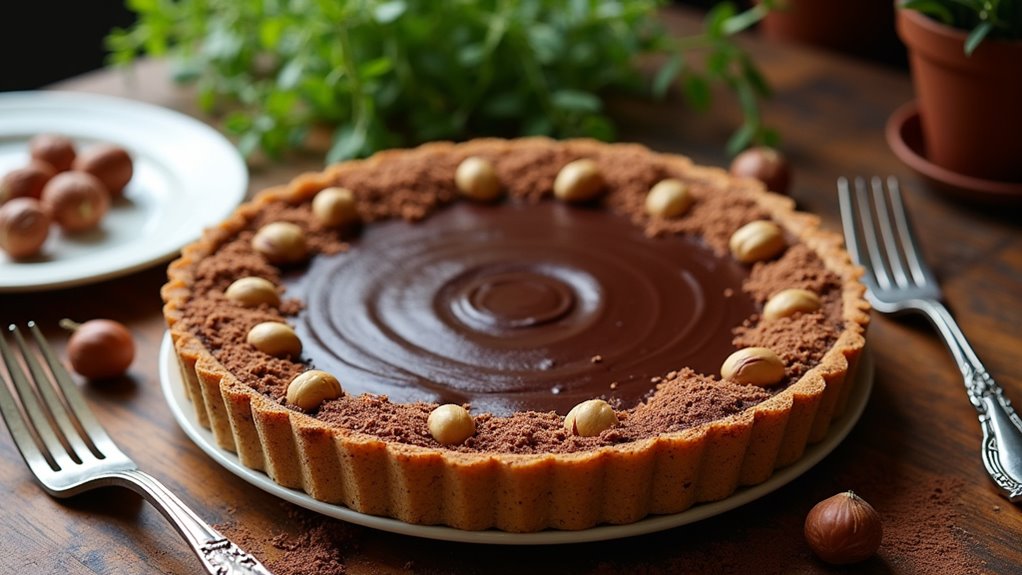
I’ve got to say, there’s something magical about a Rich Chocolate Hazelnut Tart that just pulls you in. Imagine this: a buttery graham cracker crust, with a smooth, luscious chocolate filling that melts in your mouth, not to mention the crunch of toasted hazelnuts for that perfect textural contrast. It’s all so simple yet sophisticated, don’t you think? And the best part? You can easily adapt it to match your taste. Want to know how to get started? Let’s explore the details.
Why You’ll Love This Recipe
You’ll love this chocolate hazelnut tart, especially if you’re a fan of sweet, nutty goodness. Trust me, once you take a bite, you’ll be hooked.
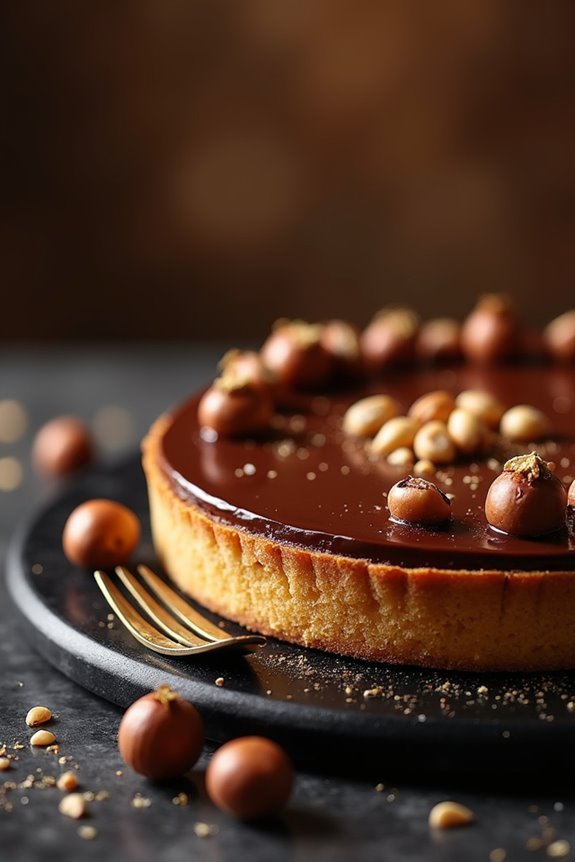
The crust is perfectly crispy, almost like a cookie, while the filling is rich and creamy. It feels indulgent but isn’t overly sweet, striking the right balance.
And let’s talk about those toasted hazelnuts sprinkled on top—pure bliss. Imagine this: a gathering with friends or a quiet evening at home, and this tart sitting in the center, ready to steal the show.
I’ve been known to eat too much of it, but hey, it’s just so good. Make this chocolate hazelnut tart, and your dessert game will never be the same.
Equipment List
Making a chocolate hazelnut tart isn’t just about the ingredients; having the right tools can make a world of difference.
First off, a good tart pan with a removable bottom is a must! Trust me, trying to pry out a tart from a regular pan is a one-way ticket to disaster. A springform pan can also serve as a great alternative for this task. For easy handling, consider using a cast iron skillet set, which provides even heat distribution.
Then, you’ll need a mixing bowl and a whisk for those smooth chocolatey dreams. A spatula? That’s essential for scraping every last bit of deliciousness.
Don’t forget a cutting board and knife to chop those pesky hazelnuts. Oh, and a baking sheet for toasting them—because nobody wants soggy nuts.
Our Ingredients
When you think of a delectable dessert, a chocolate hazelnut tart is hard to beat. It’s like a piece of heaven on your plate, ready to melt in your mouth as soon as you take a bite. Trust me, I’ve devoured way too many slices to count, and each time feels like the first.
So, whether you’re making this for a party, a special occasion, or just because it’s Wednesday and you deserve something sweet, let’s explore the ingredients that bring this blissful tart to life.
Here’s what you’ll need to whip up this irresistible treat:
- 1 ½ cups graham cracker crumbs
- 6 tablespoons salted butter, melted
- ¼ teaspoon salt, divided (because we need balance, right?)
- 1 cup hazelnuts (plus 2 tablespoons chopped for that lovely crunch)
- 1 cup heavy cream (hello, richness)
- 10 ½ oz bittersweet chocolate chips (thank you, chocolate gods)
- ½ cup chocolate-hazelnut spread (I mean, we can’t skip the Nutella)
Now, let’s chat about these ingredients for a moment. The graham cracker crumbs form this tasty, buttery crust that crumbles just right. And don’t skimp on the butter; it’s what makes everything come together beautifully.
My personal favorite part? Those hazelnuts. Toasting them brings out their nutty flavor, which is pure magic when combined with the chocolate. If you can, aim for the bittersweet chocolate chips—they provide the perfect balance of sweetness without being too overpowering.
It’s like giving your taste buds a big hug. Keep in mind that using fresh ingredients can really impact the overall flavor. So, if you find yourself rummaging through the pantry and those nuts look slightly less than perfect, maybe give them a little toast to revive their crunch.
Let’s get ready to make something incredible.
Step-by-Step Instructions
Making a chocolate hazelnut tart is a delightful experience, and I promise it’s easier than you might think. Just imagine creamy chocolate and crunchy hazelnuts mingling in a perfectly baked crust. Sounds like heaven, right? So, roll up your sleeves and let’s get started with these simple steps.
- Preheat your oven to 350°F. A warm oven is vital to getting that crust just right, so don’t skip this bit.
- Prepare the crust: In a bowl, mix together 1 ½ cups of graham cracker crumbs, 6 tablespoons of melted salted butter, and ⅛ teaspoon of salt. This mixture should look crumbly yet combined. Press it firmly into a tart pan—make sure to get the sides, too. You want it to stand proud and sturdy. Using luxury baking tools can enhance your overall baking experience.
- Bake the crust for about 7 minutes. You’re looking for it to be lightly golden and fragrant. Once it’s ready, let it cool while you prep the filling.
- Toast the hazelnuts: Spread 1 cup of hazelnuts on a baking sheet and pop them into the oven for about 6-7 minutes. Keep an eye on them; you want them to be toasty but not burnt. Once they’re golden and the aroma fills your kitchen, take them out and let them cool.
- Make the filling: In a small saucepan, heat 1 cup of heavy cream over medium heat until it just comes to a boil—watch carefully because it can boil over if you’re not paying attention (and trust me, no one wants that mess).
- Combine the chocolate: Pour that hot cream over 10 ½ oz of bittersweet chocolate chips in a bowl. Let it sit for a minute to melt those chips, then whisk until it’s smooth and you’re in chocolate paradise.
- Add the good stuff: Whisk in ½ cup of chocolate-hazelnut spread (yes, like Nutella), the toasted hazelnuts, and the remaining ⅛ teaspoon of salt. This is where the magic happens—such deep and luscious flavor all coming together.
- Pour filling into the crust: Carefully pour that chocolate goodness into your cooled crust. Make sure to spread it evenly so every bite is perfect.
- Finish with a sprinkle: Before you freeze it, sprinkle the 2 tablespoons of chopped hazelnuts on top for that delightful crunch.
- Chill: Pop the tart in the freezer for about 25 minutes. You want it to be just set, not frozen solid. Take a moment to admire your creation—don’t worry, I do that too.
To elevate your dessert experience, consider serving it alongside a freshly made high-end waffle maker for a unique twist that brings together flavors in unexpected ways.
And just like that, you’ve got a gorgeous chocolate hazelnut tart ready to impress. Remember, serving it slightly chilled is key for the perfect texture. Enjoy the process, and don’t forget to share (or not)—I won’t judge if you keep it all to yourself!
Tips & Variations
If you want to jazz up your chocolate hazelnut tart, try playing with the crust. Swap graham cracker crumbs for Oreos—trust me, it’s a game-changer.
Feeling adventurous? Add a pinch of cinnamon to the filling for a warm twist. If you’re nutty like me, throw in some caramel sauce when you whisk in the chocolate-hazelnut spread. Who doesn’t love that sweet and salty combo?
Oh, and don’t stress if your tart isn’t perfect; I’ve had my fair share of “artistic” looks. Just remember to use a tart pan with a removable bottom—it makes life way easier.
Finally, serving it slightly chilled? That’s where the magic happens. Go on, give it a whirl!
How to Serve?
Serving a chocolate hazelnut tart is just as delightful as making it. Once it’s perfectly chilled, I like to slice it into generous wedges. You know, the kind that make you feel special just holding them.
I often sprinkle a few extra chopped hazelnuts on top for a little crunch. A dollop of whipped cream adds a nice touch, too—because who doesn’t love a little cream?
When I serve it, I can’t help but watch everyone’s faces light up with that first bite. It’s like a rich, chocolaty hug.
And if you’re feeling fancy, try pairing it with a strong espresso. Adding a little coffee really kicks things up a notch. Trust me, it’s a match made in dessert heaven.
Storage & Reheating Guide
While I love indulging in a chocolate hazelnut tart right after making it, I know life gets busy, and sometimes you want to save a slice (or two) for later.
To store your precious creation, I recommend keeping it in the fridge, tightly wrapped in plastic wrap or in an airtight container. It’ll stay fresh for about three days—if you can resist the temptation. Additionally, using freezer storage bags can help keep your leftovers even fresher for longer if you decide to freeze them.
When you’re ready to enjoy it again, simply take it out, let it sit at room temperature for about 15 minutes for the perfect texture.
Honestly, if you’re feeling a little daring, a quick zap in the microwave for 10-15 seconds can wake it up! Just watch it doesn’t end up a gooey mess—trust me, I’ve been there.
Final Thoughts
As you sit down to enjoy your chocolate hazelnut tart, you might find yourself reflecting on just how satisfying it’s to pull off a dessert like this. Seriously, who knew I could create something so decadent?
With that rich filling and crispy crust, it feels a bit gourmet—like I should be wearing a chef’s hat or something. You might even catch yourself sneaking another slice, just to savor the moment a bit longer.
And let’s be honest, that combination of chocolate and hazelnuts? Pure magic. Whether you share it or keep it all to yourself, this tart’s indulgence is well-deserved.