
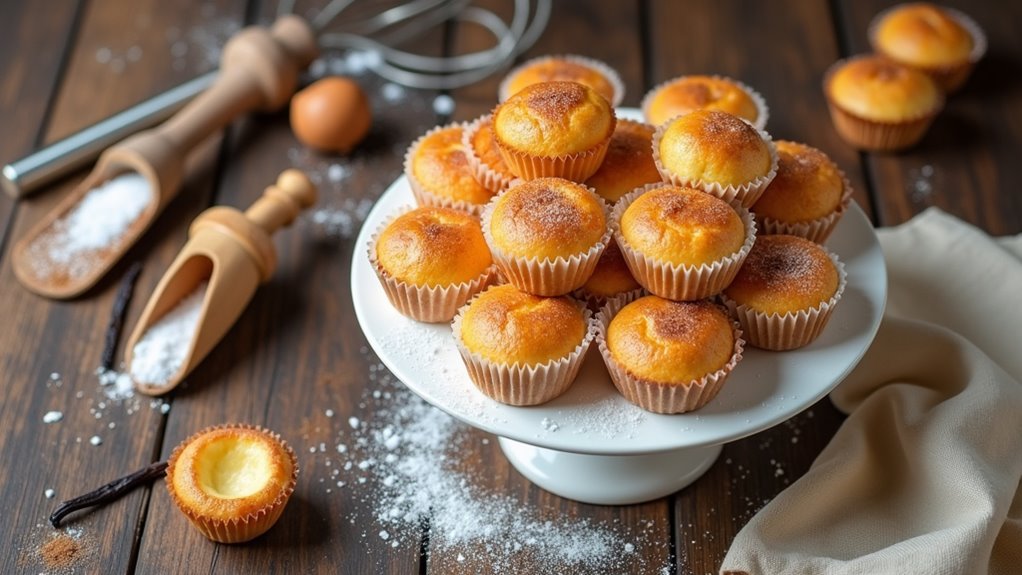
When it comes to comforting desserts, queijadas have a special place in my heart—and stomach. These Portuguese custard cupcakes are ridiculously easy to whip up, even for someone like me, who once burned water. Seriously. With a handful of simple ingredients, you can create a creamy delight that fills your kitchen with the most heavenly aroma. Curious how to achieve that perfect balance of sweetness and cinnamon? Stick around, and let’s uncover the delicious secrets together.
Why You’ll Love This Recipe
If you’re anything like me and enjoy a good treat that impresses without a ton of fuss, then you’re in for a treat with these Queijadas de Leite. Honestly, these Portuguese custard cupcakes are a total game changer. They’re creamy, dreamy, and surprisingly simple to whip up.
I love how a handful of everyday ingredients can transform into something so delightful. Plus, they’re perfect for sharing—although, let’s be real, I usually keep a batch all to myself when I need a pick-me-up. You know that feeling when the aroma wafts through your kitchen? Pure bliss.
With just the right amount of sweetness and that hint of cinnamon on top, you’ll be hooked. What’s not to love?
Equipment List
When you plunge into making Queijadas de Leite, it helps to have the right tools on hand. I like to keep my cupcake pan at the ready—it’s crucial for these little delights.
You’ll need mixing bowls too, big enough for all that eggy goodness. A whisk is a must because, trust me, all those ingredients need a good mixing. Having a reliable cutting board set can also enhance your kitchen experience as it provides a sturdy surface for all your food prep tasks.
I can’t live without my liquid measuring cup; it makes pouring the milk a breeze. Don’t forget a spatula, perfect for scraping down the sides.
Oh, and a cooling rack? Essential for letting those beauties cool down after baking. Trust me, it makes the process way smoother—and who doesn’t want an easier baking experience?
Additionally, having a quality measuring spoon set is key to ensuring accurate ingredient measurements for consistent results in your baking.
Our Ingredients
When it comes to whipping up a batch of Queijadas de Leite, the ingredients are as essential as a good playlist is for a long road trip. Each item not only adds flavor but also contributes to that delightful texture you’re aiming for.
So let’s explore the components that will turn your kitchen into a mini Portuguese bakery, shall we? Here’s what you’ll need for this lovely custard cupcake recipe.
- 7 beaten eggs
- 2 cups granulated sugar
- 2 1/2 cups all-purpose flour
- 6 cups milk
- 1 tsp vanilla extract
- 1/2 cup melted salted butter
- Ground cinnamon (for topping)
- Powdered sugar (for topping)
Now, I know what you’re thinking. Six cups of milk? That’s a lot! But fear not, my friend. It’s essential for achieving that custardy goodness that makes these pastries so irresistible.
And the melted butter? It adds just the right amount of richness without making you feel like you’ve just plopped a stick of margarine in your mouth.
Plus, the combination of granulated sugar and vanilla brings that sweet aroma wafting through your kitchen, making you feel all warm and fuzzy inside.
Just remember, while fresh ingredients are always nice, it’s the love and care you pour into mixing that makes all the difference. So grab your measuring cups and let’s get this party started!
Step-by-Step Instructions
Making Queijadas de Leite is like taking a charming trip to a cozy Portuguese bakery right in your kitchen. Mixing the batter is quick and simple—just follow these easy steps and in no time, you’ll have a batch of delectable custard cupcakes that will make everyone smile (and maybe even beg for the recipe). So grab your apron, and let’s get cooking!
- Preheat your oven to 350°F (180°C) and grease your cupcake pan. This step is essential to guarantee those yummy cupcakes come out easily and don’t leave half of themselves stuck to the pan. Imagine the horror—counting on your cupcakes for a sweet treat only to find them half in, half out of the tin.
- Beat 7 eggs in a large mixing bowl. Then, add in 6 cups of milk and 1 teaspoon of vanilla extract. Mix these ingredients together until they’re well combined. The egg and milk mixture should be smooth and creamy, like a velvet blanket ready to cover your cupcakes. Using high-end baking equipment can help you achieve this perfect blend.
- In a separate bowl, combine 2 cups of granulated sugar with 2 1/2 cups of all-purpose flour. Give this dry mix a good stir to guarantee everything is evenly distributed. It’s like creating a little sugar-flour family that’s enthusiastic to mingle with the wet ingredients.
- Gradually add the dry mixture to the wet ingredients while stirring continuously. Do this slowly so you don’t end up with lumps. We want a smooth batter, not a bumpy ride. Just picture yourself on that smooth highway, not the bumpy backroad.
- Mix in 1/2 cup of melted salted butter until everything is thoroughly combined. This is where the magic happens—you’re adding richness and flavor that will elevate these cupcakes to the next level of deliciousness.
- Pour the batter into your prepared cupcake pan nearly to the rim, but be careful not to overfill. The batter is going to puff up a little, and you don’t want a cupcake that spills over the edge. Think of it as giving them just enough room to expand their horizons.
- Bake in the preheated oven for about 40 minutes. You’ll know they’re done when the tops are golden brown and slightly puffed up but then have deflated a bit. This sudden change in appearance is totally normal, so don’t panic—it just adds to their charm.
- Once they’re out of the oven, let your Queijadas cool completely in the pan. After they’ve cooled down and are safe to touch, you can pop them out on a wire rack.
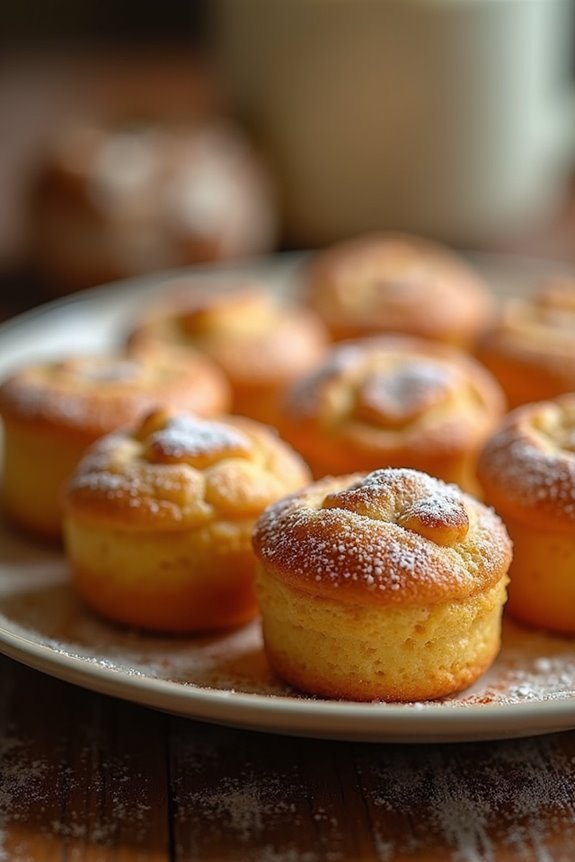
- Dust the tops with ground cinnamon and powdered sugar before serving. This is where they get their stylish finishing touch, perfect for impressing family and friends or just treating yourself. Remember, having the right premium baking equipment can make all the difference in achieving baking perfection.
And there you have it! Just a few steps and a little patience, and you’ll have a delightful batch of Queijadas de Leite to enjoy.
Tips & Variations
After getting those Queijadas de Leite baked and cooled, it’s time to get creative with tips and variations that can take this treat to even greater heights.
Did you know you can swap out the vanilla for almond extract? It gives a delightful twist that I just adore. If you’re feeling adventurous, try adding a sprinkle of lemon zest to the batter. It brightens everything up!
As for toppings, crushed nuts can add a nice crunch, or you might even drizzle a little caramel sauce for some decadence.
Oh, and if your custards deflate a bit, don’t panic—it just means they’re perfectly fluffy inside. Trust me, they won’t last long, so enjoy the deliciousness while it lasts.
How to Serve?
While you might be tempted to dive right into those gorgeous Queijadas de Leite as soon as they’ve cooled, let me share a few tips on how to serve them up that’ll make your friends think you belong on a cooking show.
First, grab a pretty serving platter; it really does make a difference. I like to dust them with a bit of powdered sugar and a sprinkle of cinnamon right before serving. It’s like giving them a little dress-up party.
You could even add some fresh berries on the side for a pop of color. You know, just to impress.
Oh, and don’t forget to have napkins handy—these are delightfully messy, but that just adds to the fun, right?
Storage & Reheating Guide
Once you’ve wowed your friends with those stunning Queijadas de Leite, you might be wondering how to keep the sweetness going for days—or even survive the inevitable leftovers.
First things first—let them cool completely, then pop them in an airtight container. They’ll last about three days at room temperature, but if you really want to stretch their lifespan, refrigerate them; they can stick around for a whole week!
Just remember to let them warm up a bit before enjoying again—trust me, they taste better that way. If you want a warm treat, zap them in the microwave for about 10-15 seconds. You’ll be in custard heaven again, even if they’re not fresh out of the oven. You might also want to consider using soup freezer containers, which are perfect for storing various treats like these custard cupcakes for longer periods.
Final Thoughts
Even though it’s easy to get lost in the process of making these delightful Queijadas, the best part is finally savoring that first bite.
I mean, who knew a cupcake could bring so much joy? As you sink your teeth into the fluffy custard, you might find yourself thinking about how you’d like to share them, or maybe not—no judgment here. You’ve put in the effort, and it’s well worth it.
Don’t forget to sprinkle that cinnamon and powdered sugar on top; it’s like dressing them up for a party. If they turn out just right, you might even want to make a double batch next time.
Trust me, they won’t last long. Enjoy every delicious morsel. Happy baking!