
Making a Delicious Vanilla Cream Pie always reminds me of family gatherings, the kind where laughter fills the air and everyone’s got that little sparkle in their eye. I still remember the first time I tried to whip up this dessert; let’s just say, mixing up the measurements led to a rather… interesting pie. But hey, that’s all part of the journey, right? So, if you’re ready to join me in crafting this sweet delight, let’s get to the good stuff—like the silky custard filling.
Why You’ll Love This Recipe
You know that feeling when you bite into something so creamy and delicious that it just makes your day? That’s my exact reaction every time I indulge in a slice of vanilla cream pie.
The silky, smooth custard filling enveloped in a perfectly baked crust is pure bliss. You can almost feel the stress of the day melting away.
And honestly, who knew whipping cream could feel like an Olympic sport? I’m always afraid I’ll overdo it, but it’s worth it for that fluffy topping.
Plus, making this pie is a fun excuse to totally zone out and get lost in the process.
That mouthwatering vanilla flavor? It even makes me forget I forgot to defrost the chicken for dinner.
Equipment List
When it comes to baking a delicious vanilla cream pie, having the right tools can make all the difference in the world. You’ll need a sturdy 9-inch pie dish—trust me, you don’t want it falling apart mid-bake.
A saucepan is essential for cooking that creamy filling, along with a whisk to mix everything just right. I also love having a mixing bowl handy for blending those egg yolks and milk; it’s like a cozy little nest for my ingredients. Investing in high-end kitchen appliances can significantly improve your efficiency and results.
A rubber spatula helps me get every last bit out of the bowl—no wastage here. Oh, and don’t forget the electric mixer for whipping that cream. You want it fluffy, not a mountain of butter, right? Investing in premium kitchen appliances can elevate your baking experience even further.
Now, let’s get baking!
Our Ingredients
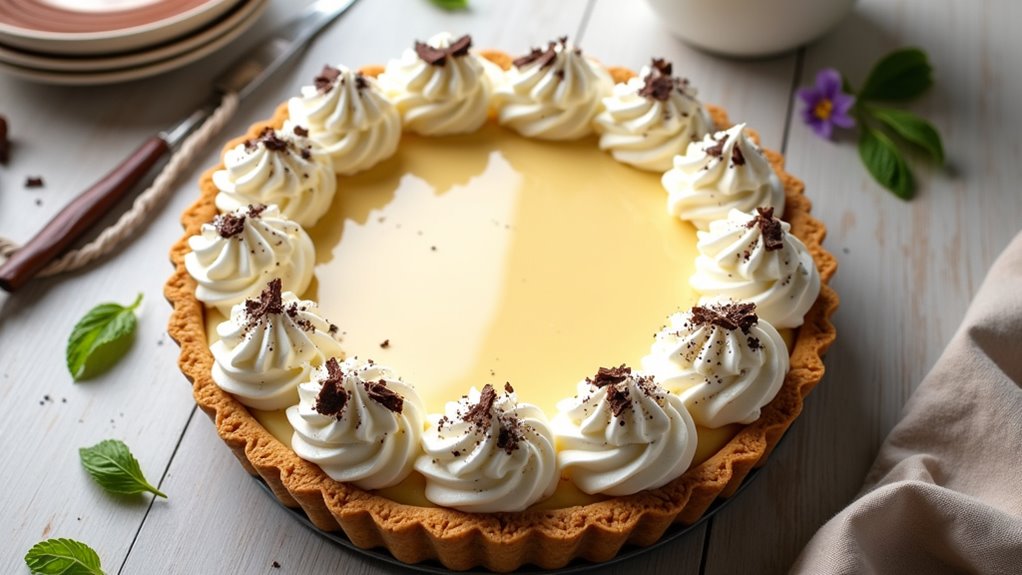
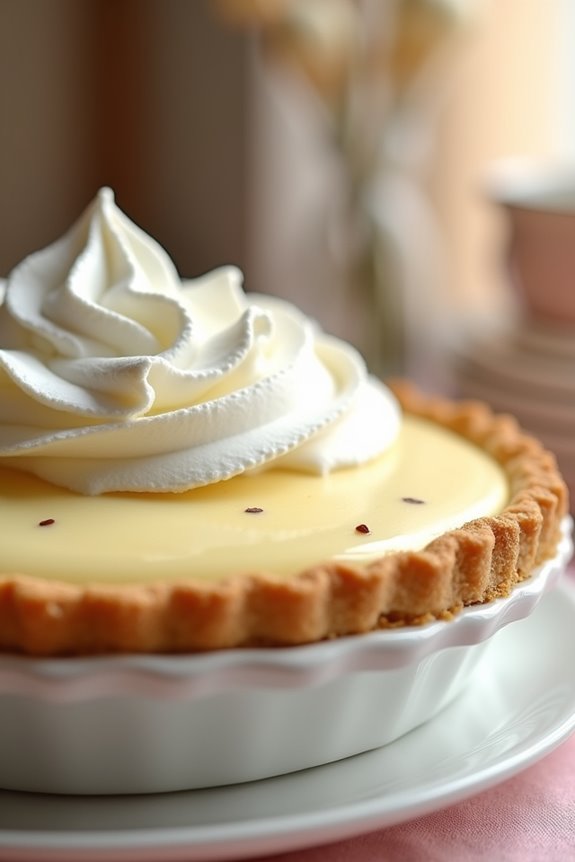
Ready to whip up a delightful vanilla cream pie? You’re in for a treat! This dessert is a classic, creamy, and oh-so-delicious—it’s kind of hard to resist. Picture the smooth vanilla custard nestled in a flaky crust, and topped with light, airy whipped cream. Seriously, it’s like a warm hug after a long day.
But before we plunge into the step-by-step instructions, let’s lay out everything you’ll need to make this little slice of heaven happen.
Here’s what you’ll need:
- 1 baked 9-inch pie crust
- ⅔ cup sugar
- ¼ cup cornstarch
- ½ tsp salt
- 3 cups milk
- 4 egg yolks
- 2 tbsp soft butter
- 1 tbsp plus 1 tsp vanilla extract
- 1 ½ cup chilled heavy cream
- 2 tbsp sugar (for whipping cream)
Now that you have the essentials, let’s talk a bit about these ingredients. It’s important to have everything measured out and ready to go, because you don’t want to end up scrambling to find that missing cup of milk when your pie custard is on the stove, do you?
And don’t skimp on the quality of your vanilla extract—trust me, this is where the magic happens. If you can find real vanilla bean or high-quality extract, go for it. You’ll notice the difference, and your taste buds will thank you.
Step-by-Step Instructions
Making a vanilla cream pie isn’t only delicious but surprisingly simple! Let’s get right into the fun of creating this creamy masterpiece. Just follow these straightforward steps, and before you know it, you’ll have a stunning pie that will impress anyone lucky enough to get a slice.
1. Mix the Dry Ingredients: Start by grabbing a medium-sized saucepan. In it, combine ⅔ cup of sugar, ¼ cup of cornstarch, and ½ teaspoon of salt. Whisk those dry ingredients together until well combined. This is the base for your custard, so give it a few good shakes to confirm everything is evenly mixed.
2. Blend the Milk and Egg Yolks****: Next, in another bowl, whisk together 3 cups of milk and 4 egg yolks. Be sure to whisk vigorously until the yolks are fully incorporated into the milk. This is where your mixture starts to get that creamy goodness, so don’t be shy with the whisk.
3. Cook the Mixture: Slowly pour your milk and egg mixture into the saucepan with the dry ingredients. Stir it all together thoroughly.
Now, place the saucepan over medium heat and keep stirring constantly. You want to cook this until it thickens and begins to bubble, which should take about 5-7 minutes. You’ll know it’s ready once it’s thick enough to coat the back of a spoon. Be patient!
4. Add Butter and Vanilla: When your custard reaches that delicious, thick consistency, remove the saucepan from the heat. Stir in 2 tablespoons of soft butter and 1 tablespoon plus 1 teaspoon of vanilla extract.
This is where the magic happens—give it a good stir until the butter melts and everything is uniform. The smell will be heavenly, so take a moment to appreciate it. Don’t forget that using quality baking equipment can enhance these flavors even further.
5. Pour and Chill: Carefully pour the creamy filling into your pre-baked 9-inch pie crust. Spread it out evenly, but don’t stress too much about perfection—it’s going to look fantastic once it’s done.
Now, here’s a little tip: press plastic wrap directly onto the custard to prevent a skin from forming while it chills. Pop it in the fridge to chill for at least 2 hours. Go ahead, take a little break. You deserve it!
6. Whip the Cream: Once the pie filling is set, it’s time for the whipped cream. In a mixing bowl, whip 1 ½ cups of chilled heavy cream with 2 tablespoons of sugar until soft peaks form.
This is the fun part—watching that cream transform before your eyes is like magic! Just be careful not to overdo it; you want it light and fluffy, not grainy.
7. Top the Pie: Finally, gently spread the whipped cream over the chilled pie. Get a bit creative with it if you’re feeling fancy—swirls, peaks, whatever floats your boat.
Once topped, you can either serve it immediately or pop it back in the fridge for a bit longer. Though honestly, who can resist diving in right away?
And there you go! You’ve just created a delicious vanilla cream pie that’s sure to make anyone’s day a little sweeter. Enjoy every creamy, dreamy bite, and remember to share, or just keep it all to yourself—no judgments here. Additionally, to enhance your baking experience, consider investing in premium baking equipment, which can make creating desserts easier and more enjoyable.
Tips & Variations
Although creating the perfect vanilla cream pie might seem like a challenging task, there are plenty of tips and variations I’ve learned along the way that can make it easier and even more delicious.
For starters, don’t skip pressing plastic wrap directly onto the custard. Trust me, it saves you from that dreaded skin forming on top.
If you want to impress, use real vanilla beans or a high-quality extract—your taste buds will thank you.
Feeling adventurous? Try adding a touch of almond extract for a unique twist. Or, mix in some chocolate shavings for an extra treat.
And hey, if your pie isn’t perfect, let’s just call it “rustic charm”—it’s the flavor that counts.
How to Serve?
When it comes to serving a vanilla cream pie, you want to create a moment that’s just as delightful as the pie itself. First, I like to slice it into generous pieces—because who wants a tiny sliver of pie?
Then, I add a dollop of that whipped cream we prepared earlier, gently plopping it on top like a cloud. Sometimes, I sprinkle a bit of grated chocolate or a dusting of cocoa for a touch of elegance.
If I’m feeling fancy, I’ll even add fresh fruit, like berries, for a pop of color and flavor. Grab a fork, take a seat, and enjoy.
Just don’t let anyone catch you sneaking an extra slice—trust me, I’ve been there!
Storage & Reheating Guide
After indulging in a generous slice of that vanilla cream pie, you might find yourself with some leftovers—if you’re lucky, that is.
If you do, here’s a handy storage tip: put any remaining pie in the fridge, making sure to cover it tightly with plastic wrap. This keeps it fresh for about three days. To maintain its ideal taste and texture, you might consider using airtight food storage containers.
Don’t worry, I know you might want to dive back in sooner.
As for reheating, I wouldn’t recommend it—creamy fillings.
Final Thoughts
Even if you’ve mastered the art of making this delightful vanilla cream pie, it’s easy to underestimate just how much joy it can bring to your gatherings or quiet evenings at home.
I remember the first time I made this pie—it felt like a pie-driven adventure. The buttery crust, the creamy filling, and that heavenly whipped cream—it’s pure magic. Seriously, who doesn’t love dessert?
Whether you’re serving it at a family barbecue or sneaking a slice after a long day, this pie has a way of bringing smiles. Plus, it’s a fantastic canvas for creativity. You can add chocolate shavings or fresh fruit if you’re feeling fancy.