
I’ve got to say, mini pumpkin cheesecakes have become my go-to fall treat. They’re a perfect mix of creamy and spiced goodness, and honestly, I can’t get enough. If you’re like me, always looking for ways to impress others (while secretly hoping for leftovers), these little bites are your answer. I promise they’re easier to make than they sound. So, let’s plunge into the world of pumpkin perfection; you won’t want to miss what comes next.
Why You’ll Love This Recipe
Why will you fall head over heels for these mini pumpkin cheesecakes? For starters, they’re the perfect bite-sized treat that packs a serious flavor punch. I mean, who doesn’t want creamy cheesecake paired with that comforting taste of pumpkin spice? The smooth filling is like a warm hug, and I can’t help but smile every time I take a bite.
Plus, they’re super easy to make—no complicated tricks here. When I bake these mini pumpkin cheesecakes, my house smells like a cozy fall festival, and my friends can’t resist sneaking a sample before they even cool down.
And don’t worry if they don’t look perfect; they taste divine. Just remember to chill them before serving. Trust me, you’ll love them.
Equipment List
When I decided to whip up these mini pumpkin cheesecakes, I quickly realized that a few key pieces of equipment could make or break my baking adventure.
First off, a muffin pan is a must—those cute little cheesecakes aren’t going to bake themselves. I also grabbed paper liners to keep things tidy; trust me, you’ll thank yourself later.
A mixing bowl for the filling is essential, and a hand mixer helps whip everything into creamy perfection. Don’t forget a measuring cup and spoons; I learned that the hard way when I dumped in an extra tablespoon of sugar. Having a reliable measuring spoon set can ensure your ingredients are perfectly portioned every time.
Finally, a cooling rack is perfect for letting the mini cheesecakes cool—no one likes a soggy bottom.
Our Ingredients
When it comes to baking, gathering your ingredients is like collecting treasure for a fantastic adventure. For these mini pumpkin cheesecakes, you’ll want to get everything organized so you can dive right into mixing and measuring without any hitches. Grab a cup of graham cracker crumbs and some melted butter to create that delightful crust.
And let’s not forget the cream cheese—the star of the show—that will make these treats creamy and rich. Pumpkin puree adds that seasonal flair while eggs bring everything together in a cozy embrace. The spices? Oh, they’ll sprinkle warmth into every bite. Ready to see what else you’ll need? Let’s list those goodies out!
- 1 cup graham cracker crumbs
- 1/4 cup unsalted butter, melted
- 2 tbsp sugar (granulated or brown)
- 12 oz cream cheese, room temperature
- 1 cup pumpkin puree
- 1/2 cup sugar
- 1 large egg + 1 egg yolk
- 1 tsp vanilla extract
- 1/2 tsp ground cinnamon
- 1/2 tsp ground ginger
- 1/8 tsp ground nutmeg
- 1/8 tsp salt
- 4 oz sour cream, room temperature
Now, while the list might seem a bit lengthy, don’t let it overwhelm you. Each ingredient plays an essential role in crafting these little bites of heaven. The graham cracker crumbs give crunch, while the butter binds everything together.
And the cream cheese? It’s like a creamy hug for your taste buds. If you prefer a certain type of sugar or want to make these dairy-free, feel free to swap stuff around. Just keep in mind that the core flavors are what make these mini cheesecakes shine. So gather your goodies, take a deep breath, and let’s get ready to dig into the next step of this sweet journey. Happy baking!
Step-by-Step Instructions
Making mini pumpkin cheesecakes is like wrapping yourself in a cozy sweater on a brisk autumn day—it’s all about warmth, flavor, and a little bit of indulgence. Don’t worry, the steps are straightforward and designed for success. Let’s explore and get these delightful treats baking!
- Start by preheating your oven to 350°F. Line a muffin pan with liners. This is your first step toward sweet success, and we want to make sure those cheesecake bites come out easily.
- In a mixing bowl, combine 1 cup of graham cracker crumbs, 1/4 cup of melted unsalted butter, and 2 tablespoons of sugar. Mix it up thoroughly until it resembles wet sand. This mixture is going to create a lovely crust that acts like a little bed for the creamy cheesecake.
- Once mixed, press the graham cracker mixture firmly into the bottom of each muffin liner. You’ll want to make it compact for a sturdy crust. Bake the crusts in the preheated oven for about 5 minutes, just enough to set them. Then, let them cool slightly while we whip up the filling.
- In a large mixing bowl, beat 12 oz of cream cheese until it’s nice and smooth—like a cloud of creamy goodness. This is when you can really start to feel the excitement. Gradually add in 1/2 cup of sugar, 1 large egg plus 1 egg yolk, and 1 teaspoon of vanilla extract. Blend until everything is well combined and there are no lumps (unless you want to keep a few for texture).
- Next, fold in 1 cup of pumpkin puree, 1/2 teaspoon of ground cinnamon, 1/2 teaspoon of ground ginger, 1/8 teaspoon of ground nutmeg, 1/8 teaspoon of salt, and 4 oz of sour cream. Mix until it’s all smooth and delicious-looking. Take a moment to admire your fall-themed mixture; it’s visually delightful and smells fantastic.
- Carefully pour the creamy pumpkin filling over the cooled crusts in the muffin pan. Fill them about 3/4 full—resist the urge to overfill; nobody wants cheesecake batter spilling over.
- Bake the mini cheesecakes in your preheated oven for about 20-25 minutes. You’ll know they’re done when the centers are set but still slightly wobbly. Keep an eye on them; overbaking can lead to a dry texture, and we want to avoid that creamy cheesecake faux pas.
- Once baked, remove the cheesecakes from the oven and let them cool in the pan for about 10 minutes. Then, transfer them to a wire rack to cool completely. They need to chill out for at least 2 hours in the refrigerator.
While you wait, it’s the perfect time to plan your toppings—perhaps some whipped cream and a sprinkle of cinnamon? Also, don’t forget to invest in premium baking equipment to enhance your baking experience.
And there you have it—the step-by-step to your mini pumpkin cheesecake masterpieces. Don’t forget, the taste test is the best part, so once they’re chilled and ready, gather some friends and indulge!
Tips & Variations
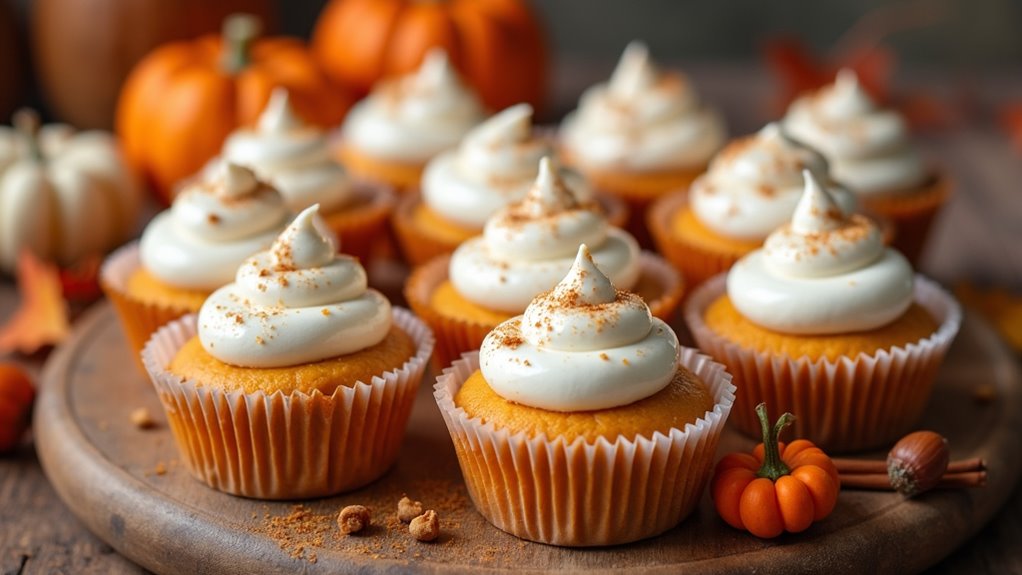
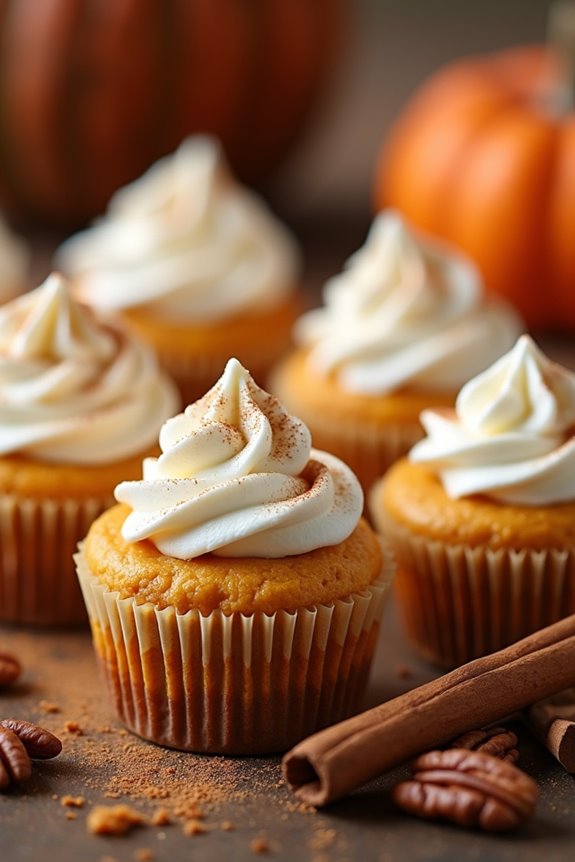
After those mini pumpkin cheesecakes have cooled and chilled, it’s time to think about serving them up and making them even more special. You could top them with a generous dollop of whipped cream and a sprinkle of cinnamon—talk about a crowd-pleaser.
I’ve even drizzled caramel sauce over them for an extra touch of decadence.
If you want to get a little adventurous, why not swap out spices? Try a dash of allspice or even some chocolate chips in the filling for a fun twist.
Oh, and don’t forget to store any leftovers (if there are any) in an airtight container in the fridge—they taste just as good the next day. Trust me, I’ve tasted many a cheesecake.
How to Serve?
Serving mini pumpkin cheesecakes is one of the best parts of making them—trust me, you’ll want to show off these little beauties.
Once they chill, I like to arrange them on a pretty platter. It’s all about presentation, right? A dollop of whipped cream on top really kicks things up a notch, and a sprinkle of cinnamon adds that perfect fall touch.
I usually grab some festive cupcake liners that match the season. Have you ever tried placing a tiny cinnamon stick beside each one? It’s adorable, and a nice touch!
Don’t forget to serve them chilled; the creamy texture is just too good to miss. Plus, your friends will be utterly impressed. How can you resist that?
Storage & Reheating Guide
Though the mini pumpkin cheesecakes are sure to disappear quickly at your gatherings, knowing how to store the leftovers—if there are any—can help you enjoy them even longer.
If you’ve somehow got some left (go you!), pop them in an airtight container and toss them in the fridge. They’ll last about five days. Not that I’d know from experience; mine never last that long!
When you’re ready to indulge again, you can enjoy them chilled straight from the fridge.
If you want a warm treat, just preheat your oven to 350°F, place them on a baking sheet, and heat for about 10 minutes. It’s the perfect way to bring them back to life, trust me. Enjoy every delicious bite! Plus, using airtight food storage solutions will help maintain the freshness of your mini pumpkin cheesecakes even longer.
Final Thoughts
As you savor those mini pumpkin cheesecakes, you might find yourself daydreaming about all the cozy fall gatherings they’ve been a part of. I mean, who doesn’t love a dessert that brings everyone together?
These little bites of heaven not only taste amazing but also look cute on any dessert table. Just picture it: laughter, stories, and maybe a little whipped cream to top it off—perfection.
If you’re like me, you’ll keep experimenting with toppings or even add your twist next time. Maybe a drizzle of caramel? Yes, please.