
I’ve always been fascinated by how a simple bite-sized treat can transport you to another world, right? These rose truffles are a perfect example of that. Seriously, the combination of rich dark chocolate and fragrant rose water is nothing short of magical. And I promise, if I can make them without turning my kitchen into a chocolate disaster zone, so can you. Now, are you ready to whip up these elegant little gems? Let’s get into it.
Why You’ll Love This Recipe
You know, I’ve always believed that dessert should be a little bit magical, and these rose truffles really deliver on that promise. Each bite feels like indulging in a secret, luxurious sweet treat that you just can’t resist. Seriously, who wouldn’t love creamy chocolate blended with delicate rose water? It’s like a garden party for your taste buds.
I remember the first time I made these; my kitchen smelled so good, I thought it might attract passing fairies. Plus, they’re surprisingly simple to whip up. A little melting, stirring, and chilling, and voilà! You’ve got truffles that look fancy enough for a special occasion but are easy enough for an everyday treat.
Trust me, you’ll love every magical bite.
Equipment List
Creating these delightful rose truffles requires just a few key tools that most home cooks already have tucked away in their kitchens.
First off, you’ll need a sturdy saucepan—it’s your melting pot for that luscious chocolate. A heatproof bowl is a must too; just think of it as a cozy spa for the chocolate.
Don’t forget parchment paper; it’s essential for keeping those truffles from getting stuck like a kid at a birthday party with too much frosting.
A cookie scoop is perfect for shaping your truffles—if I can manage to avoid making a chocolate finger painting, so can you.
Finally, a whisk or spatula helps blend everything smoothly, ensuring your truffles are both beautiful and oh-so-decadent. Additionally, consider investing in a premium outdoor grill to enhance your cooking experience with delicious grilled treats to enjoy alongside your truffles.
Our Ingredients
When it comes to whipping up delicious rose truffles, the ingredients truly set the stage for this delightful treat. Imagine rich dark chocolate mingling with floral notes of rose water and a hint of olive oil—it’s a combination that sounds like a little piece of heaven, doesn’t it?
And the best part? These ingredients are likely just a hop, skip, and a jump away in your kitchen. Let’s take a closer look at what you’ll need to gather for this sweet endeavor.
- 1 3/4 cups chopped dark chocolate (reserve 3/4 cup for dipping)
- 2 teaspoons rose water
- 3 teaspoons extra virgin olive oil
- 1 tablespoon dried rose petals (for garnish)
Now, while we’re on the topic of ingredients, let’s chat a bit about the chocolate. Quality matters! Aim for dark chocolate with a high cocoa content—look for something that makes your taste buds dance a little.
Also, rose water can be tricky; a little goes a long way. If you’re new to using it, start with a less intense brand, so it doesn’t overpower your truffles. And those dried rose petals? Oh, they add such a lovely touch.
You might even catch yourself just admiring their beauty before tossing them on. After all, we eat with our eyes first, right? Trust me, you’ll want these truffles looking as good as they taste. Happy truffle making!
Step-by-Step Instructions
Making rose truffles is a delightful experience that fills your kitchen with a lovely aroma and satisfies your sweet tooth in the best way. These truffles blend the richness of dark chocolate with the floral brightness of rose water, creating a treat that’s not just tasty but also beautiful. Ready to embark on the process? Let’s take it step by step, and you’ll have these delicious morsels in no time.
- Melt Dark Chocolate: Start by measuring out 1 cup of your finely chopped dark chocolate. Place it in a small saucepan over low heat. Stir it constantly as it melts, keeping an eye on it—you don’t want to end up with burnt chocolate. It’ll take a few minutes, and soon enough, you’ll have a smooth, glossy melt.
- Mix in Flavorings: Once your chocolate is melted and has a silky texture, remove it from the heat. Gently stir in 2 teaspoons of rose water and 3 teaspoons of extra virgin olive oil until everything is beautifully combined and smooth. Just take a moment to inhale that lovely aroma—it’s like a breath of spring!
- Chill for Firmness: Transfer the mixture to a bowl and pop it in the fridge. You need it to chill for about 30 minutes until it firms up. You’ll know it’s ready when you can scoop it without it falling apart. Trust me, a little waiting will pay off in delicious dividends.
- Shape the Truffles: Now comes the fun part. Scoop out 2 teaspoons of the chilled chocolate mixture and roll it between your palms to form little balls. Don’t worry if they’re not perfect; handmade is charming. Place them on a sheet of parchment paper. If you’re concerned about getting messy, feel free to wear gloves—it can get a bit sticky.
- Dip in Chocolate: Time to bring out the remaining 3/4 cup of chopped dark chocolate. Melt this in the same way you did before—using low heat and stirring continuously. Once it’s melted and ready, carefully dip each of your chocolate balls into the melted chocolate until fully coated. Shake off any excess chocolate before placing them back on the parchment. This might be the part where you start craving a truffle or two yourself.
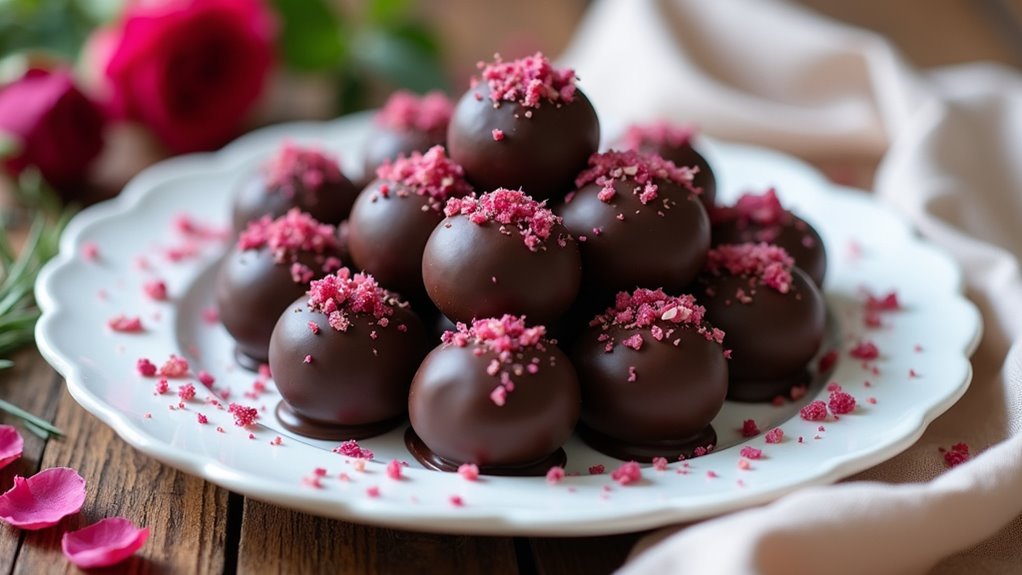
- Garnish with Rose Petals: Before the chocolate sets, sprinkle each truffle with a pinch of dried rose petals. This adds not only a beautiful touch but also a charming flavor hint.
- Let Them Set: Finally, place your decorated truffles back in the fridge for at least 1 hour. This will allow the chocolate to harden properly, ensuring you have that satisfying snap when you take a bite.
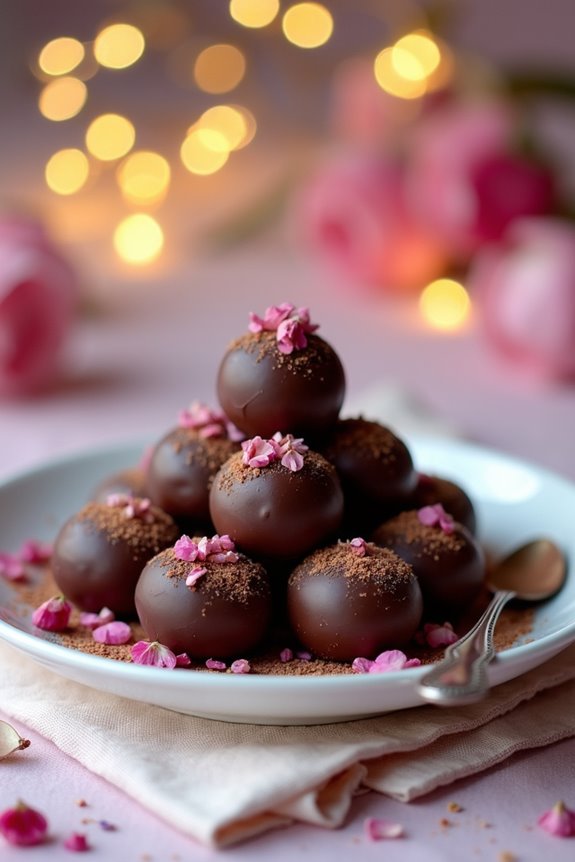
Once set, feel free to marvel at your creation. These rose truffles aren’t only delightful to eat, but they also look stunning and are a perfect gift or a fancy treat for yourself. For a finishing touch, consider using a professional kitchen torch to add a delicate caramelization on top of your truffles.
Enjoy the sweet rewards of your effort, and remember, sharing is optional! Happy truffling!
Tips & Variations
While I mightn’t be a master chocolatier, I can definitely share some tips to help elevate your rose truffles from delightful to absolutely divine.
First up, wear gloves when shaping those truffles. Trust me, it keeps things tidy and makes you feel a bit fancy.
If you’re feeling adventurous, consider adding a sprinkle of sea salt on top after dipping; it brings out those sweet notes beautifully.
Do you want a bit more floral flair? Try a drop of vanilla extract alongside the rose water.
And hey, if you’ve got a sweet tooth, replace the dark chocolate with milk chocolate for a sweeter treat.
How to Serve?
Once those beautiful rose truffles are ready, the fun really begins. I often serve them on a pretty platter, letting their colors shine. Arranging them with some fresh rose petals adds that extra touch of elegance. You know, a little garnish goes a long way.
If I’m feeling fancy, I might drizzle some melted chocolate on top—just a little, nothing over the top. I usually pair them with a nice cup of tea or coffee, perfect for savoring the flavors. And let’s be honest, who doesn’t love a sweet treat while relaxing?
I’ve found that they’re also a hit at parties. Just watch people’s eyes light up as they take a bite. It’s pure joy, isn’t it?
Storage & Reheating Guide
When it comes to storing your gorgeous rose truffles, it’s important to treat them right.
I like to keep mine in the fridge, tightly wrapped in plastic or in an airtight container. This way, they stay fresh and ready to impress whenever you’re in the mood for a sweet treat.
Just remember, too much time in the fridge can dull that lovely flavor. If you want to enjoy them warm or at room temperature, just take them out about 15 minutes before indulging.
And reheating? Well, there’s no need—these truffles are best enjoyed as is. Trust me, I tried to warm them once and ended up with a melty mess.
Additionally, using high-quality cooking equipment gourmet kitchen ensures that your truffles are made with precision and care.
Save yourself the trouble and savor them cold!
Final Thoughts
Making rose truffles isn’t just about following a recipe; it’s an experience that blends creativity with a touch of finesse. Trust me, you’ll feel like a chocolatier, even if you’re just a home cook like me.
As you dip each truffle, it’s a dance of decadence. And let’s be honest, getting a bit messy is half the fun, right? Just don’t forget the gloves—I’ve learned that the hard way.
The scent of rose water? It’s like an aromatic hug. When you finally taste that first truffle, it’s pure bliss.