
I’ve been making these white chocolate dipped sugar wafers every holiday season, and trust me, they’re a game-changer. It’s so simple—just dip, sprinkle, and you’ve got a treat that looks fancy but takes minimal effort. Who knew dessert could be this easy? I’ll admit, I once dipped my fingers in the chocolate instead of the wafers. Spoiler: not as great. Want to know the secret to making them even more festive? Stick around for the details.
Why You’ll Love This Recipe
Whether you’re whipping up goodies for a holiday party or just want a sweet treat to make your day a little brighter, you’ll love this recipe for Christmas White Chocolate Dipped Sugar Wafers.
You can immerse yourself in the wonderful world of baking without much hassle here. Seriously, these cookies are as easy as pie—or maybe easier.
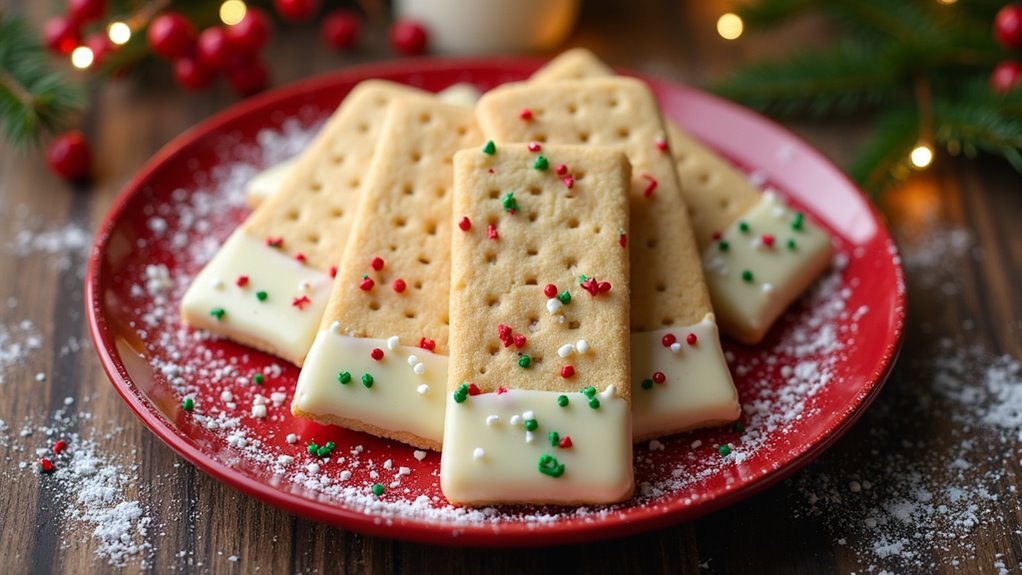
Just imagine delicate sugar wafers, lavishly dipped in creamy white chocolate, and topped with colorful sprinkles. Every bite feels festive and cheerful.
Plus, they look impressive enough to make you feel like a baking pro (even if you just burnt toast last week). You’ll find yourself making these time and again.
Trust me, they’re the perfect sweet treat for any occasion.
Equipment List
You’ll want a microwave-safe bowl for melting that white chocolate—trust me, save yourself from doing dishes—it can get messy.
Grab a spatula for stirring and a sharp knife to cut sprinkles. A baking sheet is essential, lined with wax paper, which makes cleanup a breeze.
Don’t forget the trusty tongs or your good ol’ fingers for dipping those wafers.
And if you’re feeling fancy, a cooling rack can help them set evenly. Really, it’s a simple setup. I mean, no one wants to navigate an obstacle course when the goal is delicious treats, right? Plus, investing in premium baking equipment ensures that your baking experience is as enjoyable as possible.
Our Ingredients
Making those Christmas White Chocolate Dipped Sugar Wafers is a delightful way to spread some holiday cheer. It’s not just a treat for your taste buds, but also a feast for the eyes—once those colorful sprinkles are tossed on.
Trust me; there’s something so satisfying about dipping crisp sugar wafers into silky white chocolate, and the festive sprinkles really take them over the top. Plus, this recipe is super simple and forgiving, so even if you’re a kitchen novice, you can totally rock this.
Here’s a quick rundown of what you’ll need:
- 1 package sugar wafer cookies (8 oz)
- 1 cup white chocolate chips or white candy melts
- 1 teaspoon coconut oil or shortening
- Assorted red, green, and white sprinkles
Now, you might wonder if you really need coconut oil or shortening. The answer is yes—using either of these helps to create a smoother chocolate that’s easier to dip into.
It’s like giving your chocolate a little grooming session, ensuring it looks fab and glides smoothly around those wafers. And don’t skimp on the sprinkles! I mean, who wouldn’t want their holiday treats to look cheerful and bright?
Just picture it: a platter of sparkling, festive wafers that practically shout “Holidays!” So gather your ingredients, and let’s get this party started.
Step-by-Step Instructions

Making those Christmas White Chocolate Dipped Sugar Wafers is an absolute joy—it’s all about seeing holiday magic come together in your kitchen. Mixing the simple ingredients together is a breeze, and you’ll be left with a sweet treat that’s as delightful to look at as it’s to eat. Ready to get started? Just follow these easy steps, and you’ll be serving up holiday cheer in no time.
1. Prep Your Baking Sheet: Start by lining a baking sheet with wax paper. This will be where your festive creations will rest and set, so you want to make sure it’s ready for action.
Trust me, the wax paper makes cleanup a lot easier and prevents any sticky situations (pun intended).
2. Melt the Chocolate: Grab 1 cup of white chocolate chips or white candy melts. In a microwave-safe bowl, add the chocolate with 1 teaspoon of coconut oil or shortening.
Heat it up in the microwave, stirring every 15 to 30 seconds until it’s smooth and melted. You want it to be glossy and flowing, perfect for a decadent dip.
(Just don’t let it overheat—it can go from dreamy to disastrous in a heartbeat.)
3. Dip the Wafers: Take your 1 package of sugar wafer cookies (8 oz) and immerse each one about 3/4 of the way into the melted chocolate. Let the excess chocolate drip off, and try not to be too greedy—some of that chocolate needs to stay on the wafer.
(It’s hard, but you’ll thank yourself later when they’re not dripping.)
4. Sprinkle the Joy: Right after you dip a wafer in the chocolate, turn it over and shower it with assorted red, green, and white sprinkles.
Go wild! Like a holiday fairy in your kitchen, sprinkle until your heart is content. This is where the magic happens; those sprinkles make everything look enchanting.
5. Set to Chill: Carefully place your dipped wafers on the wax paper-lined baking sheet, giving them a little room to breathe.
Now, you can either let them set at room temperature until the chocolate hardens or pop them in the fridge for about 20 minutes if you’re excited to plunge into those treats ASAP.
(Patience is a virtue, but I totally understand if it’s hard to resist!)
And just like that, you’ve transformed simple ingredients into a delightful holiday treat that’s bound to impress your friends and family. With premium baking supplies, it’s even easier to create professional-looking desserts at home.
These Christmas White Chocolate Dipped Sugar Wafers aren’t only festive but also ridiculously easy to make. Now, what’re you waiting for? Get dipping and make your holiday season shine!
Tips & Variations
When it comes to making Christmas White Chocolate Dipped Sugar Wafers, a few handy tips can elevate your festive treat game.
First off, make sure your white chocolate is melted smoothly. If I’m feeling ambitious, I even add a splash of peppermint extract for a holiday twist.
While coating, sprinkle those festive decorations right when the chocolate’s wet; otherwise, they won’t stick, and trust me, that’s frustrating.
I store mine in an airtight container, where they surprisingly last up to two weeks—though they disappear faster than I can blink.
Want to switch it up? Try using milk chocolate or adding crushed candy canes on top. It’s deliciously easy and oh-so-fun. Enjoy your cookie adventure!
How to Serve?
Once you’ve dipped those sugar wafers in white chocolate and adorned them with sprinkles, you’re almost ready to impress your friends and family.
To serve, lay them out on a festive platter. I love using a colorful dish to make them pop even more. You could even stack them in a cute tower if you’re feeling artsy; nothing says “I tried” like a confectionery skyscraper, right?
For a special touch, I sometimes add little tags with fun sayings or festive messages. And don’t forget to keep a few for yourself, because honestly, who can resist those sweet bites?
You could even pair them with coffee or hot cocoa for the perfect holiday snack moment. Just blissful.
Storage & Reheating Guide
After you’ve whipped up those beautiful sugar wafers and laid them out on a festive platter, you might be wondering how to keep the remaining treats fresh.
Trust me, I’ve been there—suddenly panicking about whether they’ll sog up or end up stale. The secret? An airtight container. Just pop those delicious wafers in there, and they’ll stay good for about two weeks. Investing in airtight food storage containers is a great way to ensure your treats maintain their delightful texture and flavor.
I always try to label mine, because let’s face it, I sometimes forget what magical goodies I stashed away. If you want to reheat them, just give them a quick zap in the microwave for about 5-10 seconds.
But honestly, they’re best fresh. So, enjoy them while they last, or share them with friends if you’re feeling generous!
Final Thoughts
Even though I could easily eat the entire batch of sugar wafers in one sitting (seriously, they’re that good), I try to remind myself to savor them a little longer. There’s something special about sharing these with friends and family. Envision this: you bring out the festive platter at a gathering, and those sprinkles just scream holiday cheer. How can anyone resist?
These treats aren’t only simple to make, but they also bring so much joy. I promise, the smiles you’ll get are totally worth it. And if you happen to nibble on a few during the process—who could blame you? Trust me, you’ll want to bookmark this recipe and keep it handy for every holiday season to come.