
I’ve got to tell you, birria is like a cozy hug in a bowl, isn’t it? The way that tender beef simmers in a rich broth just warms the soul. I remember the first time I tried to make it—let’s just say my kitchen turned into a mini disaster zone. But the end result? Worth every spilled spice. If you’re ready to bring some heartwarming joy to your table, let’s plunge into this savory recipe together.
Why You’ll Love This Recipe
Have you ever wanted to impress your friends with a dish that feels like a warm hug on a chilly day? That’s exactly what birria does.
Envision this: tender, flavorful meat swimming in a rich, savory broth. It’s pure comfort food. When I first made birria, I felt like a culinary rockstar! The aroma filled my kitchen, and I just knew my friends would love it.
Plus, it’s versatile. You can serve it as a mouthwatering stew or stuff it into tortillas for scrumptious tacos. I can’t help but sneak bites as I prepare it.
It’s such a joy to share something homemade, especially when it leaves everyone asking for seconds. Trust me, your friends won’t forget this birria!
Equipment List
Cooking birria is a delightful journey, but having the right tools makes it even smoother. First off, you’ll need a big pot, preferably a Dutch oven, because we’re dealing with some serious simmering here.
A sharp knife is a must for slicing that beef chuck roast, and trust me, a dull one just won’t cut it—literally. I’ve learned that the hard way.
You’ll also want a blender for that spicy sauce—don’t skip this step; it really brings the flavor.
Tongs are handy for flipping the meat without launching it across your kitchen.
Finally, grab some measuring spoons—getting those spices just right is vital. By the way, you can find professional kitchen equipment to elevate your cooking experience and make things even easier.
With these tools, you’ll be well on your way to birria bliss without too many culinary mishaps!
Our Ingredients
When it comes to making a fantastic birria, the heart of the dish lies in the ingredients. Each component adds its own flavor, bringing this savory Mexican classic to life.
Let’s gather everything we need and get ready to create some magic in the kitchen. Trust me, once you’ve assembled all these goodies, you’ll start smelling that rich, delicious aroma wafting through your home—and you might just find yourself drooling a little. It’s okay; it happens to the best of us.
Here’s the list of what you’ll need for this mouthwatering birria:
- 5-6 lbs beef chuck roast
- 10 dried guajillo chiles
- 10 dried ancho chiles
- 3 tbsp sesame seeds
- 1 tbsp black peppercorns
- 1 tsp cloves
- 4 garlic cloves
- 2 roma tomatoes
- 1 cinnamon stick
- 4 tsp dried thyme
- 4 tsp oregano
- 2 tsp ground ginger
- 1 tsp ground cumin
- 1/4 cup white vinegar
- 2 tbsp kosher salt
- 1 white onion
- 4 bay leaves
- 2 cups beef broth or water
- 2 tbsp vegetable oil
Now, while you’re gathering your ingredients, keep in mind a few things. Freshness matters, especially when it comes to herbs and spices.
If your spices have been hanging out in the back of your pantry since that time you made a questionable chili at a party (you know the one), it might be time to restock. Also, don’t skimp on the quality of the beef; the better the meat, the richer the flavor in your birria.
And if you feel adventurous, experiment with different types of chiles to create your own unique twist on the dish. Cooking is as much about creativity as it’s about following a recipe.
Step-by-Step Instructions
Making savory birria isn’t only straightforward, but it’s also a fun adventure in the kitchen. Trust me, as the aroma starts to fill your space, you’ll feel like a culinary wizard conjuring up something truly special. Ready to impress yourself (and everyone else) with a flavorful feast? Let’s jump into the step-by-step instructions.
- Toast the Chiles: First, grab those 10 dried guajillo chiles and 10 dried ancho chiles. Place them in a dry skillet over medium heat. Toast them for about 2-3 minutes until they become soft and aromatic but not burnt—burnt chiles can ruin your dish faster than a kitchen fire (trust me on that).
- Blend the Sauce: Next, toss the toasted chiles into a blender along with 4 garlic cloves, 2 roma tomatoes, 1 cinnamon stick, 4 teaspoons of dried thyme, 4 teaspoons of oregano, 2 teaspoons of ground ginger, 1 teaspoon of ground cumin, 1/4 cup of white vinegar, and a splash of your beef broth (or water) to help it blend smoothly. Blend until you create a rich, velvety sauce. If your sauce resembles the consistency of a thick smoothie, you’re on the right track.
- Prepare the Beef: Now, take your 5-6 lbs of beef chuck roast and cut it into large chunks—make sure to outrun any anxiety about your knife skills; nobody’s grading you here! Season the beef chunks liberally with 2 tablespoons of kosher salt and some freshly cracked black pepper. Heat 2 tablespoons of vegetable oil in a large pot over medium-high heat.
- Sear the Meat: Once the oil is shimmering (but not smoking—there’s a fine line), add the beef chunks to the pot. Sear them for about 4-5 minutes on each side until they’re beautifully browned. Don’t overcrowd the pot; work in batches if necessary. This browning will add depth and flavor—kind of like how your favorite pair of shoes look better after a little “character” (or scuffing).
- Combine Everything: Lower the heat to medium and pour in the chile sauce you just blended. Add 1 diced white onion, 4 bay leaves, and the remaining beef broth or water (around 2 cups). Stir everything together, ensuring the beef is well coated in that vibrant sauce. The once plain chuck roast is now a star in the making.
- Simmer it Down: Cover the pot and reduce the heat to low. Allow it to simmer for 3-4 hours. This slow cooking time allows the flavors to meld wonderfully and the beef to become fork-tender. If you’re tempted to lift the lid and peek, go ahead—just don’t make it a habit as it loses steam (both literally and figuratively).
- Shred the Meat: After a few hours, your kitchen should smell like a very comforting hug. Remove the beef from the pot, and using two forks, shred it into bite-sized pieces. Return the shredded meat to the enriched broth, allowing it to soak up even more flavor. Now’s a good moment to give yourself a little pat on the back—you’re doing amazing.
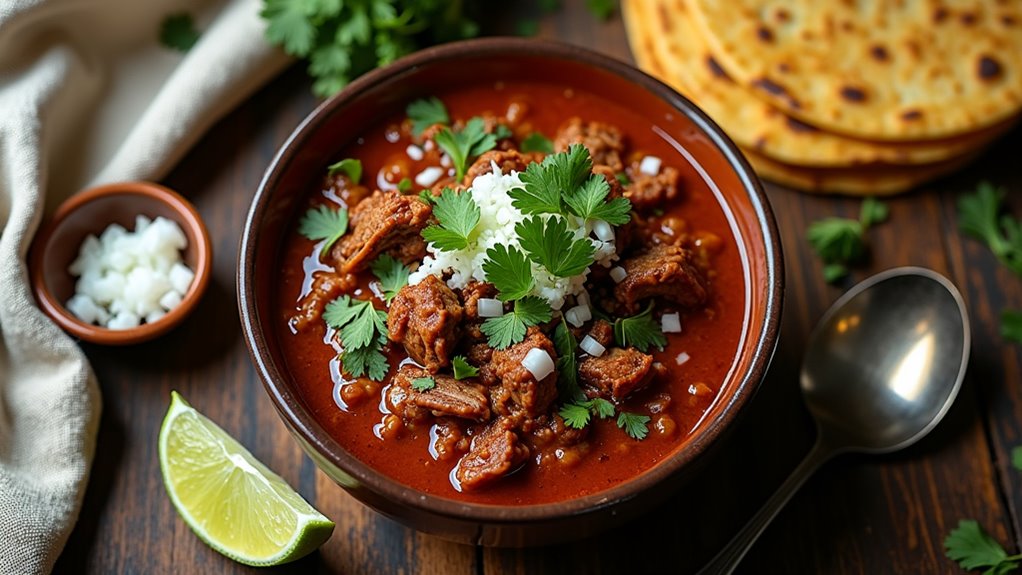
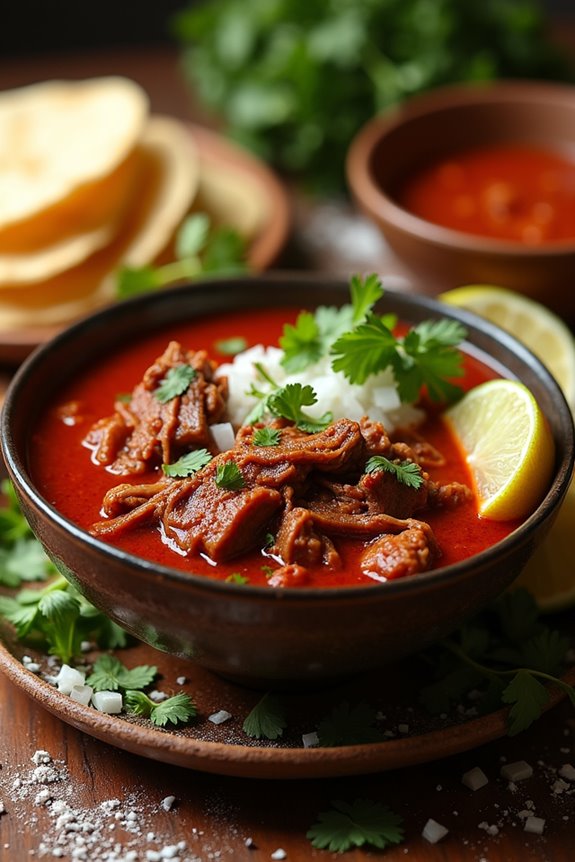
- Serve: To serve, ladle the birria into bowls alongside toppings like diced onions, fresh cilantro, chopped lime, and, of course, warm tortillas. You can go traditional or get creative—just remember, there are no rules when it comes to deliciousness.
And there you have it! You’ve created a mouthwatering birria that’s guaranteed to make your friends think you spent all day in the kitchen (but we both know our little secret). Don’t forget to relish every bite. Happy cooking! Remember, using a premium steak cooker can elevate your meat dishes to a whole new level!
Tips & Variations
Ever wondered how to elevate your birria beyond the traditional recipe? Trust me, I’ve been there.
If you’re feeling adventurous, try using beef shank or ribs; they give your dish a rich, deep flavor that’ll have everyone asking for seconds.
And, if you wanna impress, strain your consommé for a silky soup that’s perfect for dipping. I once made it and nearly forgot to serve the tortillas—what a disaster that would’ve been!
You can even switch things up by adding spices like smoked paprika for a twist.
Finally, don’t be afraid to experiment with toppings; fresh herbs can transform the dish.
How to Serve?
Serving birria is where the real fun begins, and trust me, it’s all about bringing the flavors and vibes to life. Imagine this: I’m ladling the tender meat and that glorious broth into bowls, watching everyone’s eyes light up.
You can’t forget the toppings—fresh chopped onions, cilantro, and a squeeze of lime. It’s like a flavor explosion!
And don’t skimp on the tortillas. Warm them up, and let everyone make their own tacos.
It’s messy, it’s chaotic, but hey, that’s half the charm, right? On chilly nights, nothing beats birria.
And remember, if you find some broth sloshing on your shirt—consider it your birria badge of honor. Who doesn’t enjoy a little delicious chaos while eating?
Storage & Reheating Guide
When it comes to storing the leftover birria, I often think about how I’m already plotting my next meal as soon as I’ve finished the first round.
To keep the flavors fresh, I pop the leftovers in an airtight container—my trusty Tupperware has saved me many times. Make sure to let it cool first, though; I’ve burned my fingers more times than I care to admit.
In the fridge, it’ll last about 3-4 days, but if you’re like me and can’t resist, it probably won’t last that long. For longer storage, freeze it in Freezer Storage Bags for convenient portions.
When it’s time to reheat, I gently warm it on the stove—microwaves have a weird way of turning birria into rubbery beef, don’t they?
Final Thoughts
Although I can’t resist the temptation of a steaming bowl of birria, I’ve learned that the experience is much more than just savoring those rich flavors; it’s about the memories created around the table.
Every time I whip up this dish, I’m transported back to family gatherings, laughter echoing through the kitchen. You know, like when I mistakenly added twice the amount of cumin and declared, “It’s a new recipe!”
Cooking birria becomes a comforting ritual, reminding me to treasure those moments with loved ones.