
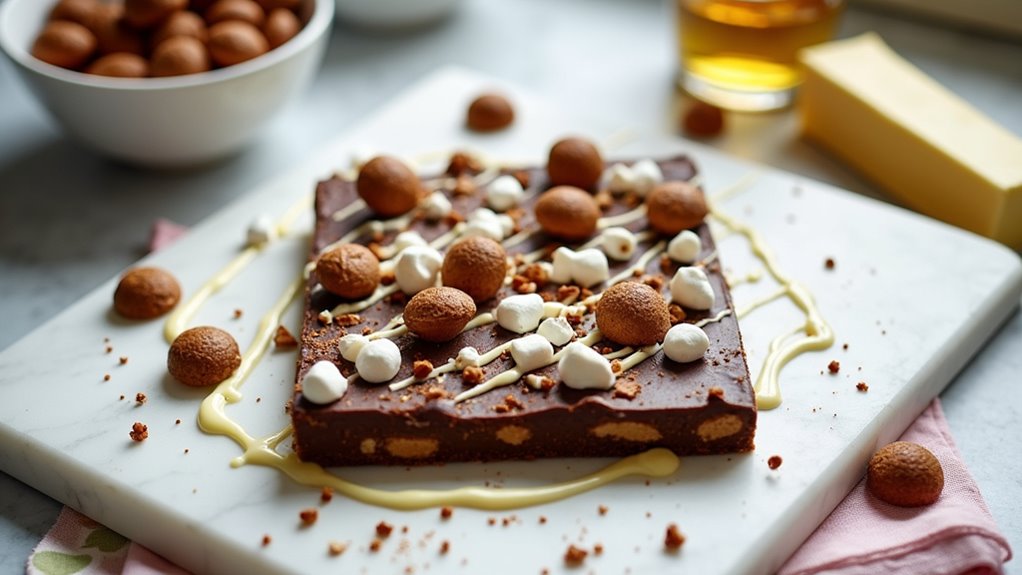
Have you ever found yourself craving something sweet that’s both simple to make and downright delicious? I know I have, and that’s where this Rich Maltesers Rocky Road recipe comes into play. It’s super easy, and trust me, it vanishes faster than I can say “more, please.” Picture crunchy biscuits, chewy marshmallows, and of course, those irresistible Maltesers. Want to learn how to whip this up? Let’s get started.
Why You’ll Love This Recipe
If you’ve ever craved something sweet, rich, and just a little bit indulgent, this Maltesers Rocky Road is here to serenade your taste buds.
Imagine a gooey blend of chocolate, crunchy biscuits, and those delightful Maltesers that dance around your tongue. You’ll love how easy it’s to whip up, and the kids? They’ll be on board for sure.
Plus, it’s a great way to impress friends at gatherings without the need for any fancy baking. I once made it for a potluck, and let’s just say, it vanished faster than I could say “rocky road.”
You won’t just enjoy every bite; you might catch yourself sneaking a piece late at night—totally worth it, right?
Equipment List
Let’s talk tools – you’re going to need a few key pieces of equipment to make this Maltesers Rocky Road a reality. First, grab a baking tin. I use an 8-inch square one; it fits just right.
Next, you’ll want some greaseproof paper to line it. Trust me, this makes the removal a breeze.
Now, a mixing bowl is essential for melting chocolate and mixing your goodies together. A saucepan helps with the melting process, and don’t forget a spatula or spoon for stirring – chocolate apocalypse awaits without one! Having a Wooden Spoon Set can significantly enhance your mixing experience.
Finally, a sharp knife is vital for slicing your delicious creation once it’s set. With these tools in hand, you’re all set for a rocky road adventure!
Our Ingredients
When it comes to whipping up a delightful tray of Maltesers Rocky Road, having the right ingredients at your fingertips can make all the difference. This isn’t just any dessert; it’s a wonderfully rich treat that combines sweet chocolates, crunchy biscuits, and malty goodness.
Trust me, once you plunge into this creation, any dessert table will never be the same. So, let’s gather what you need and get ready to mix up some magic in the kitchen.
Here’s your shopping list to create this sweet indulgence:
- 120 g unsalted butter
- 4 tbsp golden syrup
- 100 g dark chocolate (70% cocoa), chopped
- 200 g milk chocolate, chopped
- 50 g mini marshmallows
- 50 g raisins
- 50 g malted milk biscuits, broken
- 100 g Maltesers
- 50 g white chocolate (optional, for topping)
- Extra Maltesers for topping
Now, a little note on these ingredients—quality counts, friends. The dark chocolate should have a rich cocoa percentage because, believe me, the deeper the flavor, the better the end result.
And don’t skimp on those Maltesers; they’re the star of the show! If you can snag some fresh mini marshmallows and nice, crunchy malted milk biscuits, you’re already elevating your rocky road to gourmet status.
Plus, if you have a favorite chocolate brand, feel free to use that instead; this isn’t one-size-fits-all when it comes to tasty treats! So, let’s get ready to get mixing; those ingredients are just waiting to come together in delicious harmony.
Step-by-Step Instructions
Making Maltesers Rocky Road is a fun adventure that turns the kitchen into a sweet haven. Mixing the batter is quick and simple—just follow these easy steps, and you’ll have a heavenly treat ready to chill in no time. Are you ready? Let’s plunge into the delightful process of creating this irresistible dessert!
Step-by-Step Instructions
1. Prepare the Baking Tin**: Start by lining a baking tin with greaseproof paper**. This may seem like a small step, but it will save you a world of trouble later when it comes time to remove your delicious rocky road from the tin.
2. Melt the Butter and Golden Syrup**: In a medium saucepan, melt 120 g unsalted butter along with 4 tbsp golden syrup** over low heat. Stir gently until everything is melted and well combined, making sure it doesn’t burn.
Once melted, set aside to cool slightly—just enough so it won’t cook the chocolate.
3. Add the Chocolate: You’ll want to add 100 g dark chocolate (70% cocoa), chopped and 200 g milk chocolate, chopped to the melted butter and syrup mixture. Stir this heavenly mix until all the chocolate is melted and silky smooth.
This is the base of your rocky road and will bring a rich, chocolatey flavor that you’ll love.
4. Mix in the Fun Stuff: Now, fold in 50 g mini marshmallows****, 50 g raisins****, 50 g malted milk biscuits**, broken, and 100 g Maltesers**. Use a spatula to guarantee everything is evenly distributed—don’t be shy!
You’re building layers of flavor and texture here, so mix it well until you can’t see a single pocket of biscuit or marshmallow.
5. Spread into the Tin: Pour the delicious mixture into your lined baking tin. Gently spread it out into an even layer, ensuring all those tasty ingredients are beautifully visible.
Don’t be afraid to give it a few gentle pats to make it nice and compact.
6. Chill to Set: Pop the tin in the fridge for about 3-4 hours. This is where the magic happens as the chocolate firms up, turning your gooey mix into a perfect sliceable treat.
Pro tip: if you can wait that long, it makes a world of difference in texture.
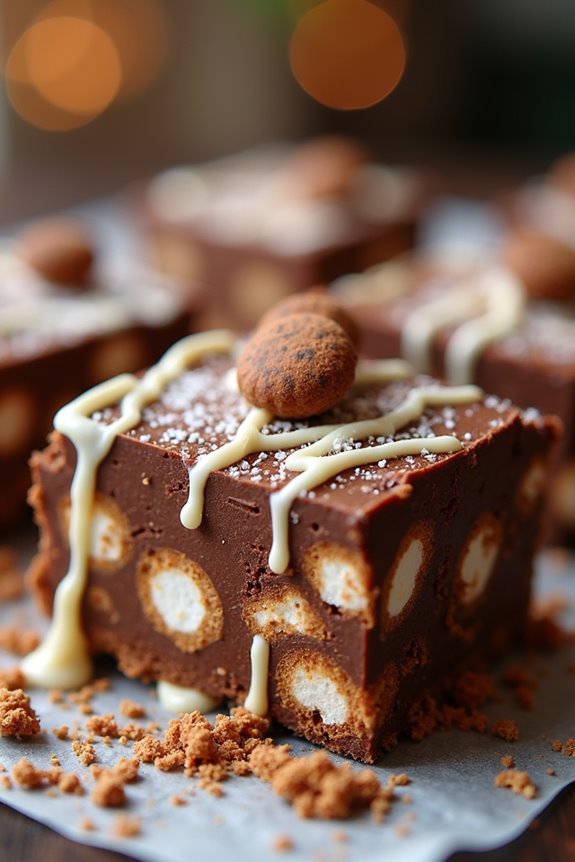
7. Optional Topping: If you’re feeling adventurous, after your rocky road has set, melt 50 g white chocolate**. Drizzle it over the top, and for a finishing touch, sprinkle on some extra Maltesers**.
This white chocolate drizzle adds not just beauty but an extra layer of sweet creaminess. Then, return it to the fridge for a little longer, about 30 minutes, to firm up the topping.
And there you have it! Your Maltesers Rocky Road is ready to slice and serve. Just remember to use a warm, sharp knife for clean cuts—this is a little trick I learned after some messy attempts.
Store it in an airtight container in the fridge; trust me, it will be hard to resist sneaking a slice every time you open that door. Enjoy your sweet creation—happiness is just a bite away!
Additionally, using glass meal prep containers is a wonderful way to store your delicious rocky road and keep it fresh for longer.
Tips & Variations
Once you’ve mastered the basics of making Maltesers Rocky Road, it’s time to get a little creative. You can mix things up by substituting those raisins for dried cherries or even cranberries—trust me, it adds a delightful zing.
I once forgot to add the biscuits, and hilariously, my mixture turned out more like a sweet pudding. Not what I intended, but tasty nonetheless!
Try adding a sprinkle of sea salt on top for that irresistible sweet-salty combo. And if you’re feeling adventurous, consider drizzling caramel over the final product. It’s a game-changer.
How to Serve?
Serving up your Maltesers Rocky Road is almost as fun as making it! Once it’s set, I like to carefully lift it out of the tin using the edges of the greaseproof paper—such a satisfying moment.
Now, grab a sharp knife, dipped in hot water, for those neat slices. Trust me, it makes a world of difference; my first attempts were less than pretty.
I often cut mine into generous squares because, who are we kidding? Nobody can stick to just one. A sprinkle of extra Maltesers on top makes it look irresistible.
I even plate it up on my favorite dessert stand. Your friends will think you’re a pro. Just watch their faces light up when they take a bite.
Storage & Reheating Guide
Even if you’re tempted to devour the whole batch of Maltesers Rocky Road in one sitting, you’ll want to ponder how to store it properly.
Trust me, I’ve learned the hard way not to just leave it out on the counter. To keep your treat fresh, pop it in an airtight container and keep it in the fridge. It’ll last about a week—if you can resist!
When you’re ready to enjoy it again, there’s no need to reheat. Just slice it cold with a knife warmed in hot water for smooth edges. Perfect pieces, right?
Honestly, I’ve eaten these straight from the fridge—who’s judging? This treat is still delightful, even chilled. Enjoy every scrumptious bite!
Also, consider pairing this delicious treat with a high end waffle maker for a truly indulgent breakfast experience.
Final Thoughts
As you take a moment to savor the deliciousness of your homemade Maltesers Rocky Road, you might find yourself wondering why you didn’t make this sooner.
Honestly, it’s an absolute game-changer. I mean, who wouldn’t want a treat that’s both chewy and crunchy, packed with chocolatey goodness?
It’s so ridiculously easy that even I can whip it up without accidentally burning something. Picture that sweet combination of marshmallows, chocolate, and those delightful Maltesers. It’s pure bliss.
Plus, this recipe is super customizable; you can throw in whatever extras you love.