

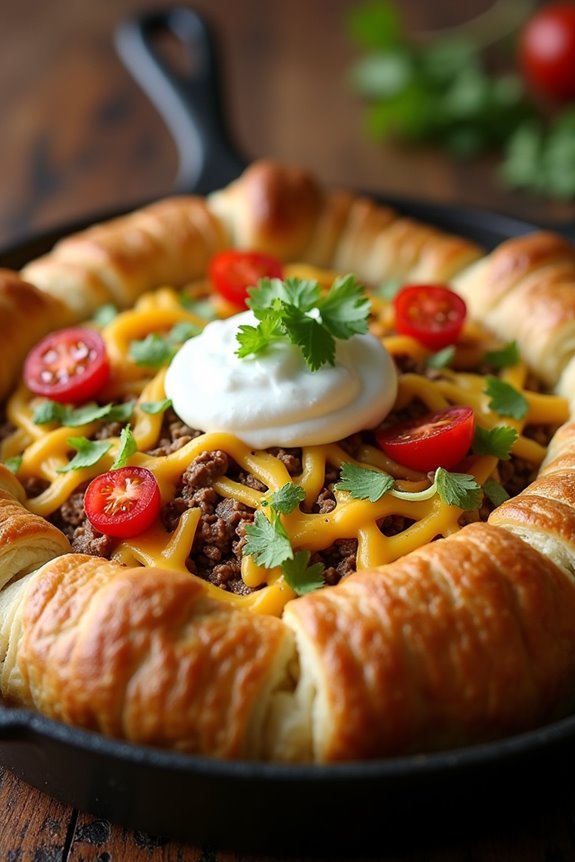
Have you ever craved Taco Bell but wanted to whip up something even more delicious at home? That’s where the Gordita Ring comes in. Imagine crispy taco shells wrapped around ooey-gooey nacho cheese and seasoned beef. It’s as indulgent as it sounds. Plus, it’s surprisingly easy to make. I promise, this dish will wow your friends and family. And trust me, you won’t want to miss the tips I’ve got in store for making it the best it can be.
Why You’ll Love This Recipe
If you’re like me and have a love affair with all things Taco Bell, you’re going to adore this Gordita Ring recipe. Seriously, it’s like a fiesta in your mouth!
The beauty of this dish lies in how simple it is. You get that familiar Taco Bell flavor but in the comfort of your kitchen. The crispy taco shells wrapped in soft dough is a game-changer. Plus, who doesn’t love nacho cheese melting into the mix?
I mean, can you think of a better way to impress friends? The layers are customizable; toss in some salsa, add shredded cheese, and you’ve got a hit.
Trust me, once you try this Gordita Ring, Taco Bell might just get jealous.
Equipment List
When diving into the delicious world of making a Gordita Ring, having the right equipment can make all the difference.
You’ll need a round ovenproof skillet or a cake pan since this is where the magic happens. If you have a cast iron skillet, that’s even better; it gives that perfect, crispy crust.
Don’t forget your mixing bowls for the beef and seasoning! You’ll also want a rolling pin for that crescent dough—trust me, it’ll save your sanity.
An egg brush is handy too, to give your ring that golden finish. Finally, grab a sharp knife for cutting and some measuring cups.
You’re ready to rock this recipe—let’s create some Taco Bell magic at home.
Our Ingredients
When it comes to making the mouthwatering Gordita Ring, having the right ingredients is essential. This recipe is like bringing a piece of Taco Bell right into your kitchen, so you’ll want to make sure you have everything on hand before you start. The good news is that these ingredients are mostly staples that you might already have hidden in the pantry—or maybe you’ll need to take a short trip to the store.
Either way, getting prepared will help this dish come together smoothly and keep the cooking stress to a minimum. So, let’s check out what you’ll need to create this tasty concoction.
Ingredients:
- 1 lb ground beef (85% lean)
- 1 crunchy taco kit (complete with sauce and seasoning)
- 1 can Pillsbury crescent roll dough
- ¼ cup nacho cheese
- ¼ cup sour cream
- 1 egg
- Optional: shredded cheese, salsa, hot sauce, lettuce, diced tomato
Now, let’s talk about some considerations with these ingredients. First off, the ground beef is usually a crowd-pleaser, but you could substitute it with ground turkey or even a plant-based protein if you’re feeling adventurous or need a healthier option.
Those taco kits? A total lifesaver. They pack a punch with the flavors, but feel free to get creative and add your own spices if you’re feeling fiery. And the crescent dough? Ah, it’s the magical blanket that holds all those scrumptious fillings together.
If you’re looking for something a bit more authentic, you could make your own dough, but let’s be real—who has the time for that? Go for convenience here, especially on a busy weeknight.
And don’t forget those optional toppings. They might seem like extras, but trust me, they can elevate your Gordita Ring to legendary status. Happy cooking!
Step-by-Step Instructions
Making the Gordita Ring isn’t just a cooking adventure; it’s a way to bring everyone together around a delicious, shareable treat that will have your taste buds dancing. With just a few simple steps and some tasty ingredients, you’ll be well on your way to creating this Taco Bell-inspired masterpiece. Ready to roll? Let’s immerse ourselves in the step-by-step instructions.
Step-by-Step Instructions
1. Preheat the Oven: Start by preheating your oven to 375°F. Getting the oven warmed up is essential so that you don’t have to wait long once you’re ready to bake your Gordita Ring.
2. Brown the Beef: In a skillet over medium heat, add 1 lb of ground beef (85% lean). Cook it until it’s nicely browned, which usually takes about 5–7 minutes. You want it crumbled up and no longer pink—just like a taco filling should be.
3. Mix in the Taco Kit**: Drain any excess grease from the beef, then add your crunchy taco kit, complete with sauce and seasoning. Mix everything together until the beef is evenly coated and the flavors meld**. This step is where the magic happens, bringing all that taco goodness to life.
4. Prepare the Crescent Dough: While the beef mixture is coming together, grab 1 can of Pillsbury crescent roll dough. Open the can with caution, as those pop cans can get a little rowdy.
Roll out the crescent dough in a greased round ovenproof skillet or cake pan, shaping it to cover the bottom and sides a bit.
5. Layer Your Fillings: Now, it’s time for the fun part. Start layering: spread the seasoned beef mixture over the dough, then add pieces of crunchy taco shells (they should be broken into smaller bits), followed by ¼ cup of nacho cheese and ¼ cup of sour cream on top.
This is where your creation starts to transform into something magical.
6. Fold the Dough: Gently fold the crescent dough over your delicious filling, making sure to secure the edges well. You want to create a ring that holds all that flavor inside, so pinch those edges together like you’re sealing a treasure chest.
7. Brush with Egg: Beat 1 egg in a small bowl and lightly brush it over the dough. This will give your Gordita Ring that golden brown, toasty finish we all love.
Just think of it as a little spa treatment for your ring.
8. Bake: Place your masterpiece in the preheated oven and bake it for about 20–25 minutes. Keep an eye on it; you’ll know it’s done when the dough is golden brown and baked through.
The aroma filling your kitchen will be an added bonus.
9. Serve and Enjoy: Once it’s out of the oven, let it cool for a couple of minutes. Then slice it up, serve with optional toppings like shredded cheese, salsa, lettuce, or diced tomatoes, and enjoy!
It’s like Taco Bell came to your Saturday night dinner party.
And there you have it—a delicious, cheesy, and oh-so-indulgent Gordita Ring that’s sure to impress your family and friends. You might even want to whip up some light and fluffy kitchen appliances breakfast cooking to complement this delightful dish.
Happy cooking, and don’t forget to enjoy every delicious bite!
Tips & Variations
Sure, you might think the Gordita Ring is already pretty fantastic as it is, but there are so many ways to jazz it up.
For instance, I love tossing in some shredded cheese before baking. It adds this melty goodness that’s irresistible.
Feeling spicy? Try adding jalapeños or a drizzle of hot sauce inside. Trust me; it’ll kick things up a notch.
On a healthier note, throwing in diced tomatoes or lettuce right before serving gives it a fresh crunch, too.
And if you’re feeling adventurous, switch out the beef for shredded chicken or even plant-based protein. The possibilities are endless.
Just remember, every tweak makes it uniquely yours. Embrace the chaos, and have fun experimenting!
How to Serve?
As you pull that golden-brown Gordita Ring out of the oven, your kitchen will start smelling like a little slice of taco heaven.
Now’s the fun part: serving it up. I like to slice it into wedges, just like a pizza. It makes sharing easier, and let’s be honest, no one can resist a good taco twist.
Grab some toppings—shredded cheese, lettuce, diced tomatoes, and salsas—and let everyone build their own masterpiece right at the table.
I usually have a little excitement in my presentation, tossing some extra nacho cheese on top, because why not? It’s taco night, right?
Honestly, I could eat this every week with different toppings. How about you?
Storage & Reheating Guide
Now that everyone’s enjoyed their share of the delicious Gordita Ring, you might be wondering what to do with those leftovers.
First, grab an airtight container and store any uneaten portions in the fridge. They’ll be good for three to four days—if they last that long.
When you’re ready for round two, preheat your oven to 350°F. Reheat the ring on a baking sheet for about 10-15 minutes, just until it’s warmed through.
No microwave here—trust me, it’ll lose that crispy goodness. If you find you have some leftover toppings, toss those on for extra flair. Consider using some premium kitchen gadgets for easy and efficient food storage.
But let’s be honest: did we really leave any toppings behind? Save yourself the trouble; just enjoy it fresh!
Final Thoughts
Whether you’re a seasoned home cook or just someone who loves a good shortcut, making the Gordita Ring is like a celebration wrapped in dough.
It’s just so satisfying to pull it from the oven, golden brown and oozing with cheesy goodness. Seriously, it’s a crowd-pleaser. You can get creative too—pile on your favorite toppings.
Lettuce, diced tomatoes, hot sauce? Yes, please. I’ve burned the occasional dinner, but this recipe is almost foolproof. Plus, it’s a great way to impress friends without spending hours in the kitchen.