

I’ve got to say, there’s something magical about the smell of freshly baked matcha scones wafting through the house. It’s like a warm hug, but better. Have you ever tried baking with matcha? It adds this earthy flavor that just pairs so well with buttery goodness. I remember my first attempt—I almost set off the smoke alarm. But trust me, the journey to nailing this recipe is worth it, especially when you see how easy it is to create your own culinary masterpiece. Want to know how?
Why You’ll Love This Recipe
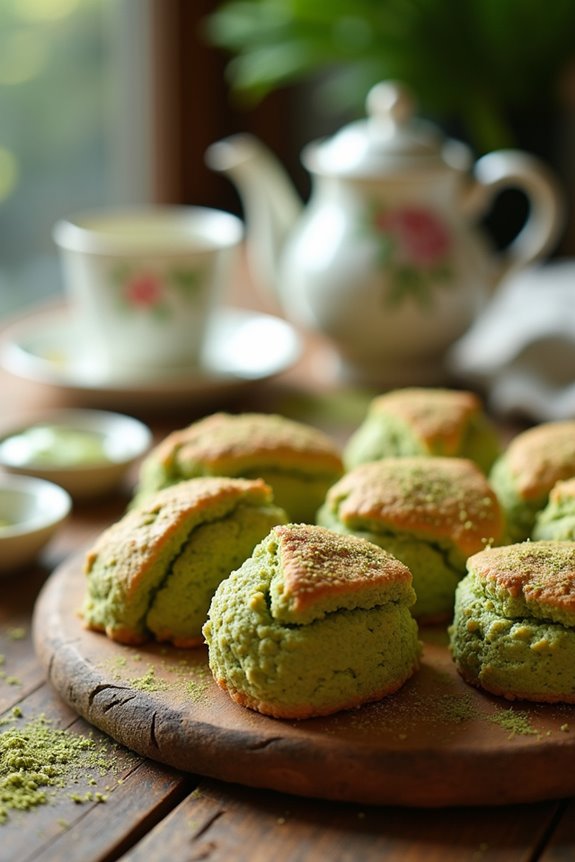
Have you ever tasted something that felt like a warm hug on a chilly morning? That’s exactly how I feel about matcha scones. These little green gems blend the blissful, earthy flavor of matcha with that flaky, buttery goodness we all crave.
They brighten up any breakfast or snack time, and trust me, once you bite into one, you’ll be hooked. Plus, they’re super easy to whip up. Just imagine your kitchen filling with that heavenly aroma while they bake.
I might even have once eaten three in one sitting—don’t judge. Whether you enjoy them plain or with icing, they’re sure to make your taste buds dance with joy.
Grab your apron; you’re going to love this!
Equipment List
When you’re ready to plunge into making these delightful matcha scones, you’ll want to gather the right tools to make the process smooth and enjoyable.
First, grab a mixing bowl—one that’s large enough to handle all that flour. You’ll also need a whisk for combining your dry ingredients and guarantee no lumps remain. A pastry cutter helps with cutting in the cold butter; don’t worry if it gets messy, that’s part of the fun.
A baking sheet lined with parchment paper will keep your scones from sticking, and using a baking sheet set ensures you have versatile options for all your baking needs. Finally, don’t forget a measuring cup and spoons. I’ve been known to eyeball measurements and… well, let’s just say that didn’t always turn out as planned.
Happy baking!
Our Ingredients
When diving into the world of baking matcha scones, having the right ingredients on hand is essential. Think of these scones as little green clouds of joy, perfect for breakfast or an afternoon treat with tea. They’re delightfully fluffy and packed with that lovely earthy flavor of matcha. Let’s gather our ingredients, shall we? Grab a notebook or open your notes app to jot these down.
Our Ingredients
- 240g all-purpose flour
- 100g granulated sugar
- 1 tbsp matcha powder
- 1 tbsp baking powder
- 1 tsp salt
- 115g cold unsalted butter, cubed
- 115g cold heavy cream
- 1 cold large egg
- 1 tsp vanilla extract
- 1 tbsp heavy cream (for brushing)
- 3 tbsp coarse sugar (for sprinkling)
- (Optional icing: 50g powdered sugar, ½ tsp matcha, 4 tsp heavy cream)
Now, you might be wondering about the significance of each ingredient—you’re not just baking; you’re creating a masterpiece. The cold butter and cream are key players here, aiding in that flaky texture we all crave in a scone.
And don’t forget about the matcha; it’s not just for trendy lattes anymore. It’s the star of the show and gives those scones their signature color and flavor.
If you’re new to matcha, act like a curious explorer—taste a little before you bake. You want to love that flavor since it’s going to take center stage.
Keep everything cold during your prep—trust me, it makes a world of difference. The last thing we want is a dense scone, right? So embrace that chill—your scones will thank you.
Step-by-Step Instructions
Making matcha scones isn’t just about following a recipe; it’s about creating a delightful experience that transports you to tea time in a cozy café. The process is simple and fun—just follow these steps, and you’ll be rewarded with deliciously fluffy scones that celebrate the vibrant flavor of matcha.
Step-by-Step Instructions
1. Preheat your oven to 425°F (220°C). This temperature is essential for getting those scones to rise beautifully. While the oven warms up, let’s prepare the dry mix.
2. In a large mixing bowl**, combine 240g of all-purpose flour, 100g of granulated sugar, 1 tablespoon of matcha powder, 1 tablespoon of baking powder, and 1 teaspoon of salt**. Give it a good whisk to verify everything is mixed evenly—you want a lovely green hue throughout.
3. Cut in the cold unsalted butter (115g, cubed) using a pastry cutter or your fingers. Work it into the flour mixture until it resembles coarse crumbs. This step is vital for that flaky texture we dream of, so don’t skip it.
It might feel a little messy, but it’s just part of the journey.
4. In a separate bowl, whisk together 115g of cold heavy cream, 1 cold large egg, and 1 teaspoon of vanilla extract. This combination, my friend, is going to bring moisture and flavor to our scones, so make sure it’s well-blended.
5. Pour the wet ingredients into your dry mix. *Now listen closely*: Stir gently until everything is just combined. Don’t overmix—the dough should still be slightly lumpy; that’s what keeps them light and airy.
6. Turn the dough out onto a floured surface** and gently knead** it a few times. Then, shape it into a round disk about 1 inch thick. Use your hands, no need for perfection here—scones have that rustic charm, remember?
7. Cut the dough into wedges (like slicing a pizza) or use a round cutter for that classic scone shape. You can make them as big or as small as you like; just adjust your baking time slightly if you make them larger or smaller.
8. Transfer the scones onto a parchment-lined baking sheet. Now, grab that extra tablespoon of heavy cream and brush it on top of each scone. This is what gives them that nice golden color when they bake.
9. Sprinkle with coarse sugar**** (3 tablespoons) for a sweet crunch on top. It’s like the cherry on top of this delicious sundae.
10. Bake in the preheated oven for about 12-15 minutes or until they’re puffed and golden brown. The smell will be heavenly, and you might just find yourself dancing in the kitchen while you wait.
11. Remove from the oven and let them cool on a wire rack.
If you’re feeling adventurous and want to add icing, mix together 50g of powdered sugar, ½ teaspoon of matcha, and 4 teaspoons of heavy cream in a small bowl. Drizzle that over the cooled scones for an extra touch of sweetness.
And there you have it—matcha scones that are fluffy, flavorful, and simply irresistible. Perfect for sharing with friends or enjoying all on your own with a cup of tea. You might want to make a double batch because they won’t last long! Additionally, having the right premium baking equipment can make your baking process even more enjoyable and efficient.
Tips & Variations
After you’ve mixed and baked your scones, let’s chat about some fun tips and variations to make these matcha scones uniquely yours.
First, if you want a little zing, toss in some lemon zest or dried cranberries—trust me, it’s a game-changer. For a richer flavor, swap some of the cream with yogurt, which I tried once when I was out of cream. Let’s just say, it was a success, not a kitchen disaster.
And hey, if you love chocolate, sprinkle in some dark chocolate chips; they’ll melt and give those scones a delightful surprise.
Don’t forget, keeping everything cold before baking is key. Flaky scones are what we’re after, right? Enjoy experimenting—there’s no wrong way to make them!
How to Serve?
Serving up matcha scones can be just as delightful as baking them, especially if you consider pairing them with the right accompaniments. I love serving mine warm, fresh from the oven, just slightly cooled with a dab of clotted cream or butter.
Sometimes I sprinkle a little extra matcha on top – you know, just to show off my fancy side.
How about some jam? A sweet berry jam contrasts beautifully with the earthy matcha.
And, of course, I can’t resist a cup of tea, preferably a nice green or even a chai for those flavor fireworks.
Just picture it: sitting down with a plate of these beauties and a cozy drink. It’s like a mini celebration every time I indulge.
Storage & Reheating Guide
While you might think these delightful matcha scones are best enjoyed fresh from the oven, knowing how to store and reheat them can make your life so much easier.
After they’ve cooled, I usually pop them in an airtight container. They’ll stay good for a couple of days at room temperature.
Want to keep them longer? Try the freezer—just wrap them tightly in plastic wrap and stash them in a zip-top bag. Using freezer storage bags can help prevent freezer burn and maintain their delicious flavor.
When it’s time to indulge, I recommend reheating in the oven at 350°F for about 5-7 minutes. That way, they’re crispy on the outside and warm inside.
Microwave? I mean, desperate times call for desperate measures, but don’t expect the same magic.
Final Thoughts
Whether you’re savoring matcha scones fresh out of the oven or pulling them from storage for a cozy snack later, there’s something incredibly comforting about these delightful treats.
I mean, who doesn’t love a warm, flaky scone that feels like a hug for your taste buds? As I dunk mine in tea, I can’t help but smile. They’re perfect for those days when I want something special but don’t want to fuss too much in the kitchen.
And trust me, your friends will be impressed—just don’t let them know how simple it is. Remember, the joy of baking should be as satisfying as the treats themselves.