

I’ve got to tell you about my latest obsession: Vanilla Bean Nice Cream. Seriously, it’s like magic. You take ripe bananas, blend ’em up, and boom! You have a creamy, dreamy dessert that makes me feel like I’m splurging—without the guilt. I mean, who knew something so simple could taste so good? You only need a few ingredients, but that’s where the fun begins. And trust me, the toppings? They’re what really take it over the top. Want to know how?
Why You’ll Love This Recipe
When you crave something indulgent yet guilt-free, this Vanilla Bean Nice Cream will be your new best friend.
Seriously, it’s like finding a treasure in your freezer. I mean, who doesn’t want dessert that’s actually healthy? Using just ripe bananas and a split vanilla bean, this recipe transforms simple ingredients into something divine and creamy.
You can whip it up in minutes—just blend everything until smooth, and you’re almost there.
And the best part? You can customize how creamy or thick you want it.
Plus, if you accidentally eat the whole batch in one sitting, don’t worry; I won’t tell anyone. It’s too delicious to resist.
Try it! You’ll be hooked on this guilt-free indulgence.
Equipment List
To whip up this dreamy Vanilla Bean Nice Cream, you’ll need a few essential pieces of equipment that make the process a breeze. First, a food processor is a must—it transforms frozen bananas into creamy goodness, and I swear it’s like magic.
Next, grab a sharp knife to handle that vanilla bean. And don’t forget a cutting board; we don’t want any kitchen mishaps, right?
You’ll also need measuring cups for the plant-based milk; trust me, too much milk can lead to a sad situation.
Finally, have a spatula handy to scrape every last bit of that sweet mixture out. It’s a messy job, but someone’s gotta do it, and I enjoy every scoop. Happy blending! Plus, using a professional kitchen mixer can elevate your mixing game and enhance the incorporation of flavors.
Our Ingredients
Oh, are you ready to immerse yourself in the delicious world of Vanilla Bean Nice Cream? Get your taste buds excited because this frozen treat isn’t only scrumptious but also super easy to whip up.
How amazing is it that you can turn simple ingredients into a creamy, dreamy dessert? Let’s gather all the goodies you’ll need before we get to the fun part.
Here’s what you’ll need to make this delightful treat:
- 5 medium bananas, peeled, sliced, and frozen
- 1 vanilla bean, split lengthwise and seeds scraped
- ¼ to ½ cup unsweetened plant-based milk
Now, let me just mention that the ripeness of those bananas is key. The sweeter they are, the better your nice cream will taste. Not to mention, frozen bananas are a game changer—they help create that luscious texture we crave.
If you’re anything like me, you might find yourself staring at some overly ripe bananas on your countertop, trying to figure out how to use them. Might as well freeze them and save them for a future dessert adventure, right?
And when it comes to the plant-based milk, you have a lot of options, whether it’s almond, oat, or coconut—pick what suits your fancy! Remember, if you’re feeling adventurous, you can always fold in some extras, like chocolate chips or nut butter, after blending.
Immerse yourself and let those creative juices flow!
Step-by-Step Instructions
Making Vanilla Bean Nice Cream is a breeze, and I promise you won’t have to break a sweat! Just follow these easy steps, and soon you’ll have a delicious, creamy treat that’s ready to be enjoyed at any time.
- Prepare the Vanilla Bean: Start by taking 1 vanilla bean and splitting it lengthwise. Using the back of a knife, scrape out all those fragrant little seeds. They’ll add a delightful burst of flavor, trust me, you don’t want to skip this part.
- Blend the Bananas: Grab 5 medium bananas that you’ve already peeled, sliced, and frozen. Toss them into your food processor along with those beautiful vanilla bean seeds and ¼ cup of unsweetened plant-based milk. It’s like a party in there—I can almost hear them mingling!
- Process Until Smooth: Turn on your food processor and blend everything together until it’s smooth and creamy. This usually takes a couple of minutes. If it’s looking a bit too thick, feel free to add a splash more milk, but go easy! A thicker consistency is what we want here.
- Serving Options: Once it looks like a soft, fluffy cloud of deliciousness, you can serve it right away if you’re in the mood for soft-serve. Or, if you’re feeling patient (which is a challenge when it comes to tasty treats), transfer the nice cream to a container and pop it into the freezer for about 4 hours or more until it’s firm and scoopable.
- Savor the Moment: When you take it out of the freezer, let it sit for a couple of minutes to soften a bit before trying to scoop. Then dig in! I mean, seriously—nothing says summer like creamy vanilla goodness, right? Plus, indulging in this treat alongside a refreshing glass of homemade premium lemonade can elevate your experience even more.
And there you have it! You’ve successfully made Vanilla Bean Nice Cream. It’s simple, quick, and you’ll impress everyone with your smoothie-making skills.
Plus, remember to store any leftovers (if there are any) in the freezer for up to a week—if you can resist finishing it all in one sitting!
Tips & Variations
While I’m all about that classic vanilla bean flavor, there are so many fun ways to jazz up your Vanilla Bean Nice Cream that I just can’t keep quiet about them.
Ever thought about adding cocoa powder for a chocolate twist? Or how about blending in some peanut butter for that creamy, nutty goodness? I’ve even tried swirling in a bit of homemade berry compote, and wow, it turns your nice cream into a dessert masterpiece.
You might want to experiment with those add-ins, like crushed nuts or even coconut flakes, too. Don’t forget to use those super ripe bananas for maximum sweetness. Trust me, they make all the difference.
Get creative, and have fun with it!
How to Serve?
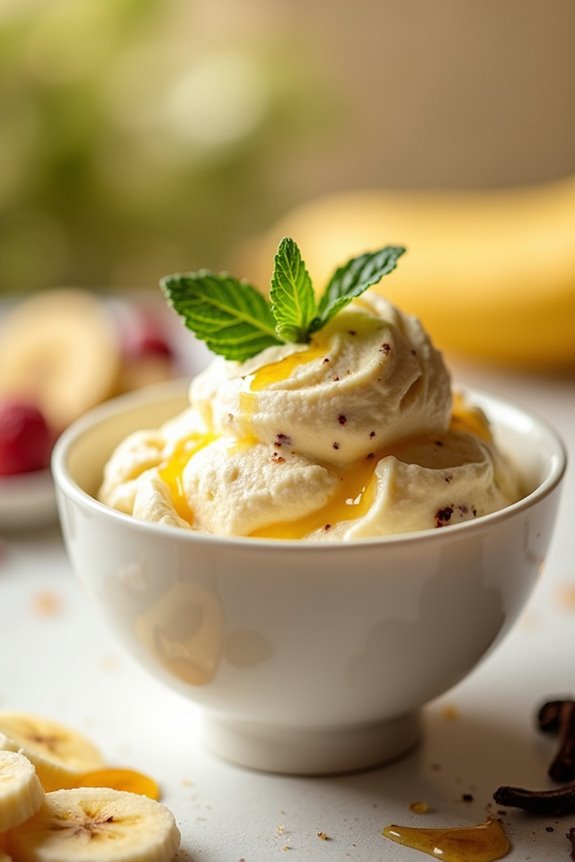
If you want to enjoy your Vanilla Bean Nice Cream at its best, think about how you serve it. For a delightful presentation, scoop it into chilled bowls or elegant glasses—trust me, it elevates the experience.
I often layer it with fresh fruit or top it with a drizzle of chocolate syrup, which is basically a dessert game-changer. Sometimes, I sprinkle some crushed nuts for a crunchy contrast.
Serving it immediately gives that soft-serve vibe you can’t resist. But if you decide to freeze it, remember to let it soften a bit before scooping.
Just don’t forget the spoons—no one wants to face a nice cream meltdown, right? Simple, fun, and oh-so-tasty. Enjoy every spoonful!
Storage & Reheating Guide
Although I adore whipping up a batch of Vanilla Bean Nice Cream, I’ve learned the hard way that proper storage is key to keeping that creamy goodness fresh.
After making it, I scoop any leftovers into an airtight container. Trust me, no one wants freezer-burnt nice cream.
When I’m ready to enjoy again, I just take it out and let it sit at room temperature for about 10-15 minutes. That’s when it softens enough to scoop easily.
Sometimes, I need to use a little muscle on those frozen chunks, but that’s just part of the fun.
I’ve learned this the hard way after trying to serve straight from the freezer. No one enjoys a rock-hard dessert, right?
Additionally, using sturdy soup freezer containers can help maintain the quality of your nice cream while stored in the freezer.
Final Thoughts
Storing your Vanilla Bean Nice Cream properly is just one part of the joy that comes with making it; enjoying this dreamy treat is another whole experience.
Trust me, there’s nothing quite like a scoop of creamy goodness after a long day. And let’s be real, who doesn’t love a treat that only takes minutes to whip up? I mean, if I can do it without making a huge kitchen mess, so can you.
Just remember, using super ripe bananas makes all the difference. If you find yourself with leftovers—because, let’s face it, that’s a rare event—pop ‘em in the freezer. You’ll thank yourself later when those cravings hit.
Happy indulging, friend—you deserve it!