
I’ve recently been experimenting with baking, and let me tell you, this Miso Burnt Basque Cheesecake has been a game changer. The burnt top? Totally intentional, and it adds a depth that’s just remarkable. Who knew miso could elevate a cheesecake? I mean, I definitely didn’t, but now I’m obsessed. And trust me, if I can nail this, so can you. But, how do you get that perfect balance of sweet and savory? Stick around; I promise the secrets are worth it.
Why You’ll Love This Recipe
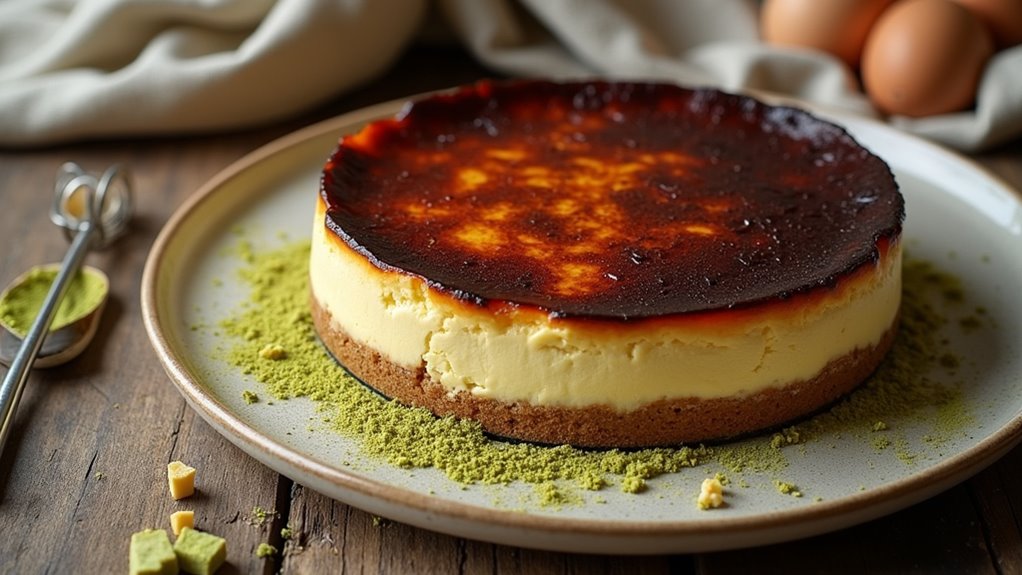
When you take that first bite of this Miso Burnt Basque Cheesecake, you might just fall in love, and I mean, who wouldn’t? It’s creamy, rich, and that hint of miso adds a unique twist that totally surprises your taste buds.
Honestly, I was skeptical at first; the idea of miso in a cheesecake sounded bizarre, right? But trust me, the umami flavor melds perfectly with the sweetness.
Plus, it’s honestly one of those desserts that gets better over time—you know, like fine wine or good relationships.
The texture’s silky, and if you let it chill properly, your friends might think you’re some sort of culinary genius. Who knew making a miso burnt basque cheesecake could be this rewarding?
Equipment List
Before you plunge into whipping up that delicious Miso Burnt Basque Cheesecake, let’s chat about the equipment you’ll need.
First off, grab a 16-cm springform pan—trust me, it’s a game changer for easy cheesecake removal.
You’ll also need some parchment paper to line that pan, because no one wants a sticky situation.
A microwave’s essential for softening cream cheese and miso.
Then, whisking bowls—two, if you’re feeling fancy.
A sifter for cornstarch? Absolutely.
And let’s not forget some good old measuring cups and spoons; precision’s key, right?
Finally, an oven thermometer can save the day—who wants to guess if it’s truly at 230°C.
Now, if you’re looking to elevate your culinary creations, consider investing in a high end lemonade maker to complement your desserts.
With these tools, you’re on your way to cheesecake paradise!
Our Ingredients
Are you ready to create something totally delicious? The Miso Burnt Basque Cheesecake is like a dream come true for those of us who love creamy, rich desserts with a twist. The star of the show here is the miso paste, which adds a surprising depth of flavor.
Once you gather your ingredients, you’ll be well on your way to baking heaven. Let’s take a look at what you’ll need to bring this masterpiece to life.
Here’s your ingredient list:
- 450 g cream cheese
- 145 g granulated sugar
- 14 g cornstarch
- 180 g eggs (that’s about 3 large eggs)
- 180 g heavy cream
- 8 g miso paste
Now, it’s important to choose your ingredients wisely. For the cream cheese, a full-fat version works best to really achieve that rich, creamy texture we all crave in a cheesecake.
As for the granulated sugar, it helps balance the savory notes from the miso. The cornstarch acts as a stabilizer, ensuring your cheesecake holds together beautifully.
Don’t skimp on the heavy cream, either; it enhances the richness of your cheesecake. And that miso paste? Go for a nice quality one—it’s going to shine through in the final flavor.
Step-by-Step Instructions
Mixing the batter for the Miso Burnt Basque Cheesecake is quick and simple—just follow these easy steps to create a dessert that’s bound to impress. From whipping up the creamy filling to achieving that beautiful burnt top, you’re just moments away from cheesecake glory. Let’s dive right into the process!
1. Soften the Ingredients: Begin by microwaving 450 g of cream cheese and 8 g of miso paste in 30-second intervals. You’ll want to whisk them together until you have a smooth and creamy mixture.
This step is essential because it helps the cream cheese blend seamlessly into the batter—no lumps allowed.
2. Add Sugar: Gradually whisk in 145 g of granulated sugar until fully combined. This step not only sweetens the cheesecake but also balances out the savory notes from the miso. Just imagine how good it will taste!
3. Sift in Cornstarch**: Next, sift 14 g of cornstarch into the mixture and stir until it’s evenly distributed. The cornstarch helps stabilize our cheesecake** so it holds together beautifully after baking.
4. Incorporate Eggs: Now, it’s time to add in 180 g of eggs, which is roughly 3 large eggs. Add them gradually, whisking gently with each addition. You want to guarantee they blend well without overmixing.
The batter should be smooth and creamy.
5. Mix in Heavy Cream**: Pour in 180 g of heavy cream and mix until everything is well combined. The heavy cream is key for that luxurious texture**, so don’t rush this part. It’ll feel like you’re blending clouds.
6. Prepare the Baking Pan: Line a 16-cm springform pan with parchment paper. Make sure it’s well-fitted to avoid any leaking during the baking process.
This little step will save you from a messy cleanup later.
7. Bake: Preheat your oven to 230°C (446°F) and Bake the cheesecake for 30-40 minutes. You’re looking for a dark brown top—don’t shy away from that burnt look!
It should still jiggle in the center, indicating that it will set up nicely after cooling.
8. Cool and Refrigerate: Once out of the oven, allow your cheesecake to cool to room temperature. It’s hard to resist, but once cool, pop it into the fridge for several hours or overnight.
Trust me, the chilling time enhances texture and flavor. Cutting into it immediately is tempting, but patience pays off!
And there you have it! Follow these steps, and you’ll be well on your way to enjoying a slice of your delicious Miso Burnt Basque Cheesecake. Just remember, it’s completely okay if things get a little messy along the way—baking is all about experimentation and fun. Additionally, consider using premium baking equipment to elevate your baking experience for delicious results every time!
Tips & Variations
When it comes to making a Miso Burnt Basque Cheesecake, there are a few tips and variations that can take your dessert from good to absolutely divine.
First off, don’t skip the chilling time. Trust me, your cheesecake will thank you for it.
If you want to play around with flavors, try adding a touch of vanilla or even some lemon zest. It adds a lovely brightness.
And if you’re feeling adventurous, switch up the miso—white miso can yield a milder flavor.
Oh, and don’t worry if it cracks a bit; it’s supposed to look rustic, like your baking skills (which, let’s be honest, may not always be on point).
Just embrace the deliciousness.
How to Serve?
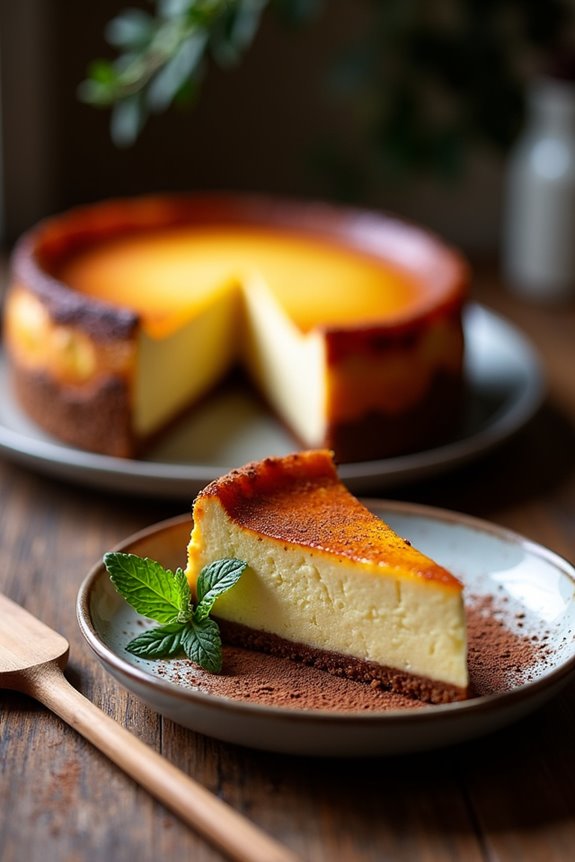
Serving a Miso Burnt Basque Cheesecake is almost as delightful as making it, wouldn’t you agree?
After that long wait in the fridge, I’m always excited to slice into it. It cuts beautifully with a sharp knife, but I recommend running the blade under hot water first—trust me, it helps!
I love serving it with a little dollop of whipped cream or a sprinkle of sea salt for that extra oomph.
Sometimes, I even add fresh berries for color and a hint of tartness. It’s all about the contrasts!
And if I’m feeling fancy, I’ll drizzle some caramel sauce.
Just plate it up, and watch those smiles appear. Who could resist such creamy indulgence?
Storage & Reheating Guide
Once it’s cooled, wrap your cheesecake tightly in plastic wrap or pop it in an airtight container. Trust me, this keeps it fresh for up to five days in the fridge.
If you want to hold onto that creamy goodness a bit longer, you can freeze it for up to a month. Just wouldn’t it be sad to lose that rich flavor?
When you’re ready to dig in, simply thaw it in the fridge overnight. Avoid microwaving unless you want a cheesecake explosion—a bit of a mess, you know? Embrace a slow, delicious thaw instead. Remember, enjoying your cheesecake is best complemented with the right tools, like a premium steak knives set, for that perfect slice.
Final Thoughts
As I wrap up this delightful culinary adventure, I can’t help but think about how making a Miso Burnt Basque Cheesecake is almost like a magical journey through flavors.
Seriously, it’s a wild mix of sweet and savory that dance on your taste buds.
Sure, it might seem intimidating at first—burnt cheesecake, really? But trust me, once you whip it up, you’ll feel like a kitchen wizard.
Just remember to let it chill before slicing, or you might end up with a gooey mess that tastes amazing but looks like a toddler created it.
You’ll savor each rich bite, feeling proud of your creation.