
Have you ever made a cake that not only tastes amazing but also looks like a work of art? The Ombre Citrus Cake for a Turkuaz Delight does just that. I remember the first time I attempted it—I thought I’d end up with a gooey mess, but surprise, it turned out gorgeous. The layers of different oranges create such a vibrant effect, but I’ll let you guess what I did to make it pop even more…
Why You’ll Love This Recipe
You’ll absolutely adore this recipe, especially if you’re like me and can’t resist anything citrusy.
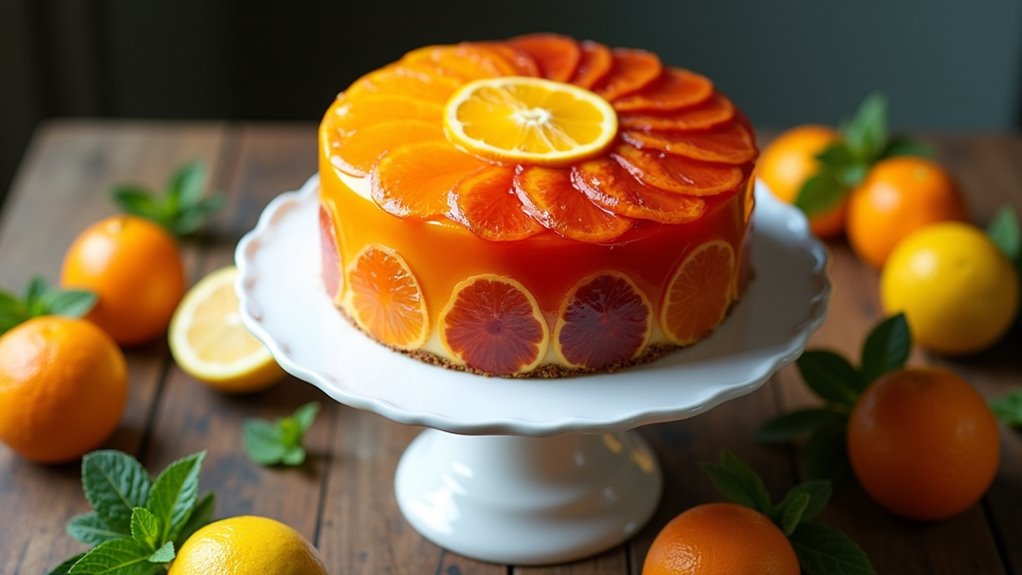
The Turkuaz Kitchen ombre citrus cake isn’t just visually stunning; it’s a sweet, zesty delight that makes your taste buds dance. Imagine this: layers of vibrant orange slices peeking through a fluffy cake, ready to surprise you with their juicy goodness.
Seriously, you’ll feel like a master baker, even if you’re more like me—aiming for the best but sometimes missing the mark. Who knew three types of oranges could bring such excitement?
It’s easy to whip up, too. When it’s done baking, you’ll be enthusiastic to flip it over and reveal that gorgeous ombre effect.
Trust me; every slice is like sunshine on a plate.
Equipment List
When diving into the delightful world of baking an ombre citrus cake, having the right equipment can make all the difference. First, you’ll need a mixing bowl, big enough to contain all that delicious batter. Trust me, nobody wants orange cake splatter on their walls.
A whisk is essential for blending your ingredients smoothly. Don’t forget a baking dish—something sturdy that can handle the weight of those juicy beauties. A sharp knife helps when you’re slicing those oranges.
Finally, a toothpick will be your best friend for checking if the cake’s done. And if you’re like me, maybe a spatula to rescue any stuck cake. I mean, who wants to leave behind a single crumb? Investing in premium baking equipment can greatly enhance your baking experience.
Our Ingredients
When it comes to baking an Ombre Citrus Cake, the ingredients are what truly bring the magic to life. It’s all about layering flavors and textures, and let me tell you, each ingredient has its own special role. You’re going to need some fresh oranges to create that beautiful ombre effect, plus a few pantry staples to pull everything together.
If you’ve never worked with blood oranges or navel oranges, this is your chance to immerse yourself in a world of vibrant colors and zesty goodness. So, roll up your sleeves and let’s gather everything we need to whip up this citrusy delight.
Here’s what you’ll need:
- 3 oranges (choose a mix of varieties like standard, navel, and blood oranges for the best color and flavor)
- 1/3 cup granulated sugar (for the syrup)
- ½ cup water (helping to create that yummy syrup)
- 2 tbsp orange juice (to enhance the syrup)
- 3 eggs (a classic ingredient to bind everything together)
- 1 cup granulated sugar (for the batter and sweetness)
- ¾ cup vegetable oil (keeping the cake moist)
- ¼ cup yogurt (adding a bit of tang and creaminess)
- 1 tsp vanilla or orange extract (for an extra pop of flavor)
- 2 tbsp orange juice (the sweetness continues)
- 1 tbsp orange zest (for that fresh, zesty aroma)
- 1¼ cups flour (the foundation of your cake)
Now, let’s talk a bit more about these ingredients. Fresh, high-quality oranges are super important because they provide the vibrant flavors we all love in this recipe.
Don’t skimp here; your cake deserves the best. Plus, if you want to experiment, you could try using mandarins or even lemons if you’re feeling adventurous.
Ah, the joy of baking—where you can mix, match, and play with flavors like a mad scientist in the kitchen. And hey, don’t get too discouraged if things don’t turn out perfectly the first time. That’s just the chef’s way of saying we need a little more practice, right?
Step-by-Step Instructions
Making the Ombre Citrus Cake is almost like starting a delightful culinary adventure. Mixing the batter is quick and simple—just follow these easy steps, and soon you’ll have a gorgeous cake bursting with citrus flavors.
It’s time to channel your inner baker, so let’s immerse ourselves in the process!
Step-by-Step Instructions:
1. Prepare Your Oranges: Start by taking those 3 oranges—whatever varieties you’ve chosen, whether orange, navel, or blood orange—and slice them thinly. These will be your canvas for the cake’s vibrant ombre effect.
In a small saucepan, combine 1/3 cup granulated sugar, ½ cup water, and 2 tablespoons of orange juice. Heat this mixture on medium until the sugar dissolves completely, stirring occasionally.
2. Candy the Oranges: Add your thin orange slices to the saucepan with the syrup. Let them simmer for about 10–15 minutes, or until they become soft and slightly translucent.
This step is important as it helps infuse the syrup flavor into the oranges while also adding a beautiful glaze. Once done, remove them from the heat and let them cool slightly.
3. Layer the Oranges: Grab a baking dish and arrange the candied orange slices at the bottom, slightly overlapping for that beautiful presentation. This will be the top of your cake once it’s flipped, and it’s where the magic happens.
4. Prepare the Batter: In a large mixing bowl, crack in 3 eggs and whisk them until they’re fluffy. Then, add 1 cup of granulated sugar, ¾ cup of vegetable oil, ¼ cup of yogurt, 1 teaspoon of vanilla or orange extract, 2 tablespoons of orange juice, and 1 tablespoon of orange zest.
Mix everything together until combined and smooth.
5. Incorporate the Flour: Gradually add in 1¼ cups of flour to the wet mixture. Stir gently until just combined (Don’t overmix—the batter should be slightly lumpy).
Overmixing can lead to a tough cake, and who wants that?
6. Pour and Spread: Carefully pour the batter over the arranged candied oranges in the baking dish. Make sure to spread it evenly so every slice gets some love from the cake batter.
7. Bake: Preheat your oven to 350°F (175°C) if you haven’t already. Place the baking dish in the oven and Bake the cake for about 30–35 minutes, or until a toothpick inserted into the center comes out clean.
You’ll know it’s done when the top is golden brown, looking oh-so-inviting.
8. Cool and Flip: Once out of the oven, let the cake cool in the pan for about 10 minutes.
Then, it’s flipping time! Carefully invert the cake onto a serving plate so that the candied oranges are now at the top.
And there you have it—an Ombre Citrus Cake that not only tastes divine but also looks like a work of art!
Serve it chilled, and get ready for the compliments to roll in. Don’t be afraid to experiment with your citrus choices next time; baking is all about having fun and playing with flavors. Enjoy!
Additionally, storing your cake in airtight food storage containers can help maintain its freshness for longer.
Tips & Variations
While I’m dreaming of sunshine and citrus, let me share some tips and variations to elevate your Ombre Citrus Cake to the next level.
For a fun twist, try mixing in some lemon or grapefruit to your citrus mix. It adds a zesty punch that’ll have your taste buds dancing.
Don’t forget, using different varieties of oranges not only makes the cake pop visually but also boosts flavor.
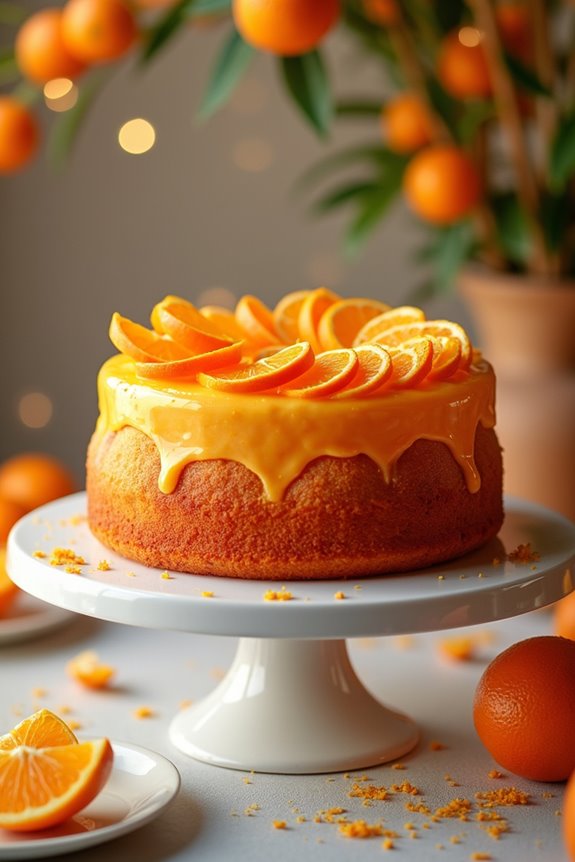
And hey, if you really want to impress, top your cake with a light glaze made from powdered sugar and orange juice. It’s like a citrus blanket.
Also, remember to chill your cake before serving. It’s simply invigorating.
How to Serve?
Serving your Ombre Citrus Cake is where the fun really starts. Imagine this: you’ve just baked a masterpiece that looks like it belongs in a bakery, and now it’s time to show it off.
I like to slice the cake while it’s chilled; it’s easier to cut and gives a delightful burst of citrus flavor. Serve each slice on a colorful plate—presentation matters, right?
For a little extra flair, drizzle some orange syrup over the top. Maybe add a dollop of whipped cream or a scoop of vanilla ice cream on the side for good measure.
Trust me, your friends will wonder how you pulled off such a stunning dessert. Just don’t tell them how simple it was to make!
Storage & Reheating Guide
It’s always a bit of a dilemma when it comes to storing leftover Ombre Citrus Cake—how do you keep that vibrant flavor and beautiful presentation intact?
I usually cover the cake with plastic wrap but, sometimes, I get so wrapped up in life that I forget! To avoid drying out, I stick it in the fridge, which surprisingly keeps it moist for about three days.
When it’s time to enjoy more, I just slice a piece and zap it in the microwave for about 10-15 seconds. That warm, zesty goodness emerges again.
But if you’re feeling fancy, serve it chilled with a dollop of whipped cream. Trust me, you’ll want to savor every last bite. Moreover, using high-end cookware sets can enhance your baking experience, ensuring consistent results.
Final Thoughts
As I reflect on this Ombre Citrus Cake, I can’t help but think about how it turned a simple gathering into a vibrant celebration.
The layers of colorful citrus not only dazzled the eyes but also delighted our taste buds. Honestly, who knew three types of oranges could work such magic?
I almost tripped over myself when people asked for seconds. Once you see those candied slices peeking through the cake, you’ll be as proud as a peacock.
And let’s not forget the joy of digging into something you made yourself. If I can whip this up—and keep the kitchen from turning into a disaster zone—so can you.
Give it a try, and watch your next gathering come alive.