
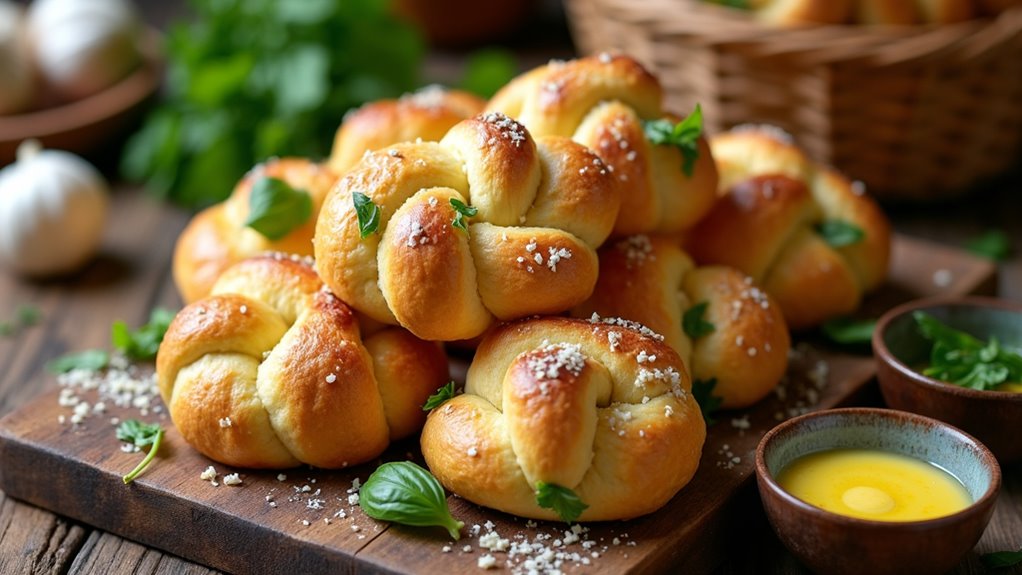
I’ve got a little secret to share—these Indulgent Buttery Garlic Knots are my go-to snack when I need something comforting, yet easy to make. Just picture soft, warm dough slathered in buttery garlic goodness. Who wouldn’t want to try their hand at making knots in the kitchen? I promise, it’s more fun than it sounds, even if my knots sometimes look more like pretzels. Ready to plunge into this deliciousness and impress your friends?
Why You’ll Love This Recipe
Let’s talk about these buttery garlic knots for a second. Seriously, they’re a game changer. I mean, who doesn’t love sinking their teeth into soft, warm dough, slathered with butter and garlic?
They’re like a little hug for your taste buds. Making these buttery garlic knots is simple enough, even if you’re not a pro in the kitchen. I always feel like a rockstar when I tie those dough pieces into a knot—I know, it sounds silly, but it’s true.
Plus, the whole kitchen smells divine while they’re baking. You’ll want to eat them right away, but trust me, letting them rest a minute makes them even better.
Just picture it: a perfect side for any meal or a snack that disappears fast.
Equipment List
When it comes to whipping up those buttery garlic knots, having the right equipment makes all the difference. You’ll need a large mixing bowl, of course, to mix your ingredients.
A sturdy wooden spoon or spatula works wonders—in my experience, it’s much better than my hands getting all sticky. A clean work surface is essential for kneading the dough, and trust me, a rolling pin will save your sanity while shaping those ropes.
You’ll also want a baking sheet lined with parchment paper for easy cleanup. Finally, don’t forget a brush for that delicious melted butter glaze. Honestly, more tools don’t mean more success, but the basics? They’ll definitely make your garlic knot adventure more enjoyable. Additionally, using high-quality professional baking equipment can enhance your overall baking results.
Our Ingredients
When it comes to making buttery garlic knots, the ingredients you choose really set the stage for how delicious those little bites will be. Think about it—each component works together, contributing to that mouthwatering aroma and irresistible flavor we all love. You’ll want fresh and quality ingredients to get the best results.
So, let’s dive right into what you’ll need to gather for this tasty adventure.
- 2–2⅓ cups bread flour
- 1 packet (2¼ tsp) instant yeast
- 1½ tsp sugar
- ¾ tsp salt
- ½ tsp garlic powder
- 2 tbsp olive oil, plus extra for the bowl
- ¾ cup warm water (105–115°F)
- 4 tbsp salted butter, melted
- 1–1½ tbsp minced garlic (about 3 cloves)
- 1 tbsp minced fresh basil
- Grated Parmesan cheese (optional)
Now, let’s chat about a few things to keep in mind regarding these ingredients. Flour is the star of the show here, and using bread flour? That’s a smart move because it’s got that extra protein that gives your knots that lovely chewiness.
Instant yeast is a great choice too; there’s no need to wait for proofing—it’s ready to help your dough rise right away. Don’t skimp on using fresh garlic; trust me, it makes a world of difference compared to the stuff that comes in a jar.
And while Parmesan is optional, I’d say it’s more of a “must-have” if you want to take those buttery knots to the next level.
Step-by-Step Instructions
Making buttery garlic knots can feel like a delightful adventure in the kitchen. Mixing the dough is quick and simple—just follow these easy steps to create those soft, fluffy bites that everyone loves. You’ll be savoring the aroma of freshly baked garlic knots in no time. Ready? Let’s plunge into the step-by-step instructions.
- Combine the Dry Ingredients: In a large mixing bowl, add 2–2⅓ cups of bread flour, 1 packet (2¼ tsp) of instant yeast, 1½ tsp of sugar, ¾ tsp of salt, and ½ tsp of garlic powder. Whisk them together until everything is well combined. This will guarantee a uniform flavor throughout your dough.
- Mix in the Liquids: Pour in 2 tbsp of olive oil and ¾ cup of warm water (make sure it’s between 105–115°F for the best results). Stir everything together until it starts forming a rough dough. It’s like a messy friend getting together for a joyful reunion—embrace the chaos.
- Knead the Dough: Once it starts to come together, turn it out onto a floured surface and knead the dough for about 5 minutes. You’re aiming for a smooth and elastic texture. If it’s too sticky, sprinkle in a little extra flour—just don’t go overboard!
- Let It Rise: Transfer the dough to a lightly oiled bowl, cover it with a clean kitchen towel, and let it rise until doubled in size, which should take about 30 minutes. You might want to make yourself a quick snack while you wait; I often do.
- Shape the Knots: After the dough has risen, punch it down (I always feel a little dramatic doing this) and divide it into 9 equal pieces. Roll each piece into a rope and tie it into a knot. Don’t worry if they don’t look perfect—your garlic knots will taste delightful, even if they’re a bit quirky!
- Prepare for Baking: Place the knots on a baking sheet lined with parchment paper, giving them some space to puff up a bit. Preheat your oven to 400°F (200°C) while they’re lounging on the sheet.
- Bake the Knots: Pop them into your preheated oven and bake for about 12–15 minutes, or until they’re golden brown on top. The smell will be absolutely divine, trust me. It’s that moment when you realize, yes, you’re indeed a kitchen rock star.
- Prepare the Garlic Butter: While the knots are baking, melt 4 tbsp of salted butter in a small bowl. Add 1–1½ tbsp of minced garlic (about 3 cloves) and 1 tbsp of minced fresh basil. Mix it all up—this will be the magical concoction that takes your knots to the next level.
- Brush on the Goodness: As soon as your knots come out of the oven, brush them generously with that buttery garlic goodness. If you have Parmesan cheese, sprinkle a little over the top for an extra touch of flavor.
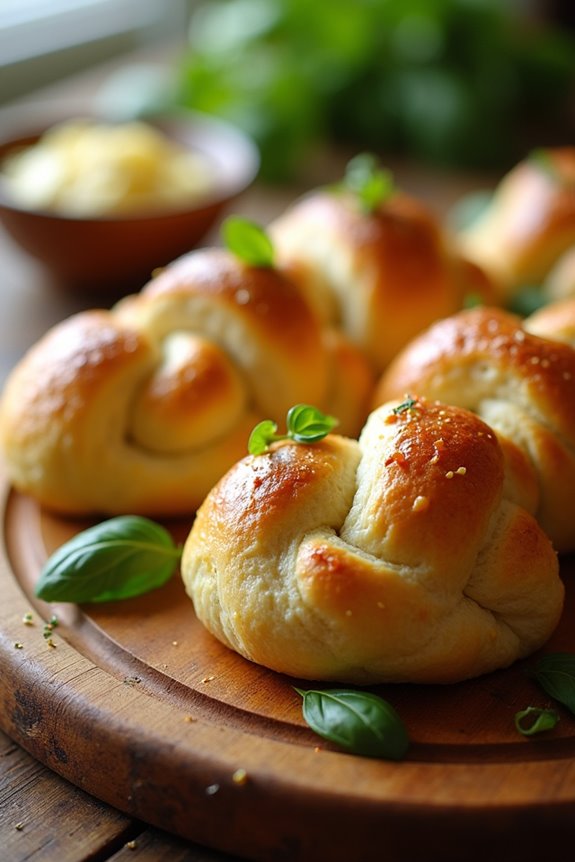
- Serve and Enjoy: Serve your buttery garlic knots warm for the best experience. Watch them disappear as friends and family take that first irresistible bite. And remember, you made these from scratch—how impressive is that?
Investing in premium cookware sets can enhance the quality of your cooking experience and results.
And there you have it, golden, fluffy, and utterly delicious buttery garlic knots. Just be prepared for compliments, even if you trip over them once in a while while walking back to the kitchen for seconds. Enjoy every mouthful!
Tips & Variations
While these buttery garlic knots are fantastic as is, there are plenty of fun twists you can take to make them your own.
For instance, try adding different herbs like rosemary or thyme for a flavor kick. Feeling adventurous? Stuff some cheese inside the knots—Mozzarella works wonders. You might even experiment with spice, tossing in a pinch of red pepper flakes.
I’ve been known to get creative and drench them in pesto instead of garlic butter. And don’t forget, a sprinkle of everything bagel seasoning can add that extra something special.
I once forgot the garlic entirely and ended up with buttery knots that were just as delightful.
How to Serve?
After having fun with variations, it’s time to think about how to serve those buttery garlic knots.
First off, serving them warm is a must; trust me, you don’t want to miss that melt-in-your-mouth goodness. I like to arrange them on a big, comfy platter, just waiting to be devoured.
You might want to dish out some extra butter or marinara sauce for dipping—why not, right? And if you’re feeling a bit cheeky, sprinkle more Parmesan on top. Those knots are practically begging for it.
Storage & Reheating Guide
When it comes to storing those perfectly fluffy garlic knots, I’ve learned a thing or two (sometimes the hard way).
First, let them cool completely before packing ‘em up. I usually toss them in an airtight container lined with parchment paper. They’ll stay fresh in the fridge for about three days.
If you’ve got more than you can eat, freeze them! Just wrap each knot tightly in plastic wrap and then pop them in a freezer bag.
When you’re ready to enjoy, let them thaw in the fridge overnight. To reheat, I prefer the oven. Just 10 minutes at 350°F will do the trick.
Trust me, your taste buds will thank you, as microwaving can be a bit soggy. Remember, using premium grill accessories can enhance your cooking experience and make those garlic knots even more memorable.
Final Thoughts
Buttery garlic knots hold a special place in my heart and my kitchen, and it’s hard not to love them. Honestly, who can resist pulling apart those warm, fluffy bites, dripping with garlic and buttery goodness?
I remember the first time I made them—innocent, ambitious me thinking, “How hard can it be?” Well, let’s just say some dough ended up on the ceiling.
But trust me, it’s worth every flour-dusted moment. You can serve these knots any time—snacks for movie night or as a gourmet side for dinner.
They’re versatile, delicious, and just plain fun to make. So, roll up your sleeves, gather your ingredients, and whip up these indulgent delights. You won’t regret it.