
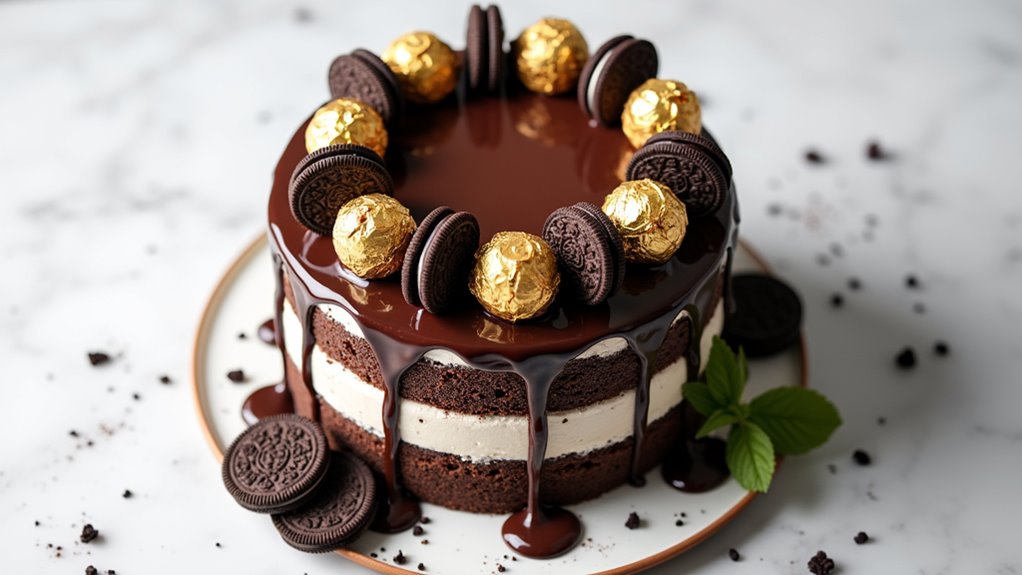
I’ve got to tell you about this Ferrero Rocher Oreo Dream Cake I made recently. It’s a chocolate lover’s dream come true. Picture rich chocolate cake layered with a creamy filling and crunchy Oreos, topped with those irresistible Ferrero Rocher chocolates—heavenly, right? Honestly, it wasn’t as hard as I thought, which is a good thing because I can be a bit of a klutz in the kitchen sometimes. Ready to see how it’s done?
Why You’ll Love This Recipe
When you think about desserts that make your heart skip a beat, this Ferrero Rocher Oreo Dream Cake is bound to be at the top of the list. Seriously, who wouldn’t love layers of rich chocolate cake combined with creamy, dreamy filling?
The Oreo crunch adds just the right amount of texture, while those luscious Ferrero Rocher chocolates on top? Pure magic! I remember making this cake for my friend’s birthday, and let’s just say, no one could resist sneaking extra slices.
If you’re like me and love indulgence, you’ll adore how simple it’s to throw together. Plus, it always impresses, and let’s be honest, isn’t that half the fun?
Equipment List
Gathering the right tools for making your Ferrero Rocher Oreo Dream Cake can make the experience smoother and way more enjoyable.
You’ll want to have two 9-inch round cake pans ready—trust me, you don’t want to bake those layers in a single pan.
A mixing bowl, electric mixer, and spatula are must-haves too.
Don’t forget the measuring cups and spoons for those moments when precision matters. An essential measuring spoon set is perfect for ensuring every ingredient is accurately measured.
A heatproof bowl or double boiler will help you melt that chocolate and butter beautifully—no one likes burnt chocolate.
Finally, you’ll need a cake stand for the ultimate show-off moment when you serve this beauty.
Who knew baking could be this fun, right?
Our Ingredients
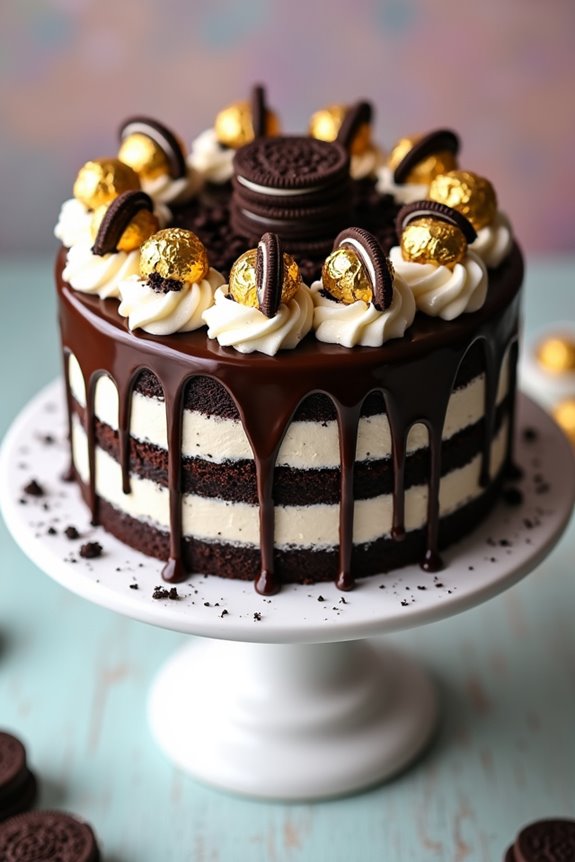
When it comes to whipping up a dessert that will wow your friends and family, the Ferrero Rocher Oreo Dream Cake is an absolute winner. Just thinking about that rich Devil’s Food cake layered with a creamy cookie frosting and decadent chocolate ganache makes my taste buds do a little dance.
It’s a cake that not only pleases the palate but also looks like a fancy bakery treat. But before we get ahead of ourselves, let’s gather those yummy ingredients to make this indulgent masterpiece a reality. Here’s what you’ll need:
- 1 box Devil’s Food cake mix
- Water, oil, eggs (as directed on the cake mix box)
- 8 oz cream cheese, softened
- 1 small container of Cool Whip, thawed
- ½ cup sugar
- 12 Oreo cookies, crushed into delightful bits
- 4 oz BAKER’s semi-sweet chocolate
- ¼ cup butter
- 12 Ferrero Rocher chocolates (for that gorgeous garnish)
Now, let’s chat a little about these ingredients. First off, make sure your cream cheese is softened; there’s nothing worse than trying to mix cold cream cheese—trust me, it’s like a workout for your wrist.
And when it comes to the Oreos, feel free to release any pent-up energy by crushing them with your hands or rolling pin; it can be quite therapeutic.
Finally, if you want to melt the chocolate and butter—oh, the sweet smell—just keep an eye on it. No one enjoys burnt chocolate; I mean, come on, we’re here for a delicious cake, not a smoky kitchen disaster.
Step-by-Step Instructions
Making the Ferrero Rocher Oreo Dream Cake is a delightful adventure, and mixing the batter is quick and simple—just follow these easy steps. With rich Devil’s Food cake, creamy cookie frosting, and a luscious chocolate ganache, you’ll be taking a delicious journey that ends in pure joy. Are you ready? Let’s get started!
1. Preheat the Oven: First things first—preheat your oven to 350°F (that’s about 175°C for our friends outside the U.S.). This step is vital because a properly heated oven guarantees your cake bakes evenly. Trust me, nothing’s worse than a half-baked cake.
2. Prepare Cake Pans**: While the oven is heating up, get your two cake pans ready. Grease them lightly** or line the bottoms with parchment paper. This way, when the cakes are done, they’ll slide out like a dream.
3. Mix the Cake Batter: Grab your box of Devil’s Food cake mix and follow the instructions on the box, adding the specified amount of water, oil, and eggs. Just mix until everything is combined—don’t overmix it, since a slightly lumpy batter is just fine.
4. Bake the Cakes: Pour the batter evenly into your prepared cake pans and pop them in the oven. Bake for about 20–25 minutes or until a toothpick inserted comes out clean. Your kitchen will soon be filled with the heavenly scent of chocolate.
5. Cool the Cakes: Once baked, let the cakes cool in the pans for about 10 minutes. After that, carefully turn them out onto wire racks to cool completely. Patience is key here; a frosted warm cake is a recipe for disaster.
6. Make the Cream Cheese Frosting****: While the cakes are cooling, it’s time to whip up the delicious cream cheese frosting. In a mixing bowl, beat together 8 oz of softened cream cheese and ½ cup of sugar until smooth.
Add in the small container of thawed Cool Whip and fold gently with a spatula. Finally, mix in the 12 crushed Oreo cookies—this is where the magic happens.
7. Chill the Frosting: Don’t skip this step! Put the frosting in the fridge while you prepare the chocolate ganache. It’ll thicken up nicely and make frosting even easier.
8. Prepare the Chocolate Ganache: In a microwave-safe bowl, melt together 4 oz of BAKER’s semi-sweet chocolate and ¼ cup of butter. Do this in 30-second intervals, stirring in between until smooth and shiny.
Keep an eye on it, though; burnt chocolate can ruin your ganache—and your day.
9. Assemble the Cake: Now for the fun part! Place one of the cooled cake layers on a platter. Spread half of your Oreo cream cheese frosting on top, then place the second cake layer gently on top.
Repeat the frosting process with the remaining frosting, spreading it evenly over the top and sides.
10. Add the Ganache: Pour the silky chocolate ganache over the top of the assembled cake, letting it drizzle down the sides for that elegant look.
There’s something so satisfying about a beautifully drizzled cake, isn’t there?
11. Garnish: Finally, grab those 12 Ferrero Rocher chocolates and place them strategically on the top of your gorgeous cake. This isn’t just for looks; it’s the cherry on top of your lavish creation.
12. Chill Before Serving: For the best texture, chill the assembled cake in the fridge before slicing. Trust me, the wait will make the cake even better.
Now, take a moment to appreciate your masterpiece. When it’s time to serve, slice and enjoy the heavenly layers of chocolatey goodness. Every bite is worth the effort you put into crafting this beauty. Remember, having the right premium baking equipment can elevate your baking experience significantly. Happy baking!
Tips & Variations
A few handy tips can really elevate your Ferrero Rocher Oreo Dream Cake experience.
First off, chilling the cake before slicing is a game-changer. It helps everything hold together beautifully, and trust me, it’s worth the wait. I’ve made the mistake of slicing too soon, and it was a messy situation.
Also, garnish those Ferrero Rocher chocolates just before serving. You want them to be nice and crisp, not soggy little sad things.
If you’re feeling adventurous, try swapping in a different cake mix flavor, like chocolate mint or vanilla.
And, hey, if you don’t have Cool Whip, whipped cream works too. Just don’t forget to lick the bowl after mixing—everyone does it, right?
How to Serve?
Serving your Ferrero Rocher Oreo Dream Cake is where the fun really begins. First, grab a sharp knife and slice into that gorgeous cake—you know, the one that’s tempting your taste buds.
I always chill mine for a bit to make slicing easier, but a little chaos never hurt anyone, right? As you plate each slice, consider drizzling some extra ganache on top; it’s basically a hug for your cake.
For a special touch, pop a Ferrero Rocher on each plate. Trust me, it’ll impress your guests. When serving, don’t forget to grab a fork for yourself; it’s the unspoken rule of cake. You deserve a slice, too, after all that work.
Enjoy every bite—guilt-free!
Storage & Reheating Guide
After you’ve savored every last crumb of your beautiful Ferrero Rocher Oreo Dream Cake, you might find yourself staring at those tempting leftovers. Trust me, I know the feeling.
To store it, simply cover the cake with plastic wrap or foil and pop it in the fridge. It’ll keep for about five days, which is a pretty good deal for such a delicious creation.
If you’re feeling indulgent, you can also freeze it. Just slice it up, wrap each piece tightly, and store them in a freezer bag. When you’re ready to enjoy a slice, let it thaw in the fridge overnight. For the best results, consider using soup freezer containers to ensure freshness and maintain flavor.
Reheating isn’t necessary, but if you want it warm, just pop it in the microwave for a few seconds. Enjoy!
Final Thoughts
Even though I’ve baked plenty of cakes in my time, I’ve to say this Ferrero Rocher Oreo Dream Cake really takes the cake—pun intended.
The layers of rich chocolate, creamy filling, and crunchy surprises make this dessert a true showstopper. Honestly, it’s a bit of a flavor bomb. Each bite feels like a celebration; I can’t help but smile when I imagine friends devouring it.
It’s perfect for any occasion, whether a birthday or just because. To be fair, I might’ve gone a little overboard on the Oreos, but who am I to judge?
If you want a cake that’ll knock your socks off, give it a shot. Trust me, you won’t regret it—your taste buds will thank you.