
I’ve always had a soft spot for churros, but let’s be honest. Sometimes the fry-oil situation just isn’t ideal for a cozy night in. That’s where these baked churro chips come in. They’re crispy, sweet, and incredibly simple to whip up. Imagine this: fresh tortillas transformed into golden, cinnamon-sugar goodness, made right in your own oven. Sound tempting? I promise, once you get a taste, you’ll be hooked. Curious about how to make them?
Why You’ll Love This Recipe
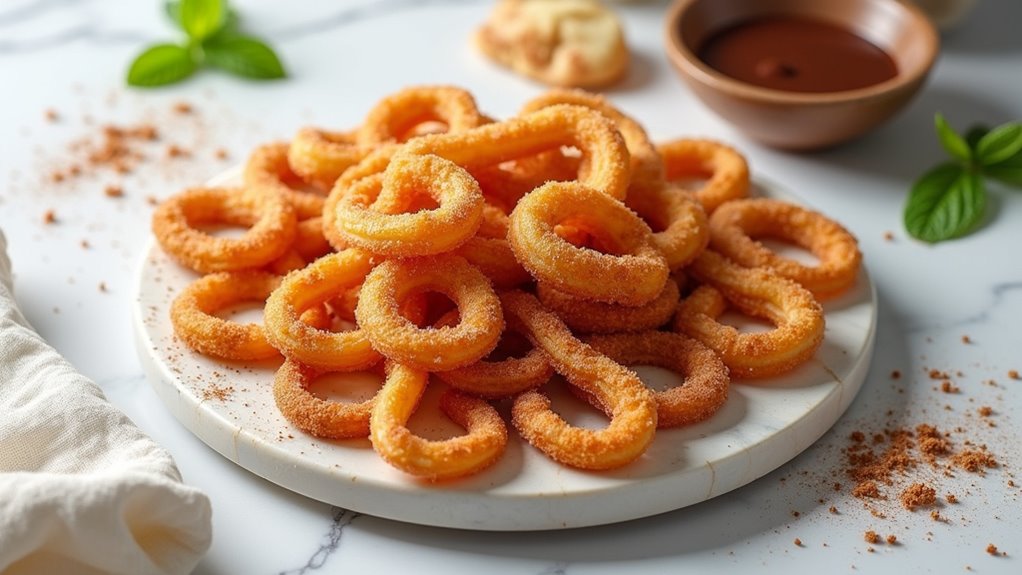
There’s something incredibly delightful about a crispy snack that’s both sweet and a little spicy, isn’t there? When I first tried baked churro chips, I couldn’t believe how easy they were to whip up. Just cut some tortillas, brush ’em with melted butter, and coat with a mix of sugar and cinnamon. Simple, right?
These chips bake to golden perfection in no time, making them the perfect treat for movie nights or casual gatherings.
Plus, they’re lighter than traditional churros but still pack that mouthwatering flavor. I love how they crunch and sweeten with each bite—it’s a little bite of heaven.
You can even store them in an airtight container, but good luck keeping them around long enough.
Equipment List
Before you start whipping up those delicious baked churro chips, let’s talk about the equipment you’ll need.
First, you’ll want a sharp knife or pizza cutter to slice those tortillas into triangles. A pastry brush is a game-changer for evenly applying melted butter.
Don’t forget a baking sheet lined with parchment paper—trust me, it makes cleanup a breeze. While we’re at it, grab a mixing bowl for that heavenly sugar and cinnamon blend.
And an oven, obviously; let’s not bake on the countertop. Oh, and some tongs can come in handy for flipping the chips without burning your fingers.
To make your mashed potato side dish perfect, consider adding a potato masher for that creamy texture.
Simple tools, right? With this gear ready, you’re all set to embark on a sweet baking adventure!
Our Ingredients
When it comes to making baked churro chips, you want to gather some simple yet delightful ingredients that’ll make your taste buds dance. Think of it as a little trip to the fiesta—fun and sweet, with just enough cinnamon to keep things interesting.
But don’t worry, you won’t need to master any culinary wizardry here. Just grab a few essentials, and you’re off to a great start.
Ingredients:
- Tortillas (flour or corn)
- Butter, melted
- Granulated sugar
- Cinnamon
Now, before you charge to the grocery store, let’s chat about each ingredient. First up are the tortillas. You can use either flour or corn, depending on your texture and flavor preference.
I won’t judge if you decide to go with flour—I mean, who doesn’t love a soft, buttery chip? Next, we’ve butter. It really does wonders here; brushing it on each side of the tortilla adds a rich flavor and helps the sugar and cinnamon stick better.
Speaking of sugar and cinnamon, the magic happens when you combine them. A 3:1 sugar-to-cinnamon ratio is classic, but don’t be afraid to tweak it if you like it spicier—perhaps a little cinnamon extra?
The beauty of baking is getting to cater to your cravings. Just make sure all your ingredients are fresh—when you mix them up, you’re setting off on a mini baking adventure that’s sure to end with a smile.
Step-by-Step Instructions
Making Baked Churro Chips is a delightful adventure that will take your taste buds on a spin. Get ready to transform simple tortillas into crispy, sugary delights that’ll satisfy your sweet tooth. This recipe is straightforward—just follow these easy steps, and you’ll be devouring these treats in no time!
Step-by-Step Instructions:
- Preheat the Oven: Start by preheating your oven to a cozy 350°F–425°F. This is like giving your oven a warm-up so it’s ready to turn those tortillas into golden, crispy chips.
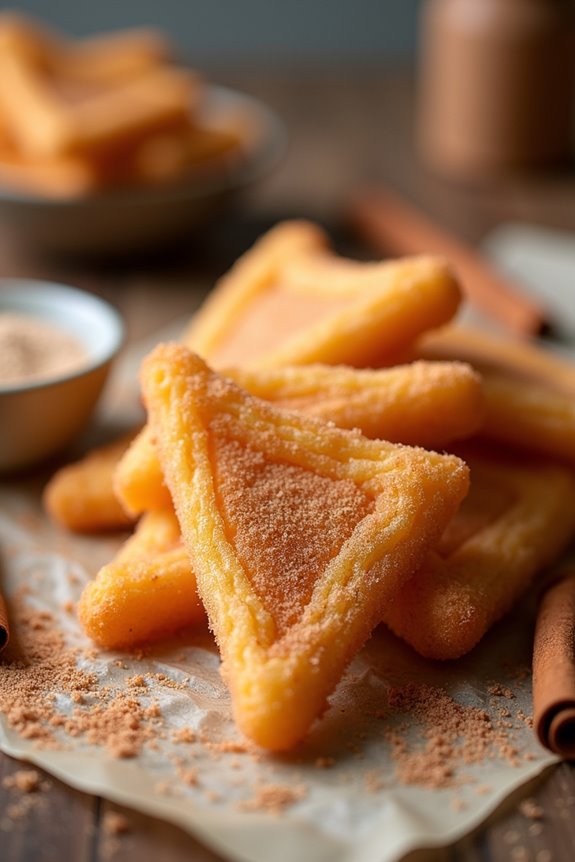
- Cut the Tortillas: Take your tortillas (you can choose flour or corn—whatever sings to your heart) and cut them into triangles or your desired shapes. Think of this as your artistic moment—go wild!
- Brush with Butter: Grab some melted butter (about 2–4 tablespoons should do) and brush both sides of your tortilla shapes. This isn’t just to make them shiny; it helps the sugar and cinnamon stick later. Plus, let’s be real, who doesn’t love the taste of buttery goodness?
- Mix the Sugar and Cinnamon: In a small bowl, combine granulated sugar and cinnamon using a 3:1 ratio (for example, 3 tablespoons sugar to 1 tablespoon cinnamon). Give it a little stir—you want to make sure the spices are evenly distributed. The scent will be so good that you might just want to plunge in right there.
- Coat the Chips: Now, take those buttered tortillas and dip them into your sugar-cinnamon mix! Make sure they’re nicely coated on both sides. Your taste buds are already doing a happy dance at this point.
- Arrange on a Baking Sheet: Place your wonderfully coated tortilla chips onto a parchment-lined baking sheet. Make sure they’re in a single layer and not overlapping—nobody wants soggy churros!
- Bake to Perfection: Bake them in your preheated oven for about 8–15 minutes. Keep an eye on them; you want them golden and crisp! It’s like a science experiment, but way tastier.
- Cool and Serve: Once they’re out of the oven, let your chips cool for about 5 minutes. This is the hard part—waiting, I know! But that’s when they get nice and crispy.
And there you have it—your delightful Baked Churro Chips are ready to be enjoyed! Additionally, using high-end cookware sets can elevate your baking experience to a whole new level.
Whether you’re munching them with friends or sneaking a few while no one is looking, these sweet, crispy delights are a treat worth savoring.
Tips & Variations
While I’m all about sticking to the classic Baked Churro Chips recipe, there’s nothing wrong with throwing in a twist or two to make it your own.
Ever thought about adding a sprinkle of cocoa powder to the sugar mix? It gives a deep, chocolatey flavor that’s simply divine.
Or, how about drizzling some melted chocolate on top once they’re baked? Yes, please!
If you’re feeling adventurous, try using flavored tortillas, like spinach or sun-dried tomato. It sounds wild, but trust me, the surprise is worth it.
Oh, and if you really want to impress, toss some chopped nuts into the sugar mix for a delightful crunch!
However you customize, just enjoy the process and have fun in the kitchen.
How to Serve?
Serving up your baked churro chips can turn a simple snack into a delightful experience, especially if you know a few tricks.
First off, don’t just toss them on a plate. Arrange them in a fun cone shape using parchment paper for that extra flair. Trust me, it’ll impress your friends.
Now, a little touch of magic: serve them with different dips. Chocolate sauce and a creamy caramel dip work wonders. I like to have a little tasting station—it’s like a party for your taste buds.
And hey, if I find crumbs all over my shirt after, that just means I’d a good time, right?
Storage & Reheating Guide
After you’ve baked those delicious churro chips, you might be wondering how to keep them fresh for your next snack attack. Trust me, I’ve had my share of chips going stale, and it’s not fun.
To store them, simply toss them in an airtight container. They should stay crispy for about 5 days—if they last that long. A word of advice? Don’t store them in the fridge; that’ll just make them soggy.
When you’re ready to indulge again, preheat your oven to 350°F and give your churro chips a quick warm-up for about 5 minutes. You won’t believe how crisp they’ll get again. In the meantime, consider making some cocktails with your freshly baked snacks using a high end cocktail making set to elevate your home bar experience.
Or, if you’re feeling lazy, just munch them cold—no judgment here.
Final Thoughts
As you finish up this tasty adventure in baking, you might find yourself craving those crispy, cinnamon-sugar-dusted churro chips again before you know it. Trust me, I can’t resist them either. They’re the perfect sweet treat to enjoy with a movie or just because.
I’ve made these so many times, I sometimes feel like a professional churro chip maker—though I’ll admit, my kitchen is often a mess. But hey, what’s a little flour and sugar between friends, right?
Just remember, the cooling step is key; those chips get crunchier as they chill. So, go ahead, whip up a batch whenever you need a quick snack.
It’s a simple, delicious moment you won’t regret. Happy baking!