
I’ve been on a bit of a strawberry ice cream kick lately, and let me tell you, it’s not just about the sweet taste; it’s about the whole experience. It’s so easy to whip up! Just a few ingredients and an ice cream maker, and you’re on your way to creamy bliss. Have you ever tried making it yourself? It’s kind of magical how those fresh strawberries transform into something so delightful. Stick around, and I’ll share my not-so-secret formula for this summer treat.
Why You’ll Love This Recipe
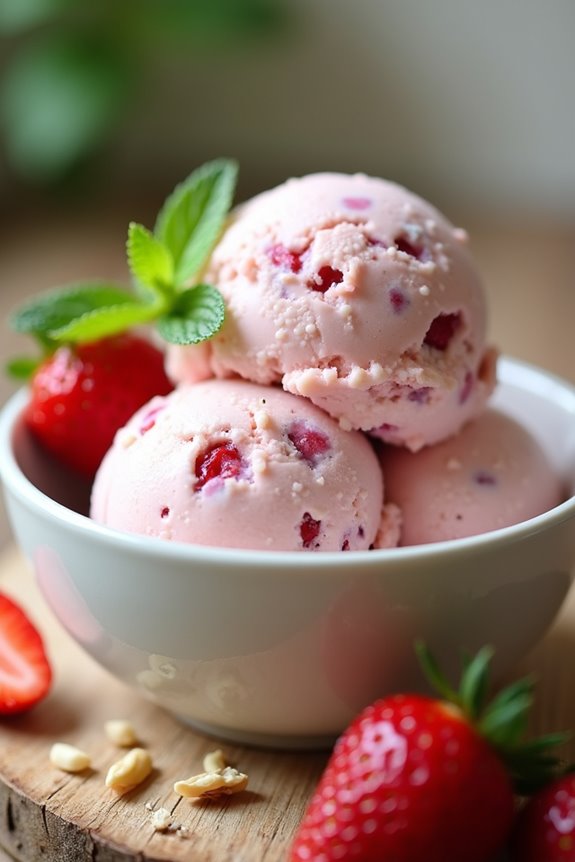
When you think about summer treats, what pops into your mind? For me, it’s all about homemade strawberry ice cream. Imagine it: juicy, ripe strawberries mixed with creamy goodness that melts in your mouth. It’s like summer in a bowl. You can whip it up in no time, and trust me, your friends will think you’re a culinary genius. Plus, who doesn’t love that blush of pink color?
I still remember the first time I made it—strawberries were everywhere, and so was my enthusiasm. I might’ve made a mess, but boy, was it worth it.
The blend of sweetness from honey and vanilla makes you crave another scoop. Forget the store-bought stuff; this is the real deal!
Equipment List
Making homemade strawberry ice cream is a delightful experience, and having the right equipment is key to getting that creamy, dreamy texture we all love.
First, you’ll need an ice cream maker. Trust me, trying to churn it by hand isn’t worth the workout. A mixing bowl is essential for combining the ingredients—it’s where the magic begins.
Don’t forget a blender or potato masher, especially if you want smooth strawberries in your ice cream. A spatula will help scrape every last bit of that delicious mixture into the ice cream maker.
Oh, and pop in some airtight containers for storage. Nobody wants ice cream with freezer burn. Investing in gourmet kitchen gear will elevate your ice cream-making experience and enhance overall quality.
With these tools, you’re ready to plunge into deliciousness—just keep that spoon handy for taste-testing!
Our Ingredients
When it comes to homemade strawberry ice cream, the ingredients really make all the difference. Imagine this: you’re sitting in your kitchen, sunlight streaming through the window, the scent of fresh strawberries wafting through the air. It’s a perfect day to whip up a batch of this delightful treat, and you need the right components to make it sing. So, let’s gather everything you’ll need to start on this sweet journey.
Here’s your list of tasty ingredients:
- 1 1/2 cups strawberries, hulled and diced
- 2 tablespoons honey
- 1/2 cup granulated sugar
- 1 teaspoon lemon juice
- 1 cup heavy whipping cream
- 1/2 cup half and half
- 1 teaspoon vanilla extract
Now, let’s talk about those ingredients a little more. First, can we just take a moment to appreciate strawberries? Choosing ripe, juicy ones is essential for maximizing the flavor—think beautiful red color and a sweet aroma that makes your mouth water.
Honey? It adds a delightful twist, but don’t worry if you prefer sugar—just swap it out straight up. When it comes to creams, that heavy whipping cream really gives your ice cream that rich, luxurious texture.
And vanilla? It’s the secret cheerleader that amplifies every other flavor. Overall, don’t be shy about experimenting a bit—add a splash more lemon juice for zing or throw in a sprinkle of salt to enhance the sweetness. Each ingredient has its role to play in this delicious symphony of flavors.
Happy cooking!
Step-by-Step Instructions
Making homemade strawberry ice cream is a delightful experience that brings out your inner chef, even if your kitchen prowess is still a work in progress. The steps are quick and simple—just follow along, and soon you’ll be enjoying a creamy, fruity scoop of goodness. Let’s plunge into the sweet process of making this delicious treat!
- Prepare the Strawberries: Start with 1 1/2 cups of ripe strawberries—hull and dice them for the best flavor. In a medium bowl, mix the strawberries with 2 tablespoons of honey, 1/2 cup of granulated sugar, and 1 teaspoon of lemon juice. Let this mixture sit for 15-20 minutes. This step is magic; it allows the strawberries to release their juices and mingle with the sweetness.
- Mash the Strawberries: After their little sit, take a fork or potato masher and mash the strawberries. You’re aiming to get rid of any large chunks, but if you prefer a smoother texture, feel free to blend them in a food processor instead. Just imagine the vibrant pink color, almost begging to be churned into ice cream.
- Mix in the Creamy Ingredients: Now for the fun part! Stir in 1 cup of heavy whipping cream, 1/2 cup of half and half, and 1 teaspoon of vanilla extract into your strawberry mixture. This is the moment when your mixture transforms into something rich and luscious—stir gently so the flavors combine seamlessly.
- Churn the Ice Cream: Pour this beautiful mixture into your ice cream maker, and churn it according to the manufacturer’s instructions—usually about 15-20 minutes. You’ll know it’s ready when it’s thick and fluffy, looking oh-so-inviting. Take a moment to marvel at your creation; the effort is already paying off.
- Freeze for Firmness: For a firm texture, transfer your churned ice cream into a container and freeze it for 3-4 hours. If you’re feeling impatient (who isn’t when it comes to ice cream?), you can dig in right after churning for a softer treat. But trust me, letting it set a while longer makes all the difference.
- Serve and Enjoy: When you’re ready to indulge, take it out of the freezer and let it soften for 5-10 minutes before scooping. This step is key; it prevents the dreaded ice cream arm workout when you try to scoop straight from the icy depths.
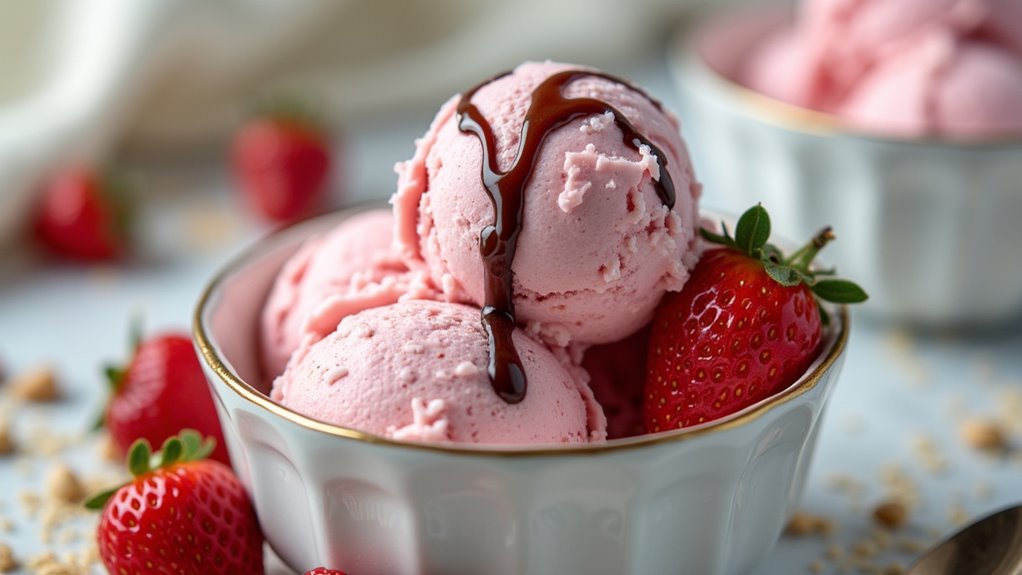
Serve it up in your favorite bowl—go ahead, try a little sprinkle of crushed nuts or a drizzle of chocolate sauce for a fun twist. For the best results in your ice cream-making adventure, don’t forget to use premium baking equipment that can enhance your culinary experience.
And there you have it—your homemade strawberry ice cream is ready! The bright flavors and creamy texture will have you wondering why you ever settled for store-bought. It’s all about the little victories in the kitchen! Enjoy every guilt-free spoonful of this fruity delight.
Tips & Variations
Although I’ve got a go-to strawberry ice cream recipe, the fun begins when you start experimenting with variations that can take your homemade treat to the next level.
Ever thought about adding a swirl of chocolate fudge? Or how about a touch of basil for a surprise flavor? Trust me, it’s invigorating. You can even swap half the strawberries for ripe peaches; summer’s favorite duo.
I like to sprinkle in some crushed graham crackers for a little crunch, almost like a deconstructed pie. And if I forget to use the ripest strawberries, uh-oh, I just drown my sorrows in extra sugar.
Play around, get creative, and remember, it’s all about what makes your taste buds dance. Give it a whirl!
How to Serve?
Serving homemade strawberry ice cream is where the real fun begins. First, scoop generous portions into cute bowls or waffle cones. Trust me, the visuals are half the joy.
I often sprinkle fresh slices of strawberries or a drizzle of chocolate syrup on top. It makes me feel like a gourmet chef, even if I just whisked some cream.
Want a little crunch? Sprinkle crushed graham crackers or nuts for that extra flair.
And don’t forget to grab a few spoons for sharing, because nothing beats laughter over ice cream with friends. You might end up with some in your hair, but isn’t that all part of the experience?
Enjoy every creamy bite because it really is a sweet moment worth savoring.
Storage & Reheating Guide
Once you’ve whipped up that luscious strawberry ice cream, you’ll want to guarantee it stays as delightful as the moment you first tasted it.
I usually transfer mine into an airtight container—trust me, your ice cream deserves this level of pampering. Just make sure to push out as much air as possible before sealing.
It’ll last about two weeks in the freezer, but let’s be real, who can wait that long?
Using freezer storage bags can be a great option for keeping the ice cream fresh and avoiding freezer burn.
When you’re ready to dive back in, just let it sit at room temperature for five to ten minutes.
This usually saves me from wrestling with a solid block of deliciousness. You want it creamy and dreamy, not a workout.
Enjoy, you’ve earned it!
Final Thoughts
As summer rolls in and the sun starts shining down, there’s nothing quite like a scoop of homemade strawberry ice cream to cool you off.
Seriously, have you ever tasted something so blissfully creamy and bursting with flavor? I could eat it every day.
Making it’s surprisingly easy, too. Just grab some ripe strawberries, blend them into delightful goodness, and let your ice cream maker do its magic. You won’t regret it. Trust me.
And if you mess up? It happens; I’ve turned ice cream into a smoothie before. Don’t sweat it.
The key is to enjoy the process—plus, there’s always room for improvement (and a little bit of ice cream on the side).