
You know how sweet and sour chicken is a classic favorite? Well, I decided to spice things up a bit—literally. Imagine this: juicy chicken, crispy veggies, and a tangy sauce, all jazzed up with the unexpected sweetness of pineapple and colorful bell peppers. I’ll admit, I wasn’t convinced at first. But trust me, this twist is a game changer. Want to know how to make it? Stick around, because I’ve got some tasty details coming your way.
Why You’ll Love This Recipe
You know that magical moment when you take a bite of something delightful, and it instantly transports you to a happy place? That’s exactly how I feel with baked sweet and sour chicken.
Seriously, it’s like a flavor party in my mouth. The crispy bits on the outside, the tender chicken inside—it’s a perfect combo.
I still remember the first time I made it; I thought, “How can something so tasty be this easy?” Every bite is a little burst of tangy and sweet goodness.
Plus, it’s versatile. Serve it with rice, noodles, or even just on its own. You’ll feel like a kitchen genius. Trust me, you’ll be dreaming about this dish long after it’s gone.
Equipment List
When diving into the world of baked sweet and sour chicken, having the right equipment can make all the difference. You’ll need a trusty baking dish—nothing fancy, just a solid one to hold your chicken. Investing in professional kitchen equipment can significantly enhance your culinary results.
A mixing bowl is essential for whisking together that delicious sauce. Don’t forget a large frying pan; it’s perfect for getting that crispy texture on your chicken pieces.
Oh, and keep a spatula handy, because flipping chicken is an art. Plus, I always grab a good pair of tongs for easy handling, and a whisk makes mixing a breeze.
Seriously, all this equipment sets the stage for culinary success. It’s important to invest in premium kitchen appliances that enhance your cooking experience. So, gear up, and let’s make some kitchen magic happen!
Our Ingredients
When it comes to making baked sweet and sour chicken, the right ingredients play a vital role in delivering that perfect balance of flavors. If you’re anything like me, there’s something utterly delightful about that tangy, sweet sauce coating tender pieces of chicken. Just thinking about it gives me a warm feeling inside.
It’s the type of dish that warms the soul and fills your kitchen with a tempting aroma. So, let’s get ready to gather those ingredients that create the magic!
Here’s what you’ll need for this delicious treat:
- 1 lb boneless chicken breasts, cut into 1-inch pieces
- Salt and pepper, to taste
- ½ cup cornstarch
- 2 eggs, beaten
- ¼ cup vegetable oil
- ¾ cup sugar
- ½ cup apple cider vinegar
- ¼ cup ketchup
- 1 tbsp soy sauce
- ½ tsp garlic powder
It’s worth noting that while these ingredients come together beautifully, you can always play around with them a little.
Want a spicier kick? Toss in a bit of crushed red pepper flakes or a splash of hot sauce. Not a fan of apple cider vinegar? You could switch it up for rice vinegar or even white vinegar in a pinch.
And let’s not ignore the chicken—feel free to experiment with chicken thighs instead of breasts for extra juiciness. The possibilities are endless, and cooking is all about making it your own, right?
Step-by-Step Instructions
Making Baked Sweet and Sour Chicken is an adventure in flavor that you won’t want to miss. With each bite of tender chicken enveloped in that perfectly balanced tangy and sweet sauce, you’ll find yourself smiling from ear to ear. It’s a dish that’s surprisingly easy to prepare and packed with flavor, making it perfect for any night of the week. So, let’s roll up our sleeves and plunge into the step-by-step instructions!
- Preheat your oven to 325°F. Grab a baking dish and give it a light coat of oil to prevent any sticking later on. Trust me, you don’t want your delicious creation turned into a sticky disaster.
- In a medium bowl, whisk together ¾ cup sugar, ½ cup apple cider vinegar, ¼ cup ketchup, 1 tablespoon soy sauce, and ½ teaspoon garlic powder. This is where the magic begins! Taste it (no judgment here), and see if it tickles your fancy. Adjust the sweetness or tartness based on your preferences if you like. Investing in premium kitchen appliances can enhance your preparation experience.
- Season 1 lb of boneless chicken breasts, cut into 1-inch pieces, with salt and pepper to your liking. Don’t be shy—seasoning brings all the flavors to life.
- Toss the chicken pieces in ½ cup cornstarch until they’re fully coated. This step gives that delightful crunch when you fry them. Once coated, dip each piece into 2 beaten eggs. Make sure they’re well-coated; this will help that cornstarch cling onto the chicken.
- Heat ¼ cup vegetable oil in a large skillet over medium-high heat. Once the oil is hot (you can test it by dropping a tiny piece of chicken in—if it sizzles, you’re good), carefully place the chicken pieces in the oil. Fry them for about 1-2 minutes on each side, or until they’re a lovely golden brown. Don’t overcrowd the skillet; you want to avoid them steaming instead of frying.
- Drain the excess oil from the chicken after frying—feel free to place them on a paper towel-lined plate to soak up any grease.
- Transfer the chicken into the prepared baking dish. Pour your irresistible sauce over the top, ensuring that each piece is coated. Give it a little shimmy if you need to mix it up lightly.
- Bake in the oven for 55 minutes. Every 15 minutes, carefully turn the chicken pieces. This helps them bathe in that sweet and sour goodness evenly. If you’ve got a kitchen timer, let it make your life easier.
- Once baked, you can remove it from the oven and serve immediately. Maybe grab a fork and indulge a little? Don’t worry, I won’t tell anyone.
Additionally, using some quality kitchen appliances can elevate your cooking experience and make the process even more enjoyable. And there you have it, your very own Baked Sweet and Sour Chicken, warming your heart and filling your kitchen with deliciousness. Can you smell it yet? Enjoy the experience and don’t forget to share (or keep it all to yourself, no judgment here).
Tips & Variations
After that deliciously rewarding baking session, here comes the fun part: Tips & Variations.
You know, this sweet and sour chicken is pretty flexible. Feeling adventurous? Try swapping the chicken for tofu or shrimp. For a spicier kick, add some red pepper flakes or a splash of hot sauce to the sauce.
If you’re anything like me, you might want to double the sauce because I can’t resist that sweet, tangy goodness.
Have some stir-fried veggies on hand? Toss them in the baking dish to infuse more flavor.
Oh, and don’t forget to stir the chicken during baking; it helps coat every piece perfectly, and you might just save a few from being sauceless.
Trust me, it’s worth it.
How to Serve?
Serving up your baked sweet and sour chicken can be just as fun as making it, especially when you’re ready to impress guests or plunge into that comforting dinner all by yourself.
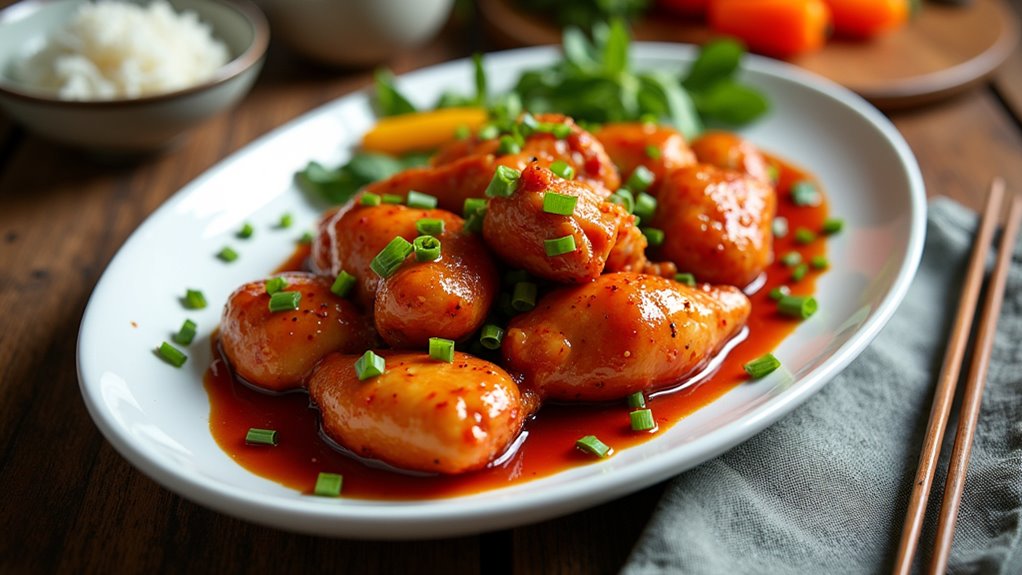
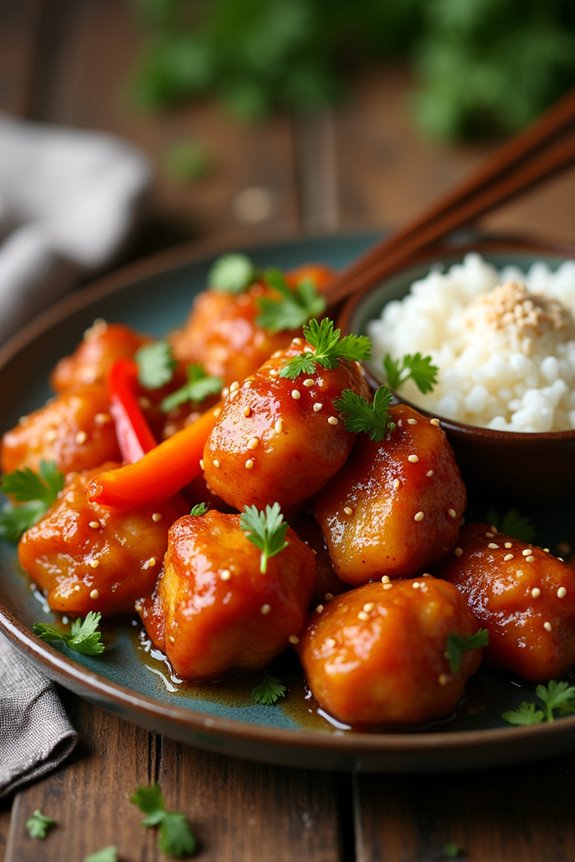
I like to plate it with a generous scoop of fluffy rice, soaking up that tangy sauce. If I’ve got fresh veggies on hand, I toss some stir-fried bell peppers or broccoli on the side—who doesn’t love a pop of color?
To make it fancy, I sometimes sprinkle sesame seeds or chopped green onions on top. Then, I step back and admire my work, feeling like a kitchen rockstar.
Honestly, there’s nothing like diving into this dish and savoring every bite. It’s like a hug in food form, right?
Storage & Reheating Guide
Once you’ve enjoyed every bite of that delicious sweet and sour chicken, you might wonder how to keep those leftovers fresh and tasty.
First off, don’t just toss everything in a plastic bag—no one wants soggy chicken. I usually place my leftovers in an airtight container.
This way, they’ll stay good in the fridge for about 3-4 days, although they rarely last that long in my house. If you want to save them longer, freeze them! Just know they’re best enjoyed within three months.
When you’re ready to dig in again, reheat in the oven to maintain that crispy texture. I recommend 350°F for about 20 minutes.
Microwave? Sure, but no one likes rubbery chicken, right? Using a reusable container can help reduce plastic waste while storing your leftovers.
Final Thoughts
While cooking this baked sweet and sour chicken, I can’t help but think about how easy it’s to impress friends and family with such a delicious meal.
Honestly, if you can chop some chicken and whisk a few ingredients, you’re already halfway there. This dish is a crowd-pleaser and makes a great weeknight dinner.
I remember the first time I made it; my friends thought I’d been slaving away in the kitchen for hours. Instead, I just tossed it in the oven and sipped some coffee while it baked.
If you’ve got a busy schedule, this recipe is your best buddy. Just don’t forget to turn the chicken every 15 minutes—trust me, it makes a world of difference.
Happy cooking!