
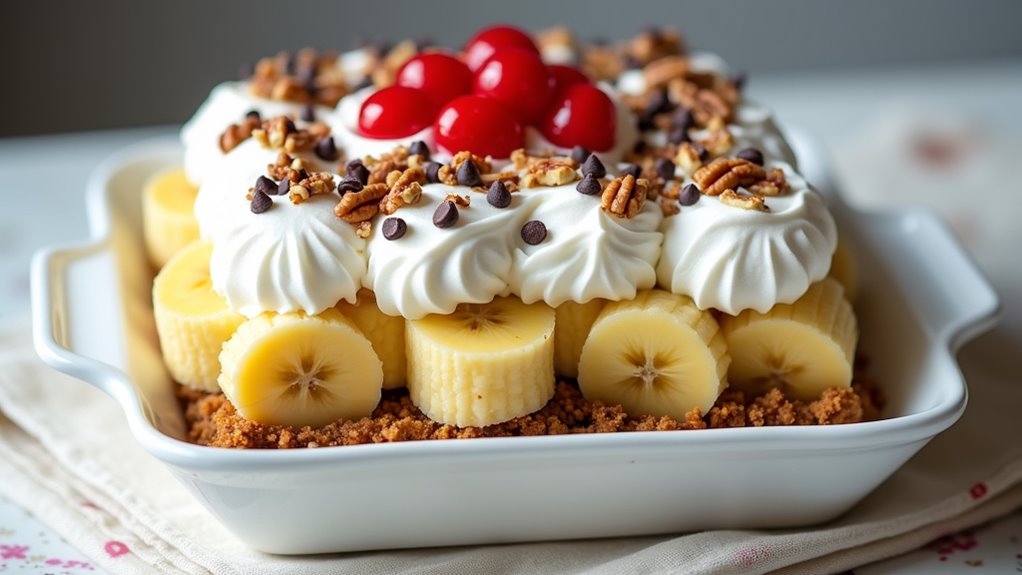
I’ve got to tell you about this Banana Split Cake recipe I’ve been making lately. It’s layered with creamy delight and feels like a slice of summer. Just imagine that crunchy graham cracker crust paired with ripe bananas and whipped topping—pure bliss, right? Honestly, if you think baking is too hard, this will change your mind. Just wait until you see how easy it is to whip this up and impress your friends. Curious about the magic behind it?
Why You’ll Love This Recipe
When I think about why I love this Banana Split Cake recipe, it’s like a delicious trip down memory lane. This dessert takes me back to summer picnics and family BBQs, where I’d sneak a slice before anyone else could grab it.
You know, the moment you’d take that first bite, and the creamy layers just melt in your mouth? It’s heavenly. Plus, it’s super easy to throw together, perfect for when I’m feeling a bit lazy in the kitchen.
The combination of cream cheese, bananas, and whipped topping makes every forkful a delightful experience. And let’s be real, who can resist the crunch of nuts and that pop of fresh cherries? It’s nostalgia served on a plate.
Equipment List
You’ll need just a handful of essential tools to whip up this delightful Banana Split Cake.
First off, a 9×13-inch baking pan is a must; it’s where all the magic happens. Investing in high end cookware set will ensure that your baking pan distributes heat evenly for the best results.
You’ll also want a mixing bowl—trust me, you don’t want to mix cream cheese without one.
A hand mixer or stand mixer will make your life way easier, especially for that fluffy layer.
Don’t forget a spatula for spreading everything evenly; I swear a good spatula can change the game.
Finally, a cutting board and knife will help you slice those bananas perfectly. I mean, it’s all about that presentation, right?
And who doesn’t want their dessert looking Instagram-ready? Just me? Alright, let’s get baking.
To make your baking even better, consider investing in premium bakeware sets which can elevate your baking experience.
Our Ingredients
When it comes to making a Banana Split Cake, the ingredients are what truly bring the flavors to life. Gathering everything you need is like collecting magic potions for a delicious dessert adventure. Don’t worry; you won’t need to hunt down a dragon or climb mountains for these! Most of these items are pantry staples, while others might require a quick stop at the grocery store.
The beauty of this cake lies in its simplicity. You’ll have creamy, fruity, and crunchy all in one delightful package—how great is that?
Here’s what you’ll need to recreate this sweet masterpiece:
- 2 cups graham cracker crumbs
- 1/2 cup (1 stick) unsalted butter, melted
- 8 oz cream cheese, softened
- 1 cup confectioners’ sugar
- 1/2 cup unsalted butter, softened
- 1 teaspoon vanilla extract
- 4 bananas, sliced
- 20 oz can crushed pineapple, drained (reserve juice)
- 8 oz frozen whipped topping, thawed
- 1 1/2 cups chopped pecans or walnuts
- Mini chocolate chips (optional)
- Maraschino cherries, drained
Now, let’s chat about these ingredients a bit more. The graham cracker crumbs serve as a lovely crust, giving the cake a nice base, while the cream cheese mixture adds that luscious creamy layer we all dream about.
Those ripe bananas? They provide that classic banana split flavor, and don’t forget to toss them in the reserved pineapple juice—you really want to avoid any unsightly browning!
On top, the nuts add a satisfying crunch, and the whipped topping brings it all together with its lightness. You can even sprinkle on chocolate chips if you’re feeling indulgent.
Seriously, can this dessert get any better? So, grab your ingredients and let’s make some magic happen.
Step-by-Step Instructions
Making a Banana Split Cake is like commencing a delightful dessert journey—it’s satisfying to see all the layers come together! Don’t worry about it being complex; it’s actually pretty straightforward and a lot of fun! Let’s plunge into the step-by-step instructions.
1. Prepare Your Crust: Start by taking 2 cups of graham cracker crumbs and mixing them with 1/2 cup (that’s 1 stick) of melted unsalted butter. The mixture will be pretty sandy.
Once combined, press this mixture firmly into a 9×13-inch pan. You want it to be compact and even, so don’t be shy with those fingers. Now, pop it in the fridge to chill while you tackle the next layer.
2. Make the Cream Cheese Mixture**: Grab your mixer and beat together 8 oz of softened cream cheese, 1/2 cup of softened unsalted butter, 1 cup of confectioners’ sugar**, and 1 teaspoon of vanilla extract.
Blend everything until it’s nice and fluffy—think clouds of cream cheese goodness. To elevate your dessert experience, consider using a high end pasta maker to create homemade pasta dishes that can complement your cake for a complete meal. Spread this luscious mixture over your chilled graham cracker crust, covering it evenly.
3. Add the Bananas****: Time for the stars of the show—4 ripe bananas! Slice them up and gently toss them in that reserved pineapple juice (you did remember to save it, right?).
This step is vital because it keeps the bananas looking fresh and vibrant. Layer the banana slices right over the cream cheese mixture, creating a beautiful banana blanket.
4. Layer on the Pineapple: Open your 20 oz can of crushed pineapple (make sure it’s drained well) and spread it over the bananas.
This will add a lovely tanginess to the cake. It’s like a tropical party on each layer.
5. Top it Off with Whipped Cream: Grab your 8 oz of thawed frozen whipped topping and layer it over the top of the pineapple.
Smooth it out gently with a spatula so it looks nice and pretty. This fluffy layer is what dreams are made of!
6. Sprinkle the Goodies: Now for the fun part. Take 1 1/2 cups of chopped pecans or walnuts and sprinkle them over the whipped topping.
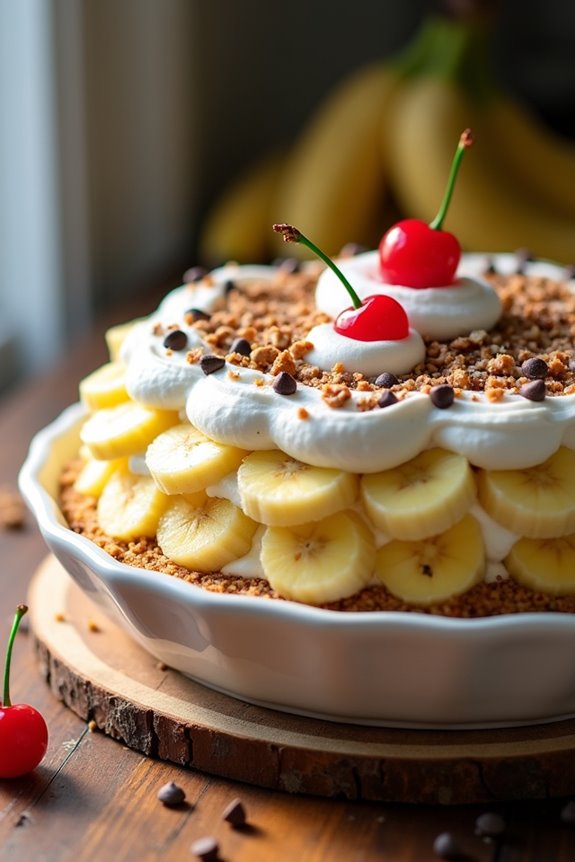
Feel free to get creative here—if you like, toss in some mini chocolate chips for extra indulgence. And, of course, don’t forget to add a few Maraschino cherries on top for that classic sundae look.
7. Refrigerate and Chill: It’s time to let this beauty chill. Cover your cake and put it in the fridge for at least 4 hours—though overnight is preferred if you can wait that long.
This resting time allows all those flavors to meld together and makes slicing more manageable.
And there you have it! You’ve created a delightful Banana Split Cake that’s as visually stunning as it’s delicious. A Lazy Susan Organizer can be a perfect addition to your kitchen for easy access to ingredients while crafting such delightful recipes!
Just remember, this cake is best enjoyed when chilled and shared with others. I guarantee every bite will bring smiles and happy reminisces of summer days, even if it’s the middle of winter.
Now, grab that fork and enjoy!
Tips & Variations
Even though the classic Banana Split Cake is a crowd-pleaser on its own, there’s always room for a little creativity and adaptation to make it even better.
I like to swap out the nuts for my favorite candies—think crushed Oreos or even gummy bears, depending on my mood.
If I’m feeling fancy, I’ll drizzle some chocolate syrup on top before serving.
Sometimes, I even add a layer of peanut butter spread for that extra kick.
And don’t forget, using pineapple juice is a must to keep those bananas from browning—trust me, I’ve learned that the hard way.
It’s all about personal taste, so don’t hesitate to experiment.
After all, it’s your slice of paradise.
How to Serve?
Serving up a Banana Split Cake is where the fun really begins. Imagine this: you slice into that chilled, creamy delight, and everyone’s eyes widen with anticipation.
I usually cut it into generous squares—don’t skimp, right? As I plate it, I like to top each piece with a drizzle of chocolate syrup or extra whipped topping. It’s the little finishing touches that wow the crowd.
Oh, and don’t forget the maraschino cherries on top; they add that classic touch. I often serve it with a side of ice cream for good measure—because why not double down?
You can see the smiles as I hand out the plates. It’s just a delightful moment, sharing something so delicious!
Storage & Reheating Guide
While you might be tempted to devour the entire Banana Split Cake in one sitting, proper storage can help you enjoy those delightful layers for even longer.
I usually cover the cake with plastic wrap, making sure it’s airtight to keep it fresh in the fridge. It should last about 3-5 days, but let’s be real, they might disappear faster than that.
If you can resist, it’s best to slice as you go; that way, the toppings stay intact.
Now, reheating isn’t really necessary, but if you want that cold treat soothing a warm day, just pull it out of the fridge for a few minutes. Really, who doesn’t enjoy a slightly softened bite? Remember, using essential tools for authentic cooking can also enhance your dessert-making experience.
Just don’t blame me if it vanishes.
Final Thoughts
As you plunge into making this Banana Split Cake, you’ll quickly realize it’s not just a dessert; it’s a delightful experience.
Trust me, when you see that beautiful layered masterpiece in the fridge, you’ll feel like a kitchen rock star. It’s almost too pretty to eat. Almost.
The blend of creamy, fruity, and crunchy textures makes every bite a celebration of flavor. And who wouldn’t want to indulge in a slice of something that literally tastes like childhood?
Remember, the key is letting it chill for hours—patience is a virtue, right? Plus, it gives you time to plan your grand reveal moment.