
I’ve got to say, the Vibrant Bell Pepper Sandwich is my go-to for turning a regular lunch into something that feels like a mini fiesta. Seriously, who knew sliced bell peppers could replace bread? It’s colorful, it’s crunchy, and let’s not forget the gooey Gruyère and savory ham—all of it just dances together in your mouth. Plus, it’s super easy to customize, which is perfect for my ever-evolving tastes. Trust me, you’ll want to know what’s next.
Why You’ll Love This Recipe
Let me tell you, you’re going to love this bell pepper sandwich recipe—at least I do, and I’m pretty picky when it comes to my food.
First off, the vibrant colors of those bell peppers get me every time. When you bite into that creamy Gruyère cheese paired with smokey ham, it’s like a flavor explosion.
Plus, it’s super simple to whip up, so you’ll have more time to binge-watch your favorite show instead of slaving away in the kitchen.
And let’s not forget about those greens. A handful of arugula adds a nice peppery kick.
Honestly, this bell pepper sandwich feels gourmet but takes hardly any effort. Who knew healthy could taste so good?
Trust me—give it a try.
Equipment List
When you’re ready to tackle this bell pepper sandwich, having the right equipment makes all the difference—trust me, I’ve learned that the hard way.
First off, grab a sharp knife for cutting those peppers. A cutting board helps too, unless you enjoy cleaning up a vegetable explosion. You’ll need a panini press or skillet to grill your masterpiece, and don’t forget a spatula for flipping.
Measuring spoons come in handy for that perfectly balanced drizzle of olive oil. Finally, position a plate nearby, so the finished product doesn’t become an accidental floor snack. Honestly, I’ve dropped more sandwiches than I care to admit.
One essential tool that can enhance the flavor profile of your sandwich is a garlic press, which allows you to easily add fresh garlic for a delicious kick.
With the right tools, your delicious lunch is just a sandwich away.
Our Ingredients
When it comes to whipping up a delicious bell pepper sandwich, having the right ingredients is key. You want layers of flavor, a crunch from the peppers, and that gooey cheese pulling apart as you take a bite.
Plus, let’s be honest—a well-stacked sandwich just feels like a hug between two vibrant peppers, doesn’t it? So let’s gather all the goodies we need to make this tasty creation happen.
Here’s what you’ll need:
- 2 large bell peppers (halved, seeded, membranes removed)
- 4 oz Gruyère or Swiss cheese, sliced
- 4 oz applewood smoked ham
- 1 tbsp whole grain or Dijon mustard
- A handful of arugula or spinach
- A drizzle of olive oil
- Salt and pepper to taste
Now, before you rush off to the store, let’s chat about a few important things when it comes to picking out your ingredients. To begin with, those bell peppers should be firm and shiny; nobody wants a soggy sandwich, right?
Go for the brightest colors—you’ll get a feast for the eyes, too. And while we love some melty, gooey cheese like Gruyère or Swiss, feel free to experiment with what you have on hand. Maybe you’re a cheddar lover, or perhaps you have a soft spot for pepper jack.
What about the greens? If you’re not in the mood for arugula or spinach, throw in some other fresh herbs or lettuce instead. The beauty of this sandwich is that it’s versatile; you can mix and match flavors to brighten your day.
Just remember, no matter what you choose, at the end of the process, you’re still going to bite into something delicious.
Step-by-Step Instructions
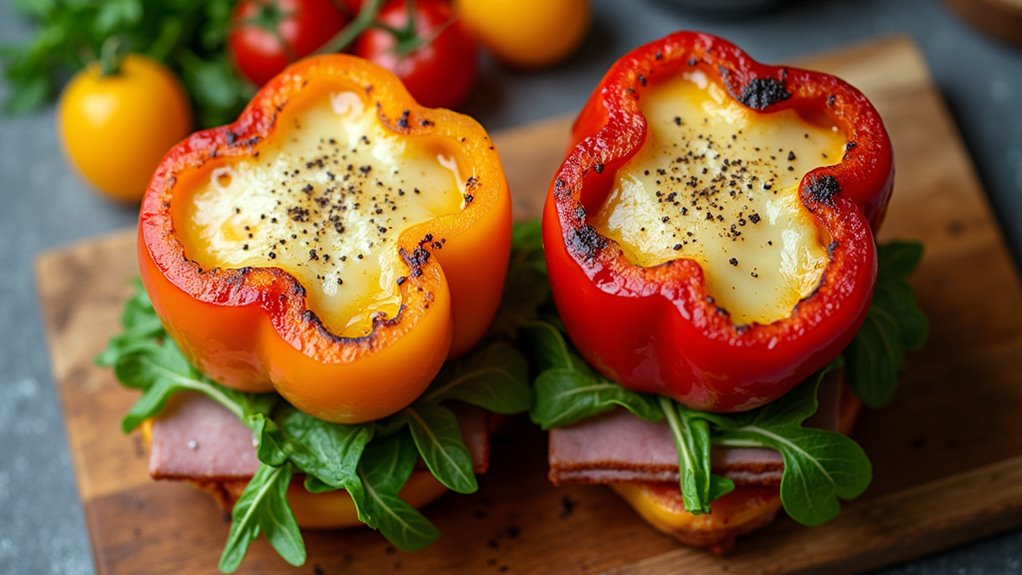
When it comes to putting together a bell pepper sandwich, it’s all about the layers—crunchy bell peppers, melty cheese, and delightful ham, all balanced with zesty mustard and fresh greens. It’s much easier than it sounds, and trust me, nobody will believe how simple it’s to make something this scrumptious. Let’s roll up our sleeves and plunge into the step-by-step process. Your taste buds are going to thank you.
1. Prep the Peppers: Grab those 2 large bell peppers. Cut each one in half lengthwise, making sure to remove the seeds and any membranes inside. This is where the magic happens—those colorful halves will serve as the perfect vessels for your filling.
(And did I mention, shiny and firm peppers are the key to avoiding a soggy sandwich?)
2. Make That Slit: Take a small knife and make a gentle half-slit on the sides of the pepper halves. This little trick helps them fold neatly around the fabulous filling you’re about to assemble. Think of it as making tiny pockets for flavor.
3. Spread the Mustard: Now, take your 1 tablespoon of whole grain or Dijon mustard and slather it generously inside each pepper half.
(Feel free to taste a little! Just a tiny dab, though—don’t triple dip.) This tangy spread will add a delicious zesty kick that pairs perfectly with the sweet pepper.
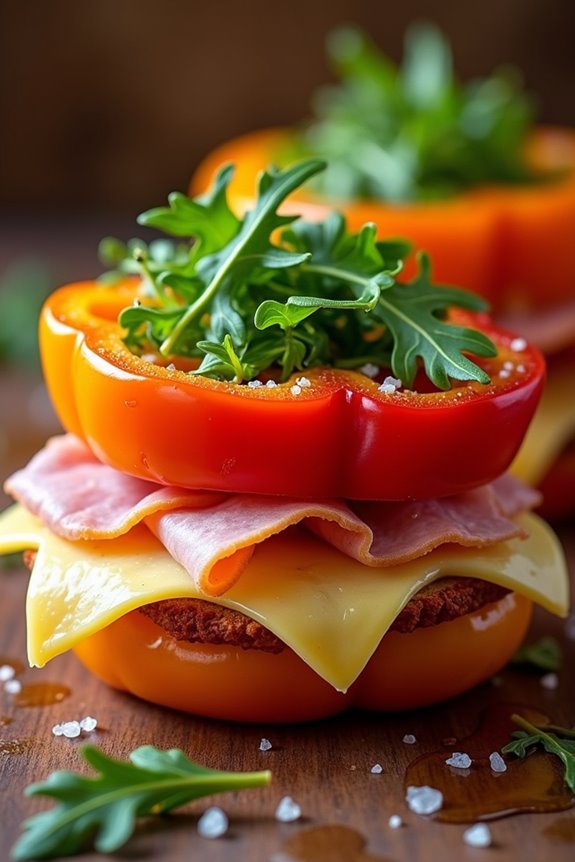
4. Layer with Goodness: Time for the tasty parts! Layer in 4 ounces of applewood smoked ham, followed by 4 ounces of sliced Gruyère or Swiss cheese. Don’t forget to toss in a handful of arugula or spinach for that fresh contrast.
(Can you hear the flavors singing? Because I can!)
5. Drizzle and Season: Give those layers a drizzle of olive oil, and sprinkle some salt and pepper for seasoning. This is where things start to get exciting, and the anticipation of biting into your grinder just builds.
(Remember, a little seasoning goes a long way—so don’t go overboard or you might need a gallon of water later.)
6. Grill Time: Place your beautifully stuffed peppers in a panini press or skillet. Grill them until the cheese is all melty and the peppers have softened to your liking—usually about 5 to 7 minutes.
(Keep an eye on them; nobody wants burnt edges ruining all of that glorious goodness.)
And there you have it! Once they’re perfectly grilled and beautiful, take them out, let them cool just a tad (if you can wait), and feast. Your bell pepper sandwich is ready to enjoy—who knew making something so vibrant and delightful could be this simple?
Just remember to keep it fun, and feel free to improvise with different ingredients next time. Happy munching! Additionally, you can enhance your cooking experience with premium cookware sets that provide excellent heat distribution and durability, making your bell pepper sandwich creation even more enjoyable.
Tips & Variations
After grilling up those gorgeous bell pepper sandwiches, you might be thinking, “How can I keep things fresh and exciting?”
Luckily, there are endless possibilities to play around with this tasty dish. For instance, try swapping the applewood smoked ham for turkey or even a grilled veggie mix if you’re feeling adventurous. I’ve done it, and trust me, it’s a game-changer.
If you’re a cheese-lover, pile on some pepper jack for a little zing. I like to drizzle some balsamic glaze on top for a sweet finish.
Feeling playful? Add sliced avocado or a handful of olives. Honestly, the sky’s the limit. Just remember to keep experimenting—your taste buds are begging for it.
How to Serve?
Serving your bell pepper sandwiches is almost as much fun as making them. I like to arrange them on a colorful platter, showcasing those vibrant peppers like a work of art. Sometimes, I even drizzle a bit of balsamic glaze on top for an extra pop.
If I’m feeling fancy—let’s be honest, who doesn’t love a little flair? I serve them with a side of crunchy chips or a light salad.
You can also toss in some fresh fruit for that delightful sweet contrast. If I’m going casual, I wrap them in parchment paper for an easy, on-the-go lunch.
Just don’t forget the napkins; things can get messy, but that’s part of the fun, right?
Storage & Reheating Guide
Once you’ve enjoyed those delightful bell pepper sandwiches, you’ll want to think about how to save the leftovers for later. I mean, why throw good food away, right?
I usually store them in an airtight container in the fridge; they last about three days. Using airtight food storage will help keep your food fresher for longer.
When it comes time to reheat, I place them in a skillet over medium heat. This way, I can crisp up the peppers again while melting that cheese.
Microwaving? Yeah, that can get soggy, so I avoid it if I can. Trust me, a slightly crispy sandwich is worth the extra effort.
But if you’re really pressed for time, just zap it for a minute. Experiment to find your sweet spot. Happy eating!
Final Thoughts
Whether you’re looking for a fun twist on a classic sandwich or just trying to sneak more veggies into your meals, making these bell pepper sandwiches is a win-win.
They’re colorful, flavorful, and ridiculously easy to throw together. I mean, who knew that swapping bread for bell peppers would make me feel like a culinary genius?
Plus, they’re perfect for meal-prepping; I whip them up ahead of time and just grab one for lunch.
Don’t forget to customize—maybe add some avocado or a sprinkle of feta if you’re feeling fancy.
Honestly, my only regret isn’t trying this sooner.