
I have to tell you, there’s something about Black Velvet Cake that just calls to me. Its rich chocolate flavor? Pure bliss. The moist texture? Totally irresistible. I first tried making this beauty for a friend’s birthday. Let’s just say, flour flew, and I had more chocolate on my face than in the bowl. But was it worth it? Absolutely. Stick around, and I’ll guide you through the simple steps to create your own decadent masterpiece.
Why You’ll Love This Recipe
When it comes to desserts, I’ve got a soft spot for anything rich and chocolaty, and that’s exactly why I adore this Black Velvet Cake. Imagine biting into a slice and feeling that indulgent chocolate melt in your mouth—pure bliss.
It’s not just any cake; it’s a showstopper. The dark, velvety texture is a feast for the eyes, making it perfect for any occasion. Plus, it’s surprisingly easy to make.
I’ve had my fair share of kitchen disasters (don’t ask about the soufflé), but this cake always comes through. Whether you’re celebrating a birthday or just treating yourself after a long day, this black velvet cake will steal the spotlight, leaving everyone wondering how you pulled it off.
Equipment List
Before diving into the deliciousness of this Black Velvet Cake, it’s important to gather your gear. You’ll need two 8-inch round cake pans, because let’s be honest, round cakes are the best cakes. Don’t forget some mixing bowls—one for dry ingredients and one for the wet stuff. A whisk or a mixer is essential; I can’t be trusted with a hand whisk. Measuring cups and spoons are non-negotiable; eyeballing just leads to chaos, believe me. You’ll also need a spatula for smoothing the batter and a cooling rack to prevent soggy bottoms. An oven thermometer is a smart move—your cake deserves precise baking. Additionally, it’s smart to have a quality set of premium steak knives for serving, as every great cake deserves a perfect cut. Investing in premium baking equipment not only enhances your baking experience but also helps ensure consistent results. With the right tools, we’re one step closer to cake perfection. Ready yet?
Our Ingredients
When it comes to baking a Black Velvet Cake, the right ingredients are essential. Each one plays a special role in creating that velvety texture and rich flavor we all love. Have you ever wondered how something can be so dark yet so delightfully sweet? It’s all in the magic of cocoa and other components coming together.
Trust me, stay close to this list, and you’ll be well on your way to cake bliss.
Ingredients:
- 2 cups all-purpose flour
- 3/4 cup black cocoa powder
- 2 cups granulated sugar
- 2 tsp baking soda
- 1 tsp baking powder
- 1/2 tsp salt
- 1 cup buttermilk, room temperature
- 1/2 cup vegetable oil
- 2 large eggs, room temperature
- 2 tsp vanilla extract
- 1 cup hot coffee or hot water
Now, while we’re gathering these tasty ingredients, remember a few things. The black cocoa powder is a must for that trademark color and flavor. Don’t even think about substituting with regular cocoa—it just won’t cut it.
Also, using room temperature ingredients—it’s a game-changer. It helps the batter blend beautifully and can make your cake rise perfectly.
Oh, and by the way, if you’re not a coffee fan, hot water can do the trick while still giving you that satisfying depth.
Step-by-Step Instructions
Making a Decadent Black Velvet Cake is a delightful experience that’s both simple and rewarding. Mixing the batter is quick and straightforward, so get ready to enjoy a rich, moist cake that’s simply irresistible. Follow these easy steps and you’ll be slicing into a velvety piece of heaven in no time.
- Preheat your oven to 350°F (175°C). While it’s warming up, take the time to grease and flour two 8-inch round cake pans. This step is essential, trust me. You don’t want your beautiful cake to stick when you try to take it out.
- Whisk together 2 cups of all-purpose flour, 3/4 cup of black cocoa powder, 2 cups of granulated sugar, 2 teaspoons of baking soda, 1 teaspoon of baking powder, and 1/2 teaspoon of salt in a large mixing bowl. This dry mixture is what gives the cake its structure and that deep, dark color—it’s like magic in a bowl. Choosing the right box grater can also help you achieve perfectly grated ingredients for your cake and frosting.
- In a separate bowl, whisk together 1 cup of room-temperature buttermilk, 1/2 cup of vegetable oil, 2 large eggs (also at room temperature), and 2 teaspoons of vanilla extract. This combination will guarantee your batter is moist and flavorful.
- Gradually combine the wet and dry ingredients, mixing until just combined. (Don’t overmix the batter—it should be slightly lumpy. We’re going for cake bliss here, not cake bricks.)
- Slowly add 1 cup of hot coffee or hot water into the mixture, folding it in gently. This step helps to create a smooth, luscious batter. The heat of the liquid activates the cocoa, deepening the flavors—trust it, you won’t taste the coffee at all!
- Pour the batter evenly into your prepared pans and place them in the preheated oven. Bake for 30-40 minutes, or until a toothpick inserted comes out clean. You’ll know it’s perfect when the cake springs back gently to the touch and the edges start to pull away from the pans.
- Remove the cakes from the oven and let them cool completely in the pans on a wire rack. Once they’re cool, gently run a knife around the edges to release them from the pans. Then flip each layer onto the rack—just don’t drop them, or you may find yourself in a cake-failure saga.
And there you have it—your Black Velvet Cake is on the way to being the star of any dessert table. Next up, you’ll want to frost it to make it extra special, but that’s an adventure for another time.
Additionally, remember that having the right shrimp cooking equipment can enhance your culinary experiences beyond baking.
Just remember to be proud of your baking skills—because this cake is going to impress everyone without a doubt!
Tips & Variations
Now that you’ve baked your Black Velvet Cake and it’s cooling like a champ, let’s chat about some tips and variations that can take your cake game to the next level.
First, don’t skimp on the black cocoa—it’s what gives that deep, rich flavor.
And please, try not to overmix! A few lumps are totally okay and help keep the cake moist.
Want to switch things up? Add a touch of espresso powder for extra depth, or toss in some mini chocolate chips for fun surprises in every bite.
If you’re feeling fancy, why not layer in some raspberry jam between the cake layers? Trust me, it’s a game changer.
Just remember to have fun with it—after all, that’s what baking’s all about.
How to Serve?
Serving your Black Velvet Cake is where the fun really begins.
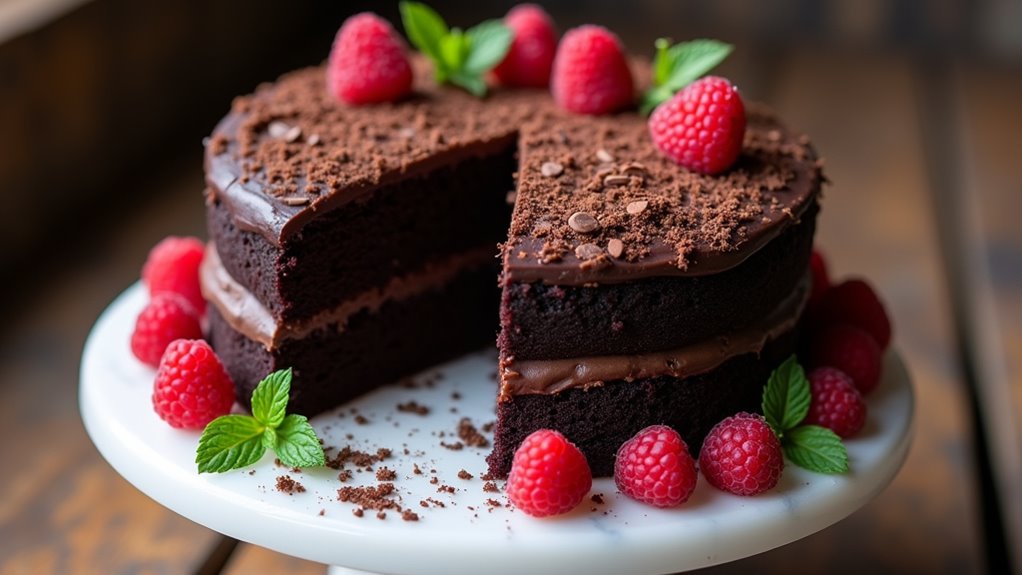
Imagine this: you pull out that gorgeous, rich cake, and everyone’s eyes light up. I usually slice it into generous wedges, making sure that each piece showcases that satisfying, deep color. Topping it with a velvety cream cheese frosting really elevates the experience—believe me, it’s a game changer.
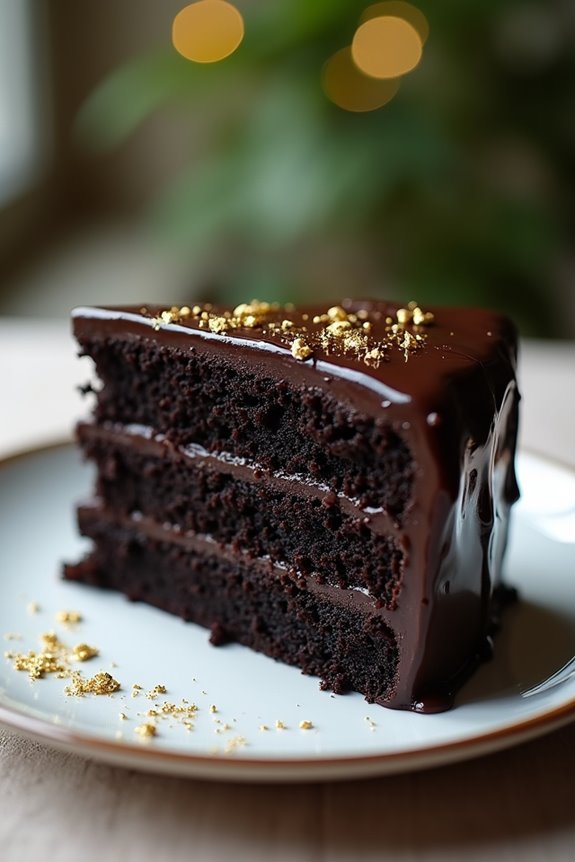
Sometimes, I sprinkle a bit of edible gold dust for that extra wow factor. And don’t forget the fresh berries! Placing them on the side adds a splash of color and a pop of tartness that’s just divine.
Honestly, it’s about creating a moment. Just remember to snap a pic before digging in; trust me, you’ll want to cherish that visually stunning slice.
Storage & Reheating Guide
Properly storing your Black Velvet Cake is key to keeping it moist and delicious for days, or even weeks. I usually wrap each layer tightly in plastic wrap once it’s cool, making sure no air gets in.
Then, I stack them in an airtight container. Trust me, this cake deserves better than being left out to dry.
If you have leftovers—lucky you—they’ll last about a week on the counter, or even longer in the fridge. Utilizing vacuum seal bags can further extend your cake’s freshness by removing air and preventing freezer burn.
When it’s time to enjoy your cake again, just let it come to room temperature. Feeling impatient? Pop a slice in the microwave for about 10 seconds; the chocolatey goodness will come rushing back.
Who needs a microwave? I might eat it cold!
Final Thoughts
As you take a moment to savor your Black Velvet Cake, you might realize just how satisfying it’s to create something so indulgent.
It’s like a warm hug in dessert form, isn’t it? This rich, chocolatey treat isn’t just for special occasions—it’s perfect for any day you want a little pick-me-up.
I remember the first time I baked this cake; it almost felt risky, but boy, was it worth it. You’ll probably have folks asking for seconds, or maybe that’s just my friends being polite.
Just embrace the messy kitchen and the joyful moments around the table. So go ahead, release your inner baker, and enjoy the delicious satisfaction of your efforts.
Trust me, you’ll be glad you did.