
I’ve always found that baking a sweet cherry pie is like a warm hug for the soul. There’s something magical about that flaky crust, right? It’s buttery and tender — just perfect for showcasing that luscious cherry filling. But let’s be honest, I’ve had my share of crust disasters. Ever had a pie so tough it could double as a hockey puck? Yeah, me too. Stick around, and I’ll share my secrets to nailing that crust and making your kitchen smell heavenly.
Why You’ll Love This Recipe
You know, when it comes to desserts, there’s just something about cherry pie that always pulls me in. Maybe it’s the sweet, tangy filling, or perhaps it’s that cherry pie with a flaky crust that makes my heart flutter. Honestly, I get a little giddy thinking about it.
Baking this pie feels like a delightful challenge—flaky crust perfection is a bit of an art, right? You’ll love how rewarding it’s when you pull it out of the oven, golden and beautiful. Plus, nothing smells quite like fresh cherry pie wafting through the house.
Trust me, there’s something magical about sharing a slice with friends, seeing their eyes light up. Will you join me on this cherry pie adventure?
Equipment List
When diving into your cherry pie journey, having the right equipment can truly make a world of difference.
First off, you’ll need a sturdy mixing bowl. Trust me, when you’re blending flour and butter, a flimsy bowl just won’t cut it. Investing in premium cooking appliances can enhance your overall baking experience.
A pastry cutter is a must; it’s my go-to tool for achieving that perfect crumbly texture. You’ll also want a rolling pin, preferably a heavy one, to roll out dough like a pro—I’ve learned the hard way that a lightweight rolling pin leads to uneven crusts. For even better results, consider using an adjustable rolling pin that allows you to roll dough to the perfect thickness every time.
And don’t forget a 9-inch pie dish; after all, no pie belongs on anything else.
Finally, a measuring cup and spoon are non-negotiable, or you might end up with a pie that’s more surprise than sweet.
Our Ingredients
When it comes to making a sweet cherry pie, the right ingredients can really set the stage for a delicious dessert. You want to gather everything you need before you begin, so you can focus on creating that heavenly pie without any interruptions.
Think of it like preparing for a game; you wouldn’t want to head into the field without your gear, right? So, let’s get you all set up with the essentials.
Here’s what you’ll need for your cherry pie:
- 1 ¼ cups of all-purpose flour, sifted
- 8 tablespoons of unsalted butter, chilled and cut into ½ inch pieces
- ¼ teaspoon of salt
- ¼ cup of ice-cold water
Now, let’s chat about those ingredients a bit. First off, that all-purpose flour serves as the foundation of your pie crust. It’s like the canvas for an artist—without it, you’ve got nowhere to start.
And speaking of starting, using chilled butter is key to that flaky texture we all love in a good pie. Saw some ninja tips about having it cold, so do yourself a favor and keep it in the fridge until you’re ready to add it.
Salt? Oh, it enhances flavor, balancing everything out nicely without trying to steal the spotlight. And let’s not forget the ice-cold water; it brings everything together in such a marvelous way.
If you’re feeling adventurous, consider doubling the crust ingredients for a delicious top layer, but that’s a whole different pie story we can explore later. Now, grab those ingredients, and let’s get ready to create some pie magic!
Step-by-Step Instructions
Making a sweet cherry pie is a delightful experience, perfect for any occasion—or even just a cozy night in. You’ll be crafting that flaky, buttery crust from scratch, filling it with a luscious cherry filling, and soon you’ll have a pie that’s as beautiful as it’s delicious. Let’s roll up our sleeves and immerse ourselves in these simple steps.
Step-by-Step Instructions
1. Prepare the Pie Crust: In a bowl, combine 1 ¼ cups of all-purpose flour** and ¼ teaspoon of salt**. It’s best to do this first—it means we can focus on the delightful butter next.
Now add 8 tablespoons of unsalted butter, making sure it’s chilled and cut into ½ inch pieces. Don’t just throw it all in at once; you want to be gentle, kind of like coaxing a shy kitten out from under the bed. Using a professional kitchen torch afterwards can also help achieve perfect caramelization on any toppings.
2. Blend Until Crumbly: Grab a pastry cutter and work that butter into the flour mixture. You’ll want to blend until it resembles coarse crumbs—it could take a couple of minutes but hang in there!
This is where the magic happens for a flaky crust. If you’re staring at what looks like a sad clump of flour, don’t worry; keep going.
3. Add Water: Now, it’s time to bring it all together. Gradually add ¼ cup of ice-cold water****. Don’t just dump it in; sprinkle it slowly while mixing until the dough starts to hold together.
Keep in mind, it should be a little shaggy—that’s totally okay. You’re not making bread, after all—just a pie crust.
4. Chill the Dough: Once your dough is together, wrap it in plastic wrap and pop it in the fridge for 1 hour. This step is essential, so don’t skip it; it allows the butter to chill and keeps everything nice and flaky for baking.
Use this time to imagine the sweet aroma of cherry pie drifting through your kitchen.
5. Roll Out the Dough: After the hour’s up, take your dough out and roll it into a 13-inch circle on a lightly floured surface. It’s a bit like rolling out pizza dough but way more satisfying.
Once you have your circle, carefully fit it into a 9-inch pie dish. Don’t fret if it tears a bit—just patch it up with spare dough. We’re not going for perfection; we’re aiming for deliciousness.
6. Chill Again: Before you fill it, chill the crust again for about 30 minutes. This keeps that wonderful flaky texture that’s so beloved in pies.
It’s a little like letting a good book sit for a bit before getting into it; the anticipation just makes it better.
7. Fill and Bake: Now comes the exciting part: add your cherry pie filling (that part you might want to have ready ahead of time).
Bake according to your filling instructions, but generally, it’s around 25-30 minutes, or until the crust is golden brown and the filling is bubbly. Ah, you can almost hear the pie humming with joy.
8. Cool and Serve: Once you’re out of the oven, let your pie cool for a bit—it’s hard, I know. But if you jump in too soon, it’ll be a hot mess.
So, give it some time to set.
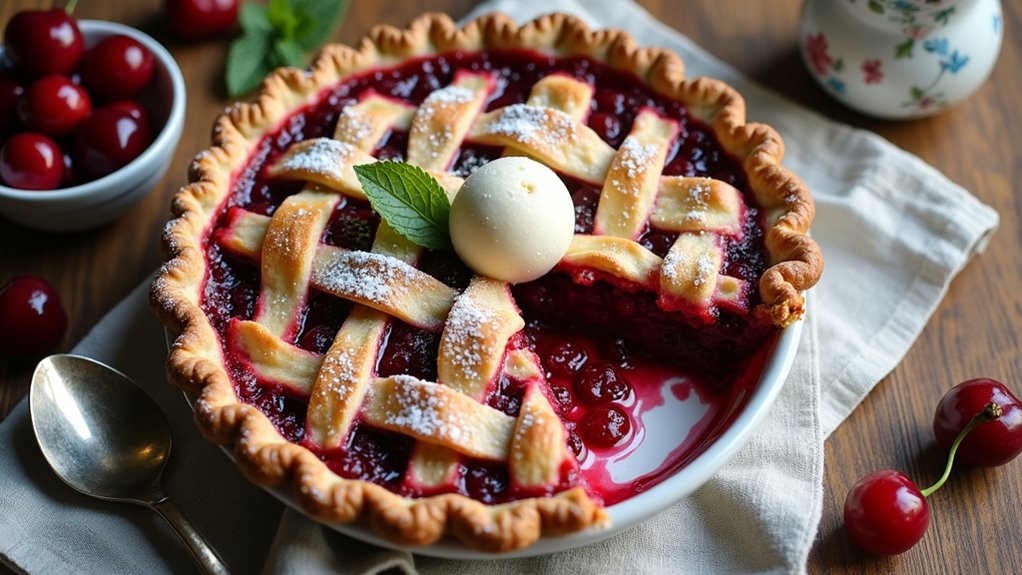
And there you have it! A beautiful cherry pie that’s begging for a dollop of whipped cream or a scoop of vanilla ice cream on the side.
What’s more satisfying than homemade pie? Trust me, it’s worth every minute spent. Make sure to use high-quality gourmet kitchen gear that can elevate your pie-making experience. Happy baking!
Tips & Variations
After you’ve rolled out that flaky crust and placed it in the pie dish, it’s time to think about how to make your cherry pie really shine.
First off, double your crust recipe if you want that beautiful, flaky top crust, because let’s be honest, who doesn’t love more pie crust?
Keep everything cold; I can’t stress this enough. It’ll help your crust stay tender and flaky, just how we like it.
Want a twist? Consider adding a touch of almond extract to your cherry filling; trust me, it takes the flavor to another level.
Also, don’t forget to sprinkle some sugar on top before baking for that lovely caramelization.
Experimenting is part of the fun, right?
How to Serve?
Serving up a slice of cherry pie feels like a little victory, doesn’t it?
I love to serve my cherry pie warm, just slightly cooling from the oven, so you can really savor that flaky crust. I often top each slice with a generous scoop of vanilla ice cream—that sweet meltiness can’t be beat. You could also sprinkle some powdered sugar on top, if you’re feeling fancy.
Don’t forget the fork! There’s something satisfying about the sound of pie crust cracking as you dig in.
And sure, I might’ve had a slice before serving—no judgment here. It’s all about enjoying the moment.
Feeling like a pie hero? You should. You deserve that victory.
Storage & Reheating Guide
Once that delicious cherry pie has had its moment in the spotlight and everyone’s enjoyed a slice (or two, no judgment here), you’ll need to think about how to store those tasty leftovers.
First, let the pie cool completely, or you’ll end up with a soggy bottom—a fate I’ve tragically experienced. Cover it with plastic wrap or aluminum foil and place it in the fridge.
It’ll be good for about 3-5 days. To maximize freshness, consider using airtight food storage solutions for optimal preservation.
When you’re ready to relive the cherry goodness, preheat your oven to 350°F. Just pop that pie back in for about 10-15 minutes.
The crust will crisp up, and the filling warms through, making it feel fresh again. Trust me, it’s worth it.
Final Thoughts
Even if you think you can’t bake, I’m here to tell you that making a cherry pie is easier than it seems. Trust me, if I can create this flaky masterpiece without turning my kitchen into a disaster zone, so can you.
You’ll enjoy the satisfying crunch of that crust and the sweet-tart burst of cherries. I still remember the first time I attempted it; I was half convinced I’d ruin everything. Spoiler alert: it turned out delicious!
The secret? Keep your ingredients cold and don’t rush the process. Don’t sweat the small stuff; it’s all about the love you put into it.