
When I first attempted making chicken enchiladas with creamy white sauce, I’ll admit, it was a bit of a culinary adventure—imagine a kitchen flour explosion. But the result? Pure comfort on a plate. There’s something about those soft tortillas hugging tender chicken and that dreamy sauce that always hits the spot. Want to create your own comforting masterpiece? Stick around; I’ve got some easy steps and tasty tips to help you out.
Why You’ll Love This Recipe
If you’ve ever found yourself craving that perfect combination of savory chicken, creamy sauce, and gooey cheese, then you’re in for a treat with these chicken enchiladas with sour cream white sauce. Honestly, there’s something magical about how the sauce melds with the chicken and cheese, creating comfort in every bite.
I remember the first time I made these; I ended up munching on the leftovers for days, and let’s just say my friends weren’t amused—more for me, right?
Plus, they’re super easy to whip up, making weeknight dinners a breeze. You won’t just love the taste; you’ll appreciate how quickly they come together. Trust me, you’ll be the star of the dinner table.
Equipment List
Making those delicious chicken enchiladas is just the beginning of your culinary adventure. First off, you’ll need a neat array of tools.
A good roasting pan or 9×13 baking dish is a must—trust me, those enchiladas need their cozy space. You’ll want a large mixing bowl for that creamy, dreamy white sauce.
Don’t forget a sturdy spoon for detailed mixing; no one likes lumpy sauce. A cutting board and knife are essential for prepping your chicken—watch those fingers!
Also, some measuring cups would be great for portioning cheese and sauce. Oh, and paper towels are your best friend for quick cleanups. An apple corer can also be a handy tool for quickly preparing apple slices if you’re looking for a fruity side dish.
With this equipment on hand, you’re all set for an enchilada extravaganza. Let’s get cooking!
Our Ingredients
When it comes to making a comforting meal, nothing quite hits the spot like chicken enchiladas.
They’re not just tasty; they’re also super satisfying, with the creamy white sauce and melty cheese that can make anyone’s taste buds dance.
And let’s be honest, who doesn’t love a good cheese pull?
Before we plunge into the kitchen and get our hands a little messy, let’s gather our ingredients!
This part is essential; you want everything ready and waiting so you can whip up those enchiladas like a pro.
Ingredients:
- 10 flour tortillas (taco size)
- 16 oz sour cream
- 10.5 oz canned cream of chicken soup
- 4 oz canned diced green chiles
- 5 cups cooked shredded chicken
- 2 cups shredded Monterey Jack cheese
- 1 cup shredded cheddar cheese
Now, when it comes to the ingredients, a few things might cross your mind.
First, do you prefer flour or corn tortillas?
While this recipe calls for flour, corn adds a unique texture and authentic flavor if you want to mix it up a bit.
Also, don’t skimp on the cheese; it’s what makes these enchiladas truly delicious.
If you want to spice things up, consider adding some jalapeños to that hearty filling.
And hey, use rotisserie chicken for a quicker prep—it’s a game changer when you’re in a rush.
So, with your ingredients prepped and your choice of flavors decided, you’re ready for the next exciting part: the step-by-step instructions.
Let’s get cooking!
Step-by-Step Instructions

Making chicken enchiladas is a fun and delicious way to bring a taste of Mexico to your kitchen. These comforting bundles of joy, stuffed with flavorful chicken and topped with a creamy white sauce, are bound to impress your family and friends. Ready to jump in? Let’s walk through the step-by-step process of creating these mouthwatering enchiladas!
Step-by-Step Instructions
1. Preheat your oven to 350°F (that’s about 175°C for our metric folks). You want it nice and cozy for those enchiladas, helping to get them bubbly and delicious.
2. Warm the tortillas: Grab a 9×13 baking dish and place your 10 flour tortillas inside. Pop them in the oven for about 5 minutes. This will soften them, making them easier to roll without tearing. Trust me, you don’t want to be wrestling with an overcooked tortilla.
3. Mix your sauce: In a mixing bowl, combine the 10.5 oz of canned cream of chicken soup, 16 oz of sour cream, and 4 oz of canned diced green chiles. Stir them together until it’s a smooth, creamy goodness.
(And breathe in that delightful aroma—it’s just a hint of what’s to come.)
4. Fill the tortillas: Once your tortillas are warm and pliable, take one and lay it flat. Spoon in about ½ cup of your cooked shredded chicken, followed by 2 tablespoons of that luscious sauce you just made, and a sprinkle of ½ cup shredded Monterey Jack cheese.
Rolling it up tightly, place the tortilla seam-side down in your baking dish. Repeat this for all 10 tortillas.
(Feeling like an enchilada-making pro yet?)
5. Cover your enchiladas: After you’ve arranged all those delightful rolls in the dish, pour the remaining sauce over the top. Then, sprinkle the rest of your shredded cheeses—the 2 cups of Monterey Jack and 1 cup of cheddar—over everything.
It’s like a cheesy blanket for your enchiladas. You should be excited by now!
6. Bake it: Cover the baking dish with aluminum foil, which will help create that perfect bake. Place it in the preheated oven and let it bake for 25 minutes.
7. Uncover and finish: After 25 minutes, remove the foil and let it bake for an additional 5 minutes.
This step lets that cheese get all melty and slightly golden. Take a moment to appreciate that cheese pull you’re about to experience.
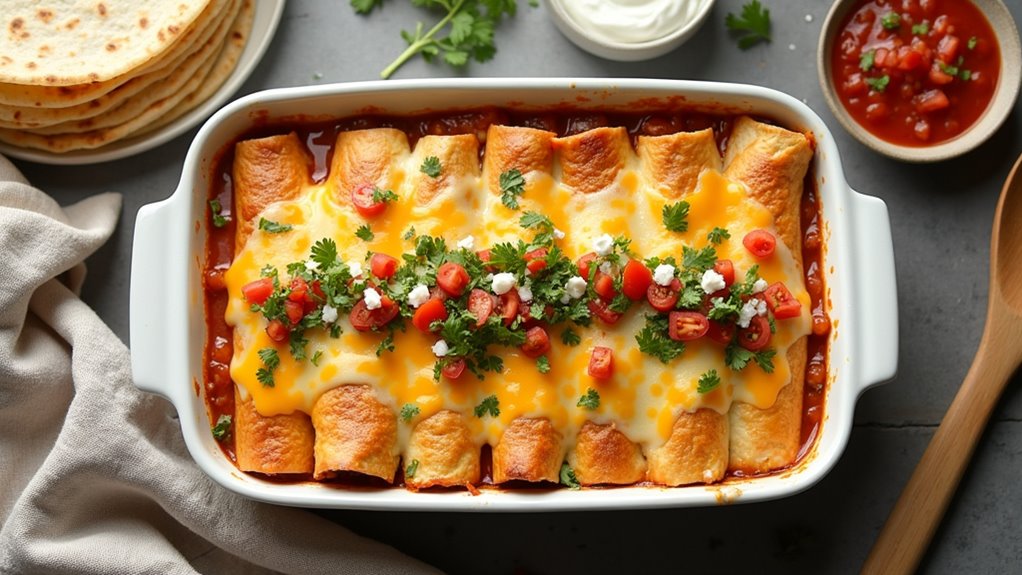
8. Serve and enjoy: Once everything is bubbly and golden, take the dish out of the oven (watch out—it’s hot!). Let it sit for a few minutes to cool.
Then, serve with your favorite toppings like chopped cilantro, salsa, or extra sour cream if you like it extra creamy.
And there you have it—homemade chicken enchiladas that aren’t just delicious, but also provide that warm, fuzzy feeling we all crave. In addition to adding delightful flavors to your meal, using a high-end waffle maker can elevate your breakfast game with homemade waffles that pair perfectly with these enchiladas.
Now, give yourself a pat on the back; you just created something wonderful!
Tips & Variations
While you might think chicken enchiladas are a one-size-fits-all dish, there are plenty of ways to get creative and make this recipe your own.
For starters, can you believe how versatile those tortillas can be? Swap in corn tortillas for a gluten-free option or try whole wheat for a healthier twist.
Feeling adventurous? Toss in some black beans or corn for added flavor and texture. And if you’re like me, you might forget ingredients now and then—no worries!
Use whatever cheese you’ve got in the fridge. As for spice, don’t hesitate to add jalapeños or chiles to the mix.
Trust me, my mishaps in the kitchen often lead to the best discoveries. Happy cooking!
How to Serve?
Serving up chicken enchiladas can feel as exciting as a mini celebration, especially after putting in all that love and effort. I like to bring them to the table hot and bubbling, with that creamy white sauce just begging for a taste.
Plating them with a sprinkle of fresh cilantro or sliced green onions adds that special touch, don’t you think? I also like to serve a side of black beans or a light salad for color and freshness.
Don’t forget some tortilla chips and salsa for that crunch factor. It’s like a fiesta on the plate!
Just be careful not to burn your mouth trying to grab that first bite – trust me, I’ve learned the hard way.
Storage & Reheating Guide
After a delightful meal of chicken enchiladas, you might find yourself thinking about what to do with the leftovers—if there are any, that is.
If you’re lucky enough to have some, you can store them easily. Just pop those enchiladas in an airtight container and place them in the fridge where they’ll last about three to four days.
Craving a warm bite later? No problem. Preheat your oven to 350°F, cover your dish with foil to keep them moist, and bake for around 20–25 minutes.
Want to skip the oven? Microwave them for about a minute, but beware—the cheese can get a bit melty. Trust me, nobody wants to be fishing gooey cheese off the roof of their microwave. For longer-term storage, you can also use freezer storage bags to keep them fresh for up to three months.
Final Thoughts
As you finish up your last delicious bite of those chicken enchiladas, it’s hard not to feel a little proud.
You’ve just created a comforting dish that’s perfect for any occasion, whether it’s a weeknight dinner or a gathering with friends.
Honestly, who would’ve thought something so tasty could come together with just a few ingredients?
I mean, I’m no chef, but even I can handle this.