

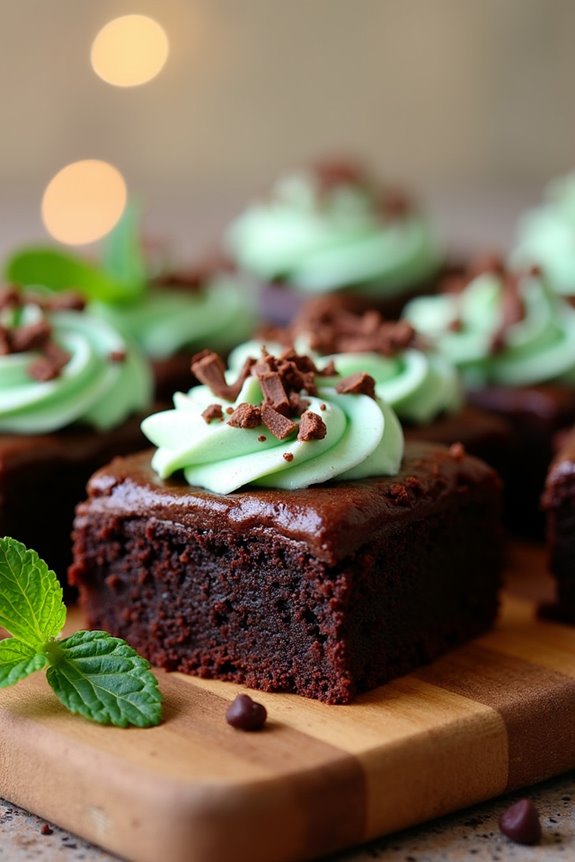
Let me tell you, there’s nothing quite like indulging in a warm, fudgy brownie that’s infused with a burst of minty freshness. I mean, who can resist, right? Imagine this: a rich chocolate base, topped with a creamy peppermint frosting that just makes your taste buds dance. Every bite is a little piece of heaven. I’ve tried many versions, and trust me, this one is a game changer. Want to find out how to whip up this sweet bliss at home?
Why You’ll Love This Recipe
Let me tell you, there’s something magical about the combination of chocolate and mint that just makes these brownies irresistible. Honestly, I think it’s a match made in dessert heaven.
The fudgy texture? Perfect. The invigorating hint of mint? A delightful surprise. I remember the first time I baked chocolate mint brownies; I couldn’t stop sneaking them off the counter.
And when I finally served them to friends, their eyes lit up. It’s like everyone shared that secret excitement over those vibrant flavors. Plus, they’re surprisingly simple to make.
One bite, and you’ll be hooked. So, why wouldn’t you want to whip up a batch? Trust me, these chocolate mint brownies will become a favorite in your recipe book.
Equipment List
Baking these chocolate mint brownies is like a sweet adventure, and having the right equipment can make all the difference.
First, grab an 8×8-inch baking pan; that’s my go-to for perfectly thick brownies.
You’ll need a mixing bowl to whip up that luscious batter—something big enough to contain my love for chocolate.
An electric mixer? Best friend. It saves my poor arms from battling those egg yolks. Having a good quality professional baking equipment can streamline your baking process significantly.
Don’t forget a spatula; it’s essential for scraping every final bit from the bowl.
A whisk helps combine dry ingredients easily.
Ultimately, parchment paper is a lifesaver for easy cleanup.
Trust me, I’ve tried the “no parchment” route, and my brownies still haunt my dreams. Additionally, using premium grill accessories can elevate your outdoor cooking experience and bring joy to every culinary endeavor.
Our Ingredients
Alright, let’s talk about the glorious ingredients that make up these chocolate mint brownies! Just thinking about them gets me all excited. I’m talking about that rich chocolate flavor, the invigorating mint kick, and the slightly fudgy texture that can make anyone swoon. Seriously, once you get a taste of these brownies, you’ll want to bake a batch for every occasion just to share the joy—or to keep them all to yourself. I don’t blame you if you go the latter route, though.
Here’s what you’ll need to whip up these delightful treats:
- 1 cup unsalted butter (for the brownie base)
- 8 oz semi-sweet chocolate, chopped (the heart and soul of the brownies)
- 1½ cups granulated sugar (for that sweet kick)
- ½ cup packed light brown sugar (a touch of caramel flavor)
- 4 large eggs (the magic binding agents)
- 2 tsp vanilla extract (instant flavor boost)
- ½ tsp salt (it enhances all the sweetness)
- ⅝ cup all-purpose flour (for the structure)
- ¼ cup unsweetened cocoa powder (for deeper chocolate flavor)
- ½ cup unsalted butter (for the frosting)
- 2 cups confectioners’ sugar (for that sweet, fluffy frosting)
- 2 tbsp milk (to make the frosting spread just right)
- 1¼ tsp peppermint extract (the minty invigorating touch)
- ½ cup unsalted butter (for the chocolate ganache)
- 1 cup semi-sweet chocolate chips (for that gooey chocolate layer on top)
Now, let’s take a moment to appreciate these ingredients. Choosing high-quality chocolate is key here, because let’s be real—no one likes a brownie that tastes bland.
Semi-sweet chocolate brings that perfect balance between sweet and rich. And the unsweetened cocoa powder? Well, that just amps up the chocolate factor!
Also, make sure you have your mint extract at hand. Too much can overpower the brownies, but just the right amount? It transforms each bite into a mini celebration of flavor.
Oh, and don’t skip the frosting. It’s like adding a cherry on top but with a chocolatey twist. Trust me, there’s a reason why I might go back for seconds—and it has a lot to do with that frosting!
Step-by-Step Instructions
6. Carefully fold the dry ingredients into your chocolate mixture. Do this gently to avoid overmixing (we want those delightful little lumps that signal fudgy goodness). Investing in high-end cooking appliances can elevate your baking experience, ensuring consistent results.
7. Once combined, pour the batter into a greased or parchment-lined 9×13-inch baking pan. Spread it out evenly—no one likes an uneven brownie.
8. Pop it in the oven and bake for about 25 minutes, or until a toothpick inserted in the center comes out with a few moist crumbs. You’ll know those brownies are ready to shine when they spring back slightly when touched.
9. While the brownies bake, make the frosting by beating together ½ cup of unsalted butter, 2 cups of confectioners’ sugar, 2 tablespoons of milk, and 1¼ teaspoons of peppermint extract in a mixing bowl until fluffy. This frosting is the icing on the cake—er, brownies.
10. Once the brownies are out of the oven, let them cool completely in the pan. This is a great time to re-evaluate your life choices while waiting for those brownies to cool (we all know that waiting game).
11. When cooled, spread the mint frosting evenly across the top. Don’t be shy here—this is where your brownies truly start to express themselves.
12. For the chocolate layer, melt another ½ cup of unsalted butter with 1 cup of semi-sweet chocolate chips. Stir until you’ve got a silky ganache.
13. Pour this chocolate goodness over your frosted brownies, spreading it around to cover every little bit.
14. Finally, chill the brownies**** in the fridge for at least 30 minutes before slicing. This helps the ganache set up nicely and makes for cleaner cuts.
And there you have it! Your chocolate mint brownies are ready to impress family, friends, or maybe just to keep all to yourself. (I won’t tell if you don’t!)
Additionally, having the perfect large capacity electric griddle can be a game changer when preparing snacks for gatherings or enjoying a large batch of brownies with friends.
Tips & Variations
When it comes to chocolate mint brownies, there are countless ways to make them your own. For a richer taste, try swapping in dark chocolate instead of semi-sweet.
I once added crushed Andes mints to the batter, and wow, it was heavenly. Really, who can say no to a burst of minty goodness? If you’re feeling adventurous, throw in some chopped nuts or even a hint of espresso powder for depth.
Don’t forget, chilling the brownies for a bit after frosting helps everything settle beautifully, trust me.
And if you’re short on time, pre-made frosting works in a pinch, but you didn’t hear that from me. You’ll still have a crowd-pleaser that’s guaranteed to impress.
How to Serve?
Serving chocolate mint brownies is half the fun, you know? First, I like to slice them into generous squares—sometimes I even cut them into hearts for special occasions.
Place them on a nice platter; it makes such a difference. Then, sprinkle some crushed peppermint or drizzle extra chocolate on top for that festive flair.
Want to impress even more? Serve each brownie with a scoop of vanilla ice cream. The creamy contrast is heavenly.
I’ve been known to have a little “taste test” before serving, just to verify they’re perfect. And trust me, no one judges if you sneak one or two!
Storage & Reheating Guide
Although I often find it hard to resist devouring an entire batch of brownies in one sitting, I’ve learned a thing or two about storing the leftovers—if there are any.
First, let them cool completely before wrapping them up. I usually grab a tight container and line it with parchment paper, because nobody likes stuck brownies. They can last about a week in the fridge, but trust me, they won’t last that long.
For reheating, I just pop a piece in the microwave for 10-15 seconds. Just enough to bring back that gooey goodness, without turning it into a chocolate lava disaster.
Interestingly, using stretchable bowl covers can help keep your treats fresher for longer by sealing in moisture and flavor.
Seriously, keep an eye on it. Enjoy those treats, even if it’s just one tiny bite at a time.
Final Thoughts
After finding the perfect way to store and reheat those delicious brownies—if you have any leftover, that is—it’s time to wrap things up with a few final thoughts.
You’ll love how the chocolate and mint dance together in every bite. Honestly, who can resist that? If you’re anything like me, you’ll find them disappearing way too fast. So, share them with friends or prepare to face the chocolate cravings alone.
Just remember, patience is key when frosting and layering; try not to devour them before they cool. Trust me, I’ve been there.
These brownies not only satisfy the sweet tooth but also bring a bit of joy to everyday life. Enjoy every indulgent moment—you deserve it!