
When it comes to holiday baking, I’ve found that the Joyful Christmas Kitchen Sink Cookie Recipe is a total winner. It’s got this buttery goodness with just about everything thrown in—think M&M’s, pretzels, and even crushed candy canes. Honestly, it’s like your cookie dreams exploded in the best possible way. And the best part? You can totally go wild with the mix-ins. What’s more festive than that? Stick around; I promise the rest will be just as fun.
Why You’ll Love This Recipe
When you think of the holidays, what comes to mind? Is it the twinkling lights, the festive gatherings, or maybe the irresistible treats?
For me, it’s definitely Christmas kitchen sink cookies. These cookies are like a party in your mouth. You’ve got chocolate, pretzels, and even potato chips all in one bite. How can you not love that?
They’re forgiving, too—I always mess up measuring and somehow still end up with delicious cookies. Plus, they’re a great way to use up all that random stuff in your pantry.
Every batch feels like a holiday surprise. Trust me, your friends and family will think you’re a baking genius, and you’ll just smile, knowing it’s all a delicious happy accident.
Equipment List
Baking those Christmas kitchen sink cookies is just as much about the tools you use as it’s about the ingredients. I mean, have you ever tried mixing sticky dough with a flimsy spoon? Not a fun time.
So, grab a sturdy mixing bowl—one that can handle some serious elbow grease. You’ll need a hand mixer (or a whisk if you’re feeling ambitious) for fluffy butter and sugar. Investing in a professional kitchen mixer can make this task even easier and more efficient.
Then, get some measuring cups and spoons; precision is key, especially when you’re mixing in all those tasty treats. A baking sheet lined with parchment paper will save you from cookie disasters.
And don’t forget a spatula for scraping every last bit of that delicious dough. Trust me, it’s worth it. Lastly, consider investing in an outdoor grill smoker combo to elevate your holiday dessert experience by adding a unique flavor to your cookies.
Our Ingredients
When it comes to baking Christmas kitchen sink cookies, the ingredients are what really make the magic happen. Just imagining that buttery sweetness combined with a rainbow of flavors, crunchy pretzels, and even some salty potato chips brings a smile to my face.
Who knew cookies could be such a wonderful mashup? If you’re ready to whip up a batch that will have everyone at the holiday party swooning, here’s an extensive list of what you’ll need.
- 1 cup softened butter
- 1 cup brown sugar
- 3/4 cup granulated sugar
- 2 large eggs
- 1 teaspoon vanilla extract
- 2 3/4 cups all-purpose flour
- 1 teaspoon baking soda
- 1/2 teaspoon salt
- 1 1/2 cups Christmas M&M’s
- 3/4 cup mini pretzels, crushed
- 3/4 cup potato chips, crushed
- 2 tablespoons sprinkles
- 1 cup semi-sweet or white chocolate chips (optional)
Now, let’s talk about some of these ingredients. Butter, for example, should be softened—this means you don’t want to zap it in the microwave and risk melting it into a puddle. Nope, just let it sit at room temperature for about a half-hour if you can.
And when it comes to those Christmas M&M’s, you can totally go wild! Not only are they festive, but they also add a burst of color and sweetness that just screams holiday cheer.
And of course, feel free to mix and match your chocolate chips; semi-sweet or white is all up to what your taste buds are craving. Just remember, it’s all about balance. The sweet and salty combo will leave you reaching for one more cookie, and who can resist that?
Step-by-Step Instructions

Mixing the batter for these Christmas Kitchen Sink Cookies is quick and simple—following these easy steps will have you well on your way to delicious, festive treats that everyone will adore. Are you ready to jump into the cookie-making magic? Just gather your ingredients, and let’s get started!
1. Preheat the Oven: Begin by preheating your oven to 350°F (175°C). This is essential to guarantee your cookies bake perfectly and evenly, so don’t skip this step.
2. Cream the Butter and Sugars: In a large mixing bowl, beat together 1 cup of softened butter, 1 cup of brown sugar, and 3/4 cup of granulated sugar. You want the mixture to look light and fluffy, which usually takes about 2-3 minutes of mixing. Just think of it as giving your butter a luxurious spa treatment.
3. Add the Eggs and Vanilla: Next, crack in 2 large eggs and add 1 teaspoon of vanilla extract to the buttery mixture. Beat everything together until it’s well combined. The aroma of vanilla will make your kitchen feel like a holiday wonderland, I promise.
4. Mix Dry Ingredients: In a separate bowl, whisk together 2 3/4 cups of all-purpose flour, 1 teaspoon of baking soda, and 1/2 teaspoon of salt. Gradually add this dry mix to your wet ingredients, mixing until just combined (Don’t overmix the batter—it should be slightly lumpy). Using quality kitchen appliances gourmet cooking will make this process even easier and more efficient.
5. Stir in the Fun Stuff: Now comes the fun part! Fold in 1 1/2 cups of Christmas M&M’s, 3/4 cup of crushed mini pretzels, 3/4 cup of crushed potato chips, and 2 tablespoons of sprinkles. If you’re feeling extra sugary, you can also toss in 1 cup of semi-sweet or white chocolate chips.
Make sure everything is evenly distributed, but be gentle.
6. Scoop the Dough: Using a rounded spoon or cookie scoop, drop the cookie dough onto the prepared baking sheets. Make sure to give them some space, as they’ll spread a bit while baking. If you want those add-ins to really shine, press a few extra on top of each dough ball before baking.
7. Bake: Pop the cookie-filled sheets into your preheated oven and bake for about 10 minutes. You’ll know they’re ready when the edges turn golden brown. Enjoy the heavenly aroma wafting through your home—you might’ve to stop yourself from eating the dough now!
8. Cool and Transfer: Once baked, let your cookies cool on the baking sheet for 5 minutes. After that, carefully transfer them to a wire rack to cool completely.
Try not to eat them all while they’re still warm; your future self will thank you when you save some for later!
And there you have it, folks! With just a few easy steps, you’ve turned a simple list of ingredients into glorious Christmas Kitchen Sink Cookies that are sure to impress. Who knew baking could feel this rewarding?
Investing in quality cooking equipment gourmet kitchen can significantly enhance your baking experience!
Tips & Variations
Although I’m no Martha Stewart, I’ve picked up a few handy tips over the years that can elevate your Christmas Kitchen Sink Cookies to a whole new level.
For a festive twist, try swapping in crushed candy canes instead of sprinkles—trust me, it’s magical. And if you want that wow factor, press extra M&M’s or pretzels on top right before baking. You’ll feel like a cookie rockstar.
Oh, and keep a close eye on baking time; every oven’s different, and burnt cookies are the saddest tragedy.
When it’s time to cool, patience is key—if you can resist the temptation, let them sit a bit before storing. After all, the longer they last, the more joy you can spread.
How to Serve?
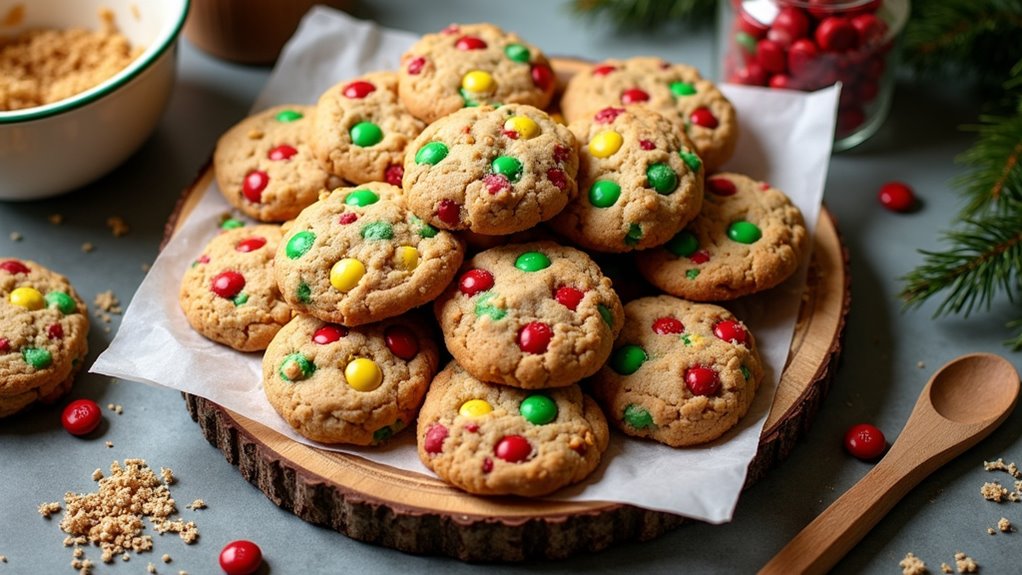
Serving up Christmas Kitchen Sink Cookies is about more than just placing them on a plate; it’s about making the moment special.
When I pull these vibrant treats from the oven, I can’t help but feel the holiday spirit. I like to arrange them in a festive tin or on a colorful platter, so they’re picture-perfect. You can even stack them high for that wow factor.
Don’t forget to sprinkle some extra festive flair on top—maybe a dusting of powdered sugar or additional sprinkles. If I’m feeling fancy, I pair them with a cup of hot cocoa.
It’s a simple touch, but it transforms cookie time into a cozy holiday gathering, don’t you think?
Here’s to joyful moments with cookies!
Storage & Reheating Guide
Once you’ve baked those scrumptious Christmas Kitchen Sink Cookies and devoured a couple (or maybe more than a couple, no judgment here), you’ll want to know how to keep them fresh and delicious for as long as possible.
Trust me, you don’t want these goodies going stale. Store your cookies in an airtight container at room temperature; they’ll stay yummy for about a week.
For longer storage, pop them in the freezer. Just layer those cookies between sheets of parchment paper and use a freezer bag. Essential freezer storage bags are perfect for maintaining freshness and avoiding freezer burn.
When you’re ready for a treat, heat them in the microwave for about 10-15 seconds. The warm, melty chocolate will make it feel like you just baked them.
Enjoy every last crumb!
Final Thoughts
As the holiday season rolls around, I can’t help but feel giddy about baking these Christmas Kitchen Sink Cookies. Seriously, who wouldn’t? The combination of chocolate, pretzels, and a sprinkle of holiday cheer makes them irresistible.
You’ll never find two cookies the same, which is part of the fun. Plus, they’re so forgiving. Made a mistake? Just plop in some more M&M’s.
Everyone in my family loves these cookies, and it’s a joy to whip up a batch to share. So, whether you’re baking solo or with friends, enjoy every moment.
Who knew a kitchen sink could be so thrilling? Grab your mixing spoon and jump in—you won’t regret it.
Happy baking, and may your holidays be sweet and delightful!