
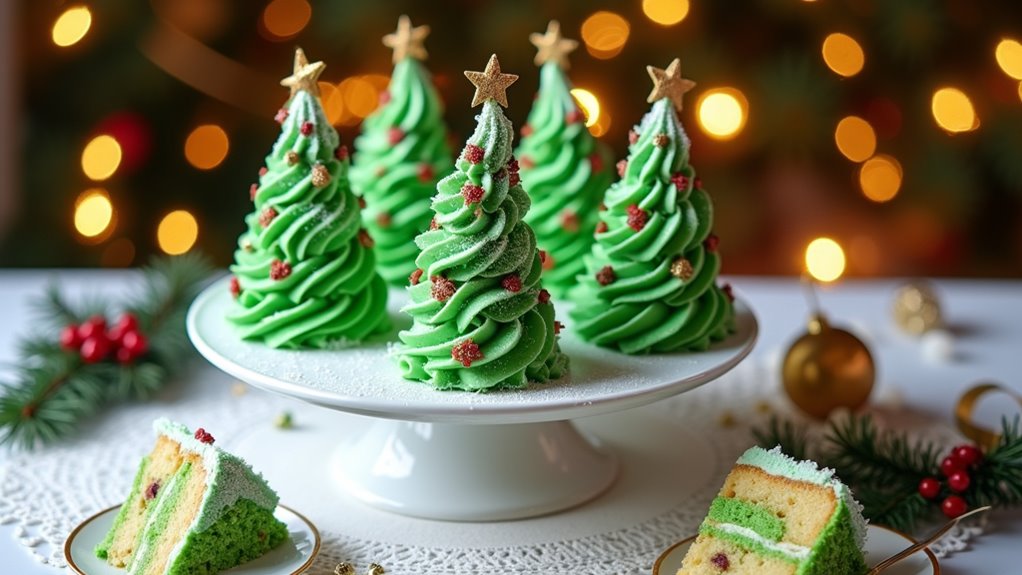
When I first discovered the Festive Christmas Tree Cake, I thought, “How cute is that?” It looked challenging, but honestly, it’s easier than it seems. Think of a moist white cake filled with a creamy marshmallow mix and covered in white almond bark—sounds dreamy, right? I can’t tell you how many compliments I’ve gotten after making it. If you’re ready to impress, let’s plunge into what you’ll need to whip this up.
Why You’ll Love This Recipe
You’ll love this Christmas Tree Cake recipe because it’s not just another holiday dessert; it’s a festive centerpiece that’s fun to make and even more delightful to eat.
Seriously, who wouldn’t want to impress their family with a cake shaped like a tree? When I first attempted this masterpiece, let’s just say, it might’ve looked like a toddler’s art project.
But hey, it’s the taste that matters, right? The combination of creamy filling and sweet almond bark is pure bliss.
Plus, who can resist the joy of decorating with sprinkles? You’ll find yourself grinning while dipping each tree into that glossy coating.
It’s like being a kid again, and trust me, it’ll be gone faster than you can say “Merry Christmas.”
Equipment List
Before we get to mixing and baking, let’s talk equipment.
First up, you’ll need a jelly roll pan. Trust me, it’s perfect for our cake. Don’t forget parchment paper; it saves your sanity during cleanup.
A mixing bowl is essential; I always use a large one because, well, things can get messy. A hand mixer will make your life easier—no need to arm wrestle with a whisk. Additionally, investing in high end kitchen appliances can significantly enhance your baking experience and ensure consistent results.
I also suggest a tree-shaped cutter for that festive touch. You’ll want a piping bag for the filling—it’s like frosting magic.
And, if you have a microwave-safe bowl for melting chocolate, that’s a big bonus. Seriously, no one wants to end up burnt from melting chocolate on the stove. Additionally, using silicone baking mats can enhance your baking experience by providing a non-stick surface that makes for effortless cake removal.
Our Ingredients
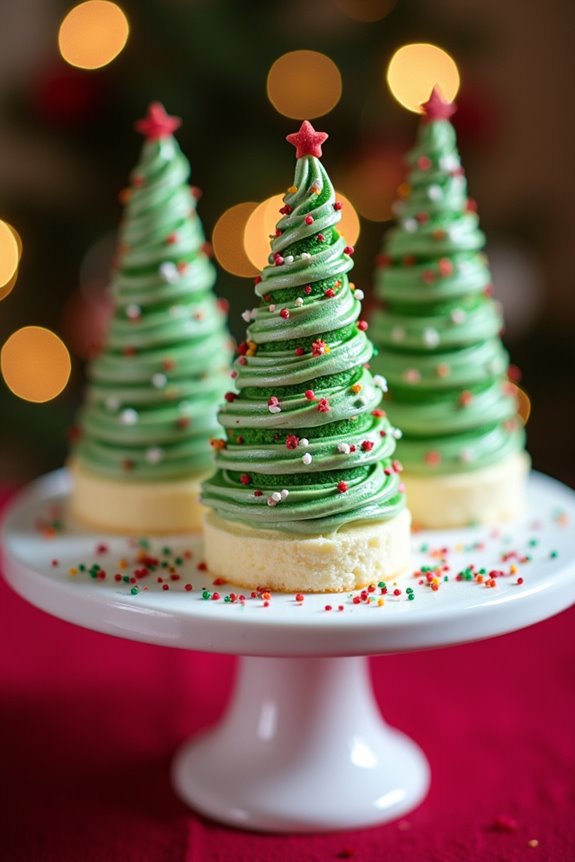
When it comes to whipping up something special for the holidays, nothing quite beats the charm of a Christmas Tree Cake. It’s not just a treat; it’s a festive centerpiece that can bring a smile to anyone’s face.
You’ll have some fun getting your ingredients together, and trust me—there’s something magical about turning simple items from your pantry into a masterpiece. So, let’s gather what we need, roll up our sleeves, and get this show on the road!
Here’s a handy list of all the ingredients you’ll need to make this delightful cake:
- 6 eggs
- 1 box white cake mix
- ½ cup water
- ¼ cup vegetable oil
- ½ cup powdered sugar (for the frosting)
- 7 oz marshmallow creme
- ¾ cup softened butter
- 1 tsp vanilla extract
- 1 ½ cups powdered sugar (for filling)
- 24 oz white almond bark or white chocolate
- 2 tbsp shortening (optional, but recommended for dipping)
- Green sugar or sprinkles (for that extra festive sparkle)
Now, before you dive headfirst into baking, let’s chat about a few considerations regarding these ingredients.
First off, eggs—fresh eggs really do make a difference in texture and flavor, so don’t skimp on quality. As for the cake mix, feel free to choose your favorite brand, just make sure it’s the white variety to keep that classic look.
The almond bark or white chocolate? Oh, that’s really what elevates this cake from good to “Holy moly, that’s delicious.” If you’re feeling adventurous, you could even experiment with colored melts for an even more vibrant look.
And the green sugar? It adds that magical touch of cheer and whimsy, setting the tone for your festive gathering. So, don’t forget to have some fun with it—you’re not just baking; you’re creating edible art!
Step-by-Step Instructions
Making a Christmas Tree Cake isn’t only a fantastic way to celebrate the holidays, but it’s also a fun project that can bring the family together. Mixing the batter is quick and simple—just follow these easy steps, and before you know it, you’ll have a beautiful festive centerpiece that tastes as wonderful as it looks, especially when using professional kitchen cookware to ensure the best results. Using premium baking equipment can also elevate your baking experience significantly.
- Preheat the Oven: Start by preheating your oven to 375°F (190°C). This is important because a hot oven guarantees your cake bakes evenly. While that’s heating up, grab a jelly roll pan, line it with parchment paper, and give it a good spray with cooking spray. You want to make certain that cake slides right out later.
- Mix the Batter: In a large mixing bowl, crack 6 eggs and beat them until they’re thick and frothy. Then, add in ½ cup of water, ¼ cup of vegetable oil, and one box of white cake mix. You’ll want to blend this mixture well. Don’t be afraid to channel your inner baker; just make sure not to overmix it. A few lumps are acceptable.
- Bake the Cake: Pour your batter into the prepared jelly roll pan. Slide it into the oven and bake for about 10-12 minutes. Keep an eye on it—when it’s slightly golden and springs back when touched, you’re good to go.
- Cool the Cake: Once baked, remove the cake from the oven and let it cool completely in the pan. Take this moment to admire your handiwork; maybe snap a quick pic for the ‘gram.
- Prepare the Filling: In another bowl, combine 7 oz of marshmallow creme, ¾ cup of softened butter, 1 tsp of vanilla extract, and 1 ½ cups of powdered sugar. Mix until everything comes together and becomes oh-so-smooth. This filling is what takes your cake from good to “wow, how did you do that?”
- Shape the Trees: Once the cake is cool, it’s time to get creative. Use a tree-shaped cutter to cut out your cake. You should end up with several delightful cake trees. Carefully split each tree horizontally, creating two halves.
- Pipe the Filling: Grab a piping bag (or a zip-lock bag with the corner snipped off) and fill each tree with your delicious filling before putting the top half back on. This step not only adds flavor but also gives you that lovely surprise when you slice into it.
- Freeze the Trees: For the best results, pop these filled trees into the freezer for about 2 hours. This helps everything hold together and makes dipping easier. Plus, it gives you some time to dance around the kitchen while listening to your favorite holiday tunes.
- Melt the Coating: In a microwave-safe bowl, melt 24 oz of white almond bark (or white chocolate if that’s what you have) with 2 tbsp of shortening, if you’re using it. Stir every 30 seconds until completely smooth. This is where the magic happens; the coating should be glossy and pool-like.
- Dip the Trees: Remove the frozen trees from the freezer. Dip each tree into the melted chocolate, allowing any excess to drip off. This might feel like a bit of a challenge at first, but it quickly becomes fun.
- Decorate: While the coating is still soft, sprinkle on some green sugar or fun sprinkles. It’s the icing on the cake—literally. Let the chocolate coating harden (you can refrigerate them for extra speed), and then drizzle any leftover filling for that show-stopping effect.
- Serve and Enjoy: Once decorated, you can proudly present your Christmas Tree Cake to friends and family. Slice it up and watch those smiles appear. You might even gain a few admirers, so be prepared to share the recipe.
And there you have it—your very own Christmas Tree Cake, ready to impress! Enjoy the process, have some fun, and remember: baking is all about love and creativity. Happy baking!
Tips & Variations
While you might think of the Christmas Tree Cake as just a festive dessert, it’s actually a wonderful canvas for creativity and personalization.
Want to add your twist? Try using different cake flavors—chocolate or red velvet can be a fun surprise. When it comes to filling, I love mixing in crushed candy canes or nuts; it adds crunch and excitement.
And the decorations? Go wild! Edible glitter or colorful sprinkles can steal the show. I usually freeze the cakes before dipping; trust me, it helps prevent any melty disasters.
Oh, and don’t achieve perfection—let’s embrace the “rustic” look. After all, who doesn’t enjoy a cake that looks like it was made with love?
How to Serve?
After you’ve poured your creativity into that beautiful Christmas Tree Cake, it’s time to think about how to serve it up.
First things first—slice those cute tree shapes with a serrated knife, taking your time to keep the edges clean.
Plating is important, so I like to arrange them on a festive platter, maybe with some extra green sprinkles scattered for flair.
Don’t forget to have some forks ready; you wouldn’t want your guests fighting over dessert, right?
And, here’s a tip—I love drizzling a bit of chocolate sauce or just a dollop of the remaining filling on each slice for that extra “wow” factor.
Trust me, everyone will be asking for seconds, and you might need a few immediate cake enthusiasts to help.
Storage & Reheating Guide
Once you’ve crafted that delightful Christmas Tree Cake, it’s easy to wonder how to keep it fresh for those later enjoyment sessions.
First, wrap your cake slices tightly in plastic wrap, or put them in an airtight container. Trust me, no one wants a dried-out cake.
If you’re planning on enjoying it later, the freezer is definitely your friend. Just freeze it for up to a month.
When you’re ready to indulge, pop a piece in the refrigerator overnight to thaw. If you’re a little impatient, you can also defrost it in the microwave for a few seconds—just keep an eye on it.
I once forgot and ended up with a sad, gooey mess. Lesson learned! Additionally, using Mason Jars with Lids can also be a great way to store smaller cake portions to keep them fresh.
Final Thoughts
Now that you’ve got your Christmas Tree Cake wrapped snugly or frozen for later, let’s take a moment to appreciate the magic of baking during the holidays.
There’s something special about filling your kitchen with sweet aromas while creating a centerpiece that’ll impress your family and friends. And let’s be honest, I still get flour on my nose every time I bake, but that just adds to the charm, right?
You’ve crafted a delightful treat that’s more than just a dessert; it’s a memory-maker.
Whether it’s at a holiday gathering or a cozy night in, your cake will spark joy and maybe even a little friendly competition.