
I’ve got to say, cream puffs are one of those magical treats that make you feel like a culinary genius, even if my first attempts looked like deflated balloons. Seriously, who can resist their light, airy shells filled with creamy goodness? You can fill them with chocolate, vanilla, or whatever floats your boat. Plus, they’re surprisingly simple to whip up. Ready to transform some basic ingredients into something extraordinary? Let’s get started on this delightful journey together.
Why You’ll Love This Recipe
When you bite into a cream puff, it’s like a little cloud of happiness has landed right in your mouth. Seriously, who doesn’t love that airy, delicate shell filled with creamy goodness? I can’t think of a dessert that makes me feel quite as accomplished and satisfied.
They’re surprisingly easy to whip up, which is a bonus for those of us that sometimes burn toast. Plus, you can customize them to your heart’s content. Chocolate, vanilla, or even lemon filling—it’s a flavor playground.
And trust me, your friends will think you’re a pastry chef when they see (and taste) those gorgeous cream puffs. So why not treat yourself? Life’s too short not to indulge in a little happiness.
Equipment List
Before we plunge into making those delectable cream puffs, let’s chat about the equipment you’ll need.
First off, a sturdy saucepan is a must for boiling the water and butter. You’ll also want a mixing bowl and a whisk, because we’re going to get a bit hands-on with that dough.
Piping bags, or at least a sturdy zip-top bag with the corner snipped off, will help you shape those lovely puffs. Don’t forget parchment paper; it’ll save you from a sticky disaster on your baking sheet.
Finally, an oven thermometer will guarantee you’re baking at just the right temperature. Trust me, you’d rather not wing it when it comes to these scrumptious delights. Do I sound a bit dramatic? Maybe, but it’s for good reason.
Also, using a nonstick frying pan can greatly simplify the cleanup process for any remnants of your cream puff adventure.
Our Ingredients
When it comes to whipping up a batch of delightful cream puffs, the ingredients play a starring role in this delectable show. Don’t worry, you won’t find anything too exotic here; these are ingredients you can easily find at your local grocery store. It’s all about having some fun in the kitchen, so let’s get this party started and gather up what we need to make those golden, airy shells that will hold the sweet, creamy goodness inside.
Here’s the list of ingredients you’ll need to create your divine cream puffs:
- 1 cup water
- 1/2 cup (1 stick) salted butter
- 1 cup all-purpose flour
- 4 large eggs (make sure they’re at room temperature for best results)
- 2 cups pastry cream or prepared vanilla pudding (your choice, but we all know homemade is top-tier)
- Powdered sugar for that final touch of sweetness when dusting
Now, let’s talk about the magic of these ingredients. First off, the combination of butter and water creates that luscious moistness that makes your shells puff up just right.
And don’t skimp on the eggs—those bad boys are what give structure and lift. If you want a luxuriously rich filling, consider making your own pastry cream instead of the store-bought vanilla pudding; it’s a bit more work but worth every whisk.
And trust me, a light dusting of powdered sugar at the end gives your cream puffs that extra “wow” factor that will impress anyone who gets a bite.
Step-by-Step Instructions
Making delicious cream puffs can feel like a formidable task, but don’t worry—it’s actually quite simple and oh-so-rewarding. Mixing the batter is quick and easy; just follow these straightforward steps, and you’ll be well on your way to impressing yourself and anyone lucky enough to be around when those golden treats come out of the oven.
1. Preheat your oven to 425°F (220°C). This will guarantee your cream puffs bake evenly and puff up perfectly. While that heats up, go ahead and line a baking sheet with parchment paper to keep things tidy.
2. In a medium saucepan, bring 1 cup of water and 1/2 cup (1 stick) of salted butter**** to a boil. Stir a little as the butter melts, and get ready for the next step. (Can you smell that butter? It’s just the beginning of something magical.)
3. Once it’s boiling and the butter is fully melted, remove the pan from the heat. Quickly add 1 cup of all-purpose flour** to the pan and stir vigorously**, almost like you’re fighting off a bad dream. Keep stirring until the dough pulls away from the sides of the pan and forms a ball.
Once it’s together, let it cool for about 10 minutes—patience is key here.
4. Now for the fun part. Beat in 4 large eggs, one at a time, mixing thoroughly after each addition. The batter will appear a bit intimidating at first, but keep going. It will turn smooth and shiny; it should be thick yet soft, kind of like a cozy blanket ready to wrap around your pastry cream.
5. Using a piping bag (or a spoon if you’re feeling brave), pipe or spoon the dough onto your lined baking sheet. Space them about 2 inches apart; these little guys are going to expand and puff up, so give them some room to breathe.
6. Bake for 22-25 minutes, or until they look golden brown and puffed up like little clouds. Do resist the temptation to open the oven door during baking; it’ll ruin the puffing magic happening inside. (Trust me, I learned this the hard way.)
7. Once they’re golden and puffed, remove them from the oven and let them cool completely on a wire rack****. This is vital—you want to avoid hot pastry cream disasters.
8. When they’ve cooled down, fill each cream puff with 2 cups of pastry cream or prepared vanilla pudding. You can cut them in half or use a piping bag to get that creamy goodness inside. Remember, the more you stuff them, the happier they’ll be—and so will you.
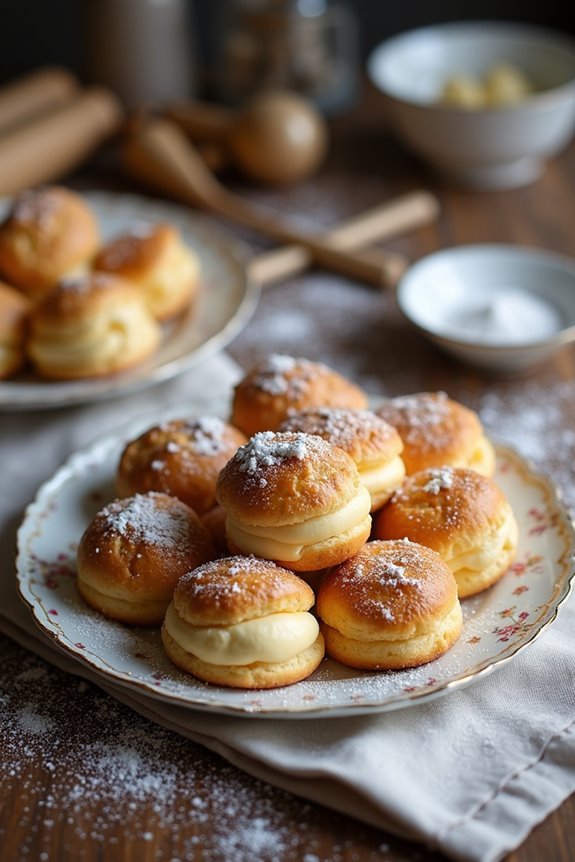
9. Finally, dust the tops with powdered sugar**** for that oh-so-fancy finish. It adds a lovely touch and makes them look like they belong in a fancy dessert shop.
Also, don’t forget to elevate your baking experience with premium baking supplies, ensuring that your cream puffs turn out as delicious as possible.
And there you have it—a delightful batch of cream puffs, ready to be devoured. Just remember, if you get a bit flour on your shirt or have dough under your nails, that’s all part of the fun. Enjoy the compliments; you’ve earned them!
Tips & Variations
Tips and variations can elevate your cream puffs from delightful to downright extraordinary. For instance, I love making the shells ahead of time and freezing them.
When I need a sweet treat, I just pop them in the oven for a quick reheat. Easy, right?
You could also mix half milk and half heavy cream in the pastry cream for an ultra-rich filling. Trust me, it’s like a hug in dessert form.
Want a twist? Add a splash of vanilla extract or even some citrus zest to brighten things up.
And if you’re feeling adventurous, sprinkle some cocoa powder into the dough for a chocolatey spin. The possibilities are endless, making every batch a new adventure.
How to Serve?
Serving these delightful cream puffs is where the real fun begins. Once they’re filled with your luscious pastry cream, it’s time to get creative.
I love dusting them with powdered sugar, but why stop there? You could drizzle melted chocolate or caramel for that extra wow factor.
When I serve them, I like to arrange them on a pretty platter, feeling like a pastry chef, even if my kitchen still looks like a tornado hit it.
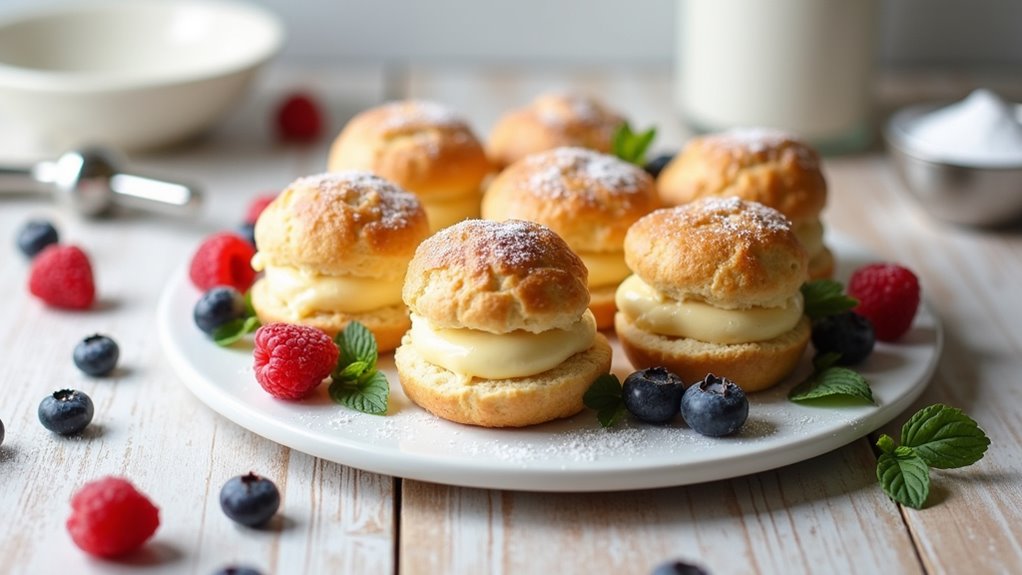
You can also add fresh berries on the side, creating a beautiful contrast on the plate. They’re perfect for parties or just a cozy night in.
Seriously, who can resist them? My friends always ask for seconds, and I just pretend I’m not secretly taking some for myself.
Storage & Reheating Guide
Although cream puffs are almost always best enjoyed fresh, there’s a world of joy in knowing how to store and reheat them for later indulgence.
First, if you’ve got leftovers, pop them in an airtight container; they’ll last about two days in the fridge.
Want to freeze them? Flash freeze those tasty little clouds, then transfer to a freezer bag. Trust me, it works wonders.
When it comes time to enjoy them again, just preheat your oven to 350°F (175°C). Place the puffs directly on the oven rack for about 5-10 minutes.
They’ll be warm, crispy, and ready to fill with luscious pastry cream. Honestly, is there anything better than a late-night cream puff treat? I think not. Remember, using premium kitchen appliances makes the process easier and more enjoyable.
Final Thoughts
There’s something truly magical about cream puffs, isn’t there? Every bite melts in your mouth, bringing a wave of sweetness that makes you feel all warm and fuzzy inside.
I remember the first time I tried making them. I thought it would be a breeze, but let’s just say my kitchen looked like a flour bomb went off. Still, the joy when they puffed up perfectly was totally worth it.
As you whip up these little clouds, don’t forget to savor the moments, too, because baking should be a fun adventure, not a chore. So, whether you’re serving them for a fancy dessert or just because, these cream puffs will definitely impress.
Enjoy, and happy baking!