
I’ve always struggled to find a snack that feels indulgent yet doesn’t leave me guilty, but then I discovered crispy kale chips. Seriously, who knew that this leafy green could turn into something so addictive? With just a sprinkle of sea salt and a dash of olive oil, I was hooked. They’re crunchy, satisfying, and way healthier than a bag of chips. Curious about how easy it is to whip them up? Let’s explore the details.
Why You’ll Love This Recipe
When it comes to snacking, crispy kale chips are a game changer—trust me, you’ll love ’em.
I never thought I’d be raving about a leafy green, but here we are. They’re not just delicious; crispy kale chips are a healthier crunchy snack that satisfies those pesky cravings without the guilt.
You know those moments when you’d plunge into a bag of chips? Instead, I reach for these little green wonders. It’s like magic; you get a crunchy texture that you can season however you like.
Plus, making them at home means I can control the ingredients. Who knew kale could be this fun? Just try it once, and you might just become a kale chip enthusiast like me.
Equipment List
While it might seem like all you need is kale and a sprinkle of salt to whip up some crispy chips, having the right equipment makes life so much easier. First, you’ll want a good baking sheet—trust me, a flimsy one just won’t cut it. I’ve learned this the hard way, you know.
Next, grab a large bowl for tossing your kale with olive oil and seasonings. A salad spinner makes drying the kale a breeze; no one wants soggy chips, right? You’ll also need parchment paper for easy cleanup and even crisping.
Finally, a pair of kitchen scissors is handy for cutting kale stems and keeping your fingers safe—because nobody wants to be picking tiny kale bits out of their nails. Plus, using stainless steel mixing bowls helps ensure that your ingredients are mixed thoroughly and evenly.
Our Ingredients
Making crispy kale chips is a delightful adventure. I mean, who’d have thought that a leafy green could transform into a crunchy, snackable treat? It’s like magic, really.
You only need a handful of simple ingredients, which most of you probably have lurking in your pantry or fridge right now. Let’s break it down and get you excited about those crispy greens that not only taste amazing but are also a healthy snack choice.
Ingredients:
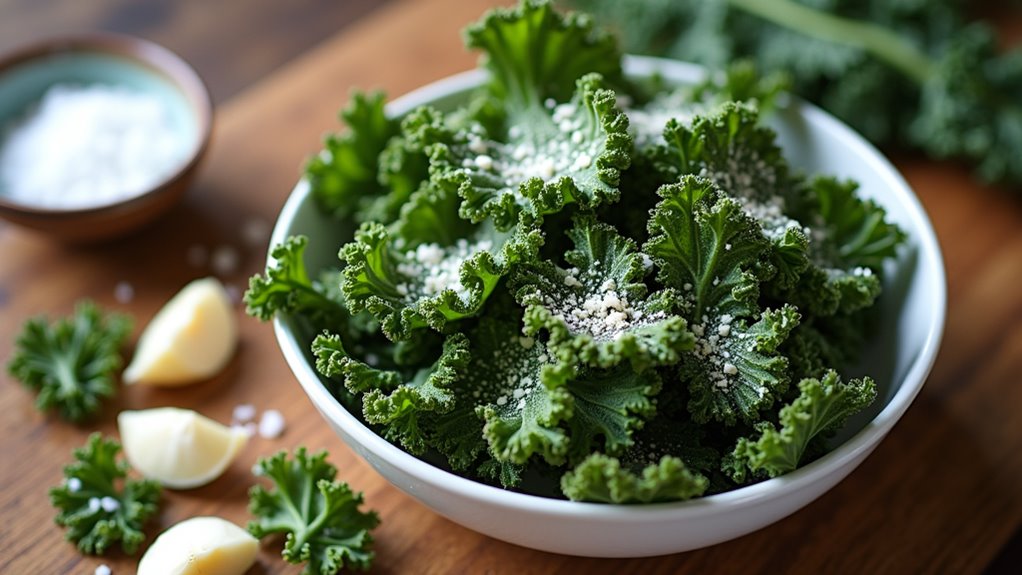
- 2 bunches fresh kale
- 3 teaspoons olive oil
- Sea salt, to taste
- 5-6 cloves garlic, minced (optional)
- 1/4 cup freshly grated parmesan cheese (optional)
Now, here’s something to chew on (pun intended): when choosing kale, try to look for vibrant, firm leaves without blemishes. Curly kale is a popular choice because it crisps up quite nicely, but if you prefer the flat leaves of Lacinato kale, go for it!
Freshness is key, and yes, your kale can have feelings too—it should look happy and not sad and wilted. If you want to spice things up a bit, consider experimenting with different seasonings. Maybe some chili flakes for heat or nutritional yeast for a cheesy flavor without the dairy.
Step-by-Step Instructions
Making crispy kale chips is a delightful experience that transforms a humble leafy green into a satisfying snack. Ready to discover how to make this crunchy treat? Just follow these easy steps, and you’ll have a batch of delicious kale chips in no time.
1. Prep the Kale: Start with 2 bunches of fresh kale. Remove the stems—this part can be a little tricky, like trying to unstick a sticker that just won’t budge. But don’t worry, just take your time!
Once the stems are out, chop the kale into bite-sized chunks. Give it a good wash, and make sure to dry it thoroughly (a salad spinner works wonders here).
2. Add the Flavors: In a large bowl, toss your kale with 3 teaspoons of olive oil. This is where those five or six cloves of minced garlic come in, if you’re feeling adventurous.
Sprinkle in some sea salt to taste. Go ahead, give it all a good mix until the kale is nicely coated. (Don’t be shy—get in there with your hands; it’s way more fun.)
3. Spread it Out: Now, grab a baking sheet (or two, if you’re feeling fancy). Spread the kale in a single layer. Remember, we don’t want them crowded—this is a crisping party, not a kale overcrowding situation.
4. Bake and Rotate: Preheat your oven to 300°F. Place your baking sheet in there and bake the kale for about 10 minutes.
Then, here’s a little secret: halfway through, rotate the pan. This helps everything cook evenly. Bake for another 10 to 15 minutes until the kale is crisp but not burnt (we want crunchy, not charred, remember!).
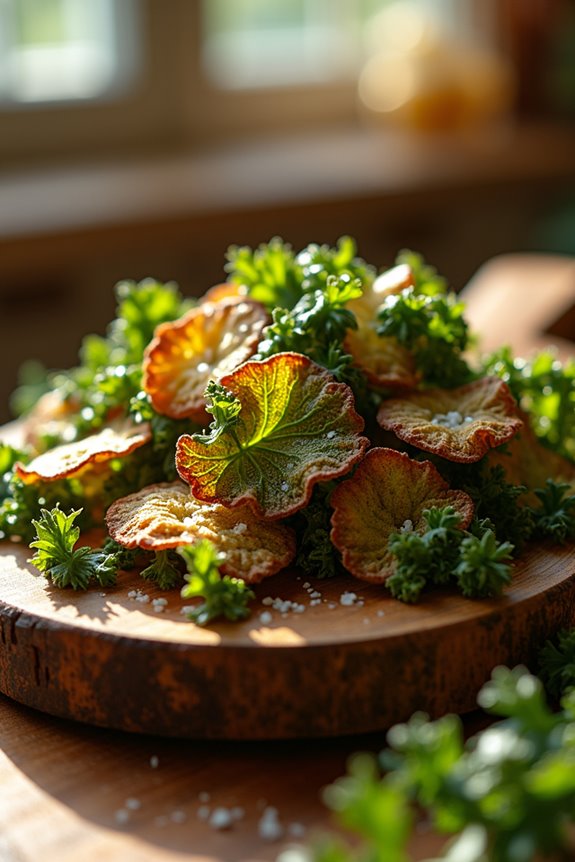
5. Finish and Enjoy: Once your kale chips are ready, take them out of the oven and let them cool slightly.
This is the perfect time to sprinkle on 1/4 cup of freshly grated parmesan cheese if you’re feeling cheesy (metaphorically and literally). Indulge and enjoy your homemade crispy kale chips—snacking has never been so good for you!
And there you have it! Simple, satisfying, and ready to impress your taste buds. Remember, each step is an opportunity to sprinkle a little joy into your cooking. So, are you ready to plunge into your kale chips adventure? Did you know that investing in professional kitchen equipment can enhance your cooking experience even further?
Tips & Variations
Now that you’ve mastered the art of baking crispy kale chips, let’s talk tips and variations to elevate your snacking game even further.
First things first, make sure you dry your kale really well. If it’s damp, you’ll end up with kale mush instead of chips—trust me, I’ve been there.
I like adding garlic for extra flavor, but don’t overdo it unless you want your breath to clear a room.
For fun variations, try tossing in some smoked paprika or nutritional yeast for a cheesy taste without cheese.
And if you’re feeling adventurous, experiment with spicy seasonings—my last batch had me gulping water like a marathon runner.
Oh, and remember, store them in an airtight container to keep that crunch.
How to Serve?
When it comes to serving crispy kale chips, presentation can really amp up the snacking experience. I like to grab a colorful bowl—or even a funky plate—and pile those lovely green chips high.
It doesn’t hurt to sprinkle a bit more sea salt or parmesan on top for some flair, does it? Serving them with a dipping sauce can also add some excitement to your snack game. I’ve used hummus, guacamole, or even a spicy yogurt dip, and let me tell you, it’s a game-changer.
Make sure to offer these chips fresh and crispy; trust me, no one likes a soggy snack. Plus, you’re bound to impress anyone who walks through the door for a casual visit.
Storage & Reheating Guide
Even though I love munching on my crispy kale chips right out of the oven, I’ve learned the hard way that proper storage is just as important as the recipe itself.
If they’re not stored right, they lose that satisfying crunch faster than I can say “guilt-free snacking.” I usually stash mine in an airtight container—think Tupperware or a resealable bag. This keeps them crispy for a few days.
When I feel the urge to reheat, I just pop them back in the oven at 300°F for a few minutes. Don’t microwave them, trust me. Who wants soggy chips?
It’s a tough lesson I learned after my first batch ended up resembling wilted leaves. Not the vibe I was going for. Additionally, using a vacuum sealer machine can enhance the freshness and longevity of your snacks by effectively removing air from the packaging.
Final Thoughts
While I mightn’t claim to be a culinary genius, I’ve certainly had my share of kitchen experiments—and let’s be honest, crispy kale chips are a delicious triumph.
Who knew something so simple could be so satisfying? Each crunch brings a little joy, doesn’t it? The best part is they’re guilt-free, making snacking feel downright virtuous.
I mean, you can practically feel the nutrients working their magic as you munch. Plus, it takes just a bit of patience and some basic ingredients.
If I can whip these up, trust me, you can too. So go ahead, give your kale a chance to shine.
And next time you’ve got the munchies, skip the chips and savor those crispy greens. You won’t regret it.