
When it comes to gathering friends and family, fire grilled fajitas are my go-to dish, and I bet you’ll love them too. Imagine this: sizzling meat, colorful peppers, and that smoky aroma wafting through the air, making everyone suddenly hungry. I can’t help but remember the first time I tried grilling them – let’s say it involved a bit too much smoke and a few singed eyebrows. But trust me, with a few simple steps, you’ll have a feast that’s both fun to make and even more enjoyable to share. Want to know how to get started?
Why You’ll Love This Recipe
When you think of a delicious dinner that makes everyone happy, fire grilled fajitas definitely come to mind.
There’s just something about the sizzling sound and the mouthwatering aroma that pulls everyone to the table.
Trust me, you’ll love these fire grilled sheet pan fajitas because they’re super easy to whip up and taste heavenly.
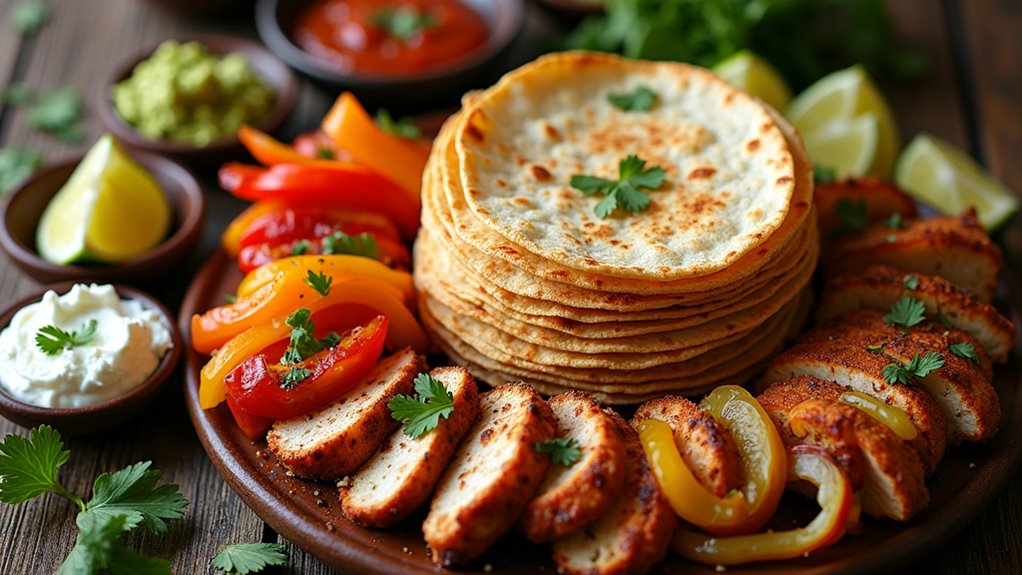
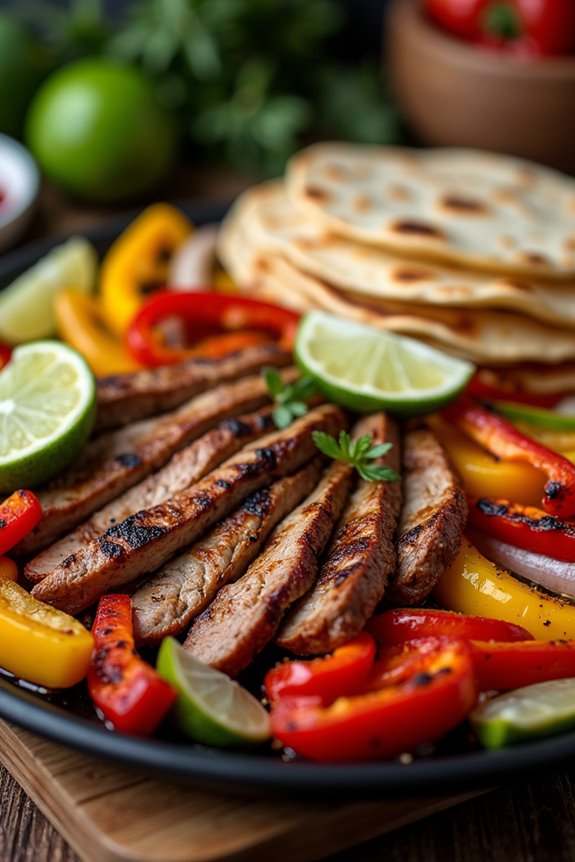
With juicy chicken or steak, vibrant bell peppers, and a medley of spices, they pack a delightful punch.
Plus, you don’t need to be a culinary genius to get it right. The oven does most of the work, and you can focus on enjoying time with family and friends.
Equipment List
To make these fire grilled fajitas a reality, you’ll need a few essential pieces of equipment that’ll make your cooking experience smooth and effortless. First up, grab a rimmed sheet pan—trust me, it’ll be your best friend for this recipe.
You’ll also want a mixing bowl for tossing those juicy chicken or steak strips with veggies and spices. A good set of measuring spoons is key too; we don’t want to wing it with those spices.
Oh, and don’t forget a sharp knife for slicing against the grain and a cutting board that won’t move around like my cat during dinner prep. Finally, having some tongs on hand will save you from using your hands, which isn’t always the best idea, right?
Our Ingredients
When it comes to whipping up a tasty tray of fire grilled fajitas, a well-curated list of ingredients is your starting line. Each ingredient plays a crucial role in creating that delightful burst of flavor that will have everyone coming back for seconds—if not thirds. Plus, you’ll have the bonus of making your kitchen smell like a fiesta.
So, without further ado, let’s breakdown what you’ll need to make these grilled beauties.
- 1½ lb chicken breasts or steak (your choice, and feel free to mix it up)
- 3 bell peppers (opt for red, yellow, and green for that colorful vibe)
- 1 onion (sliced, of course, because we want a bit of sweetness)
- 2-4 tbsp olive oil (to make everything nice and coated)
- 2 tsp chili powder (bring on the heat)
- 1 tsp ground cumin (a classic flair)
- 1 tsp smoked paprika (totally optional but adds a lovely smoky depth)
- 1 tsp garlic powder (because garlic makes everything better)
- 1 tsp onion powder (double the onion flavor, double the fun)
- 1 tsp salt (don’t skimp here; it brings all the flavors together)
- ½ tsp black pepper (a little kick never hurt anyone)
- Lime wedges (for that fresh, zesty finish)
- Tortillas (grab your favorite type; corn, flour, tortilla life is good)
- Toppings like sour cream, guacamole, and cilantro (the cherry on top)
Now, let’s chat a bit about the ingredients. First off, using fresh produce can make a world of difference. Those vibrant bell peppers not only look great, but they also add crunch and sweetness.
And on the topic of meat, whether you go with chicken or steak, choose quality cuts; trust me, nobody likes the chewy stuff. If you’re feeling adventurous, consider marinating your meat for a few hours to really soak up those spices.
Oh, and don’t be that person who forgets the toppings. Guacamole is basically life, and a good sour cream dollop? Oh, it elevates the whole experience!
Step-by-Step Instructions
Making fire grilled fajitas is a breeze, and the delightful flavors will have everyone at the table excited for dinner. You’ll be tossing veggies and meat with spices, baking to perfection, and enjoying the irresistible aroma that wafts through your kitchen. Plus, using premium seafood cooking equipment can elevate your grilling game to a whole new level! Ready to dig in? Let’s jump right into the step-by-step instructions!
1. Preheat the Oven: Start by preheating your oven to 425°F (220°C). This temperature is essential for that perfect cooking environment—high enough to cook quickly while still letting the flavors mingle.
2. Prep Your Ingredients: While the oven warms up, grab your 1½ lb chicken breasts or steak and slice them into strips. Don’t worry about being perfect; think tasty, not aesthetically pleasing.
Then, slice up those colorful 3 bell peppers and 1 onion. The mix of red, yellow, and green will make your fajitas pop visually and give a sweet crunch.
3. Mix Everything Together: In a large mixing bowl (or right on a rimmed sheet pan if you’re feeling adventurous), toss the sliced meat and veggies with 2-4 tbsp of olive oil.
Next, sprinkle in 2 tsp chili powder, 1 tsp ground cumin, 1 tsp smoked paprika (optional, but amazing), 1 tsp garlic powder, 1 tsp onion powder, 1 tsp salt, and ½ tsp black pepper.
Get your hands in there and mix until everything is well coated in that glorious spice blend—this is where the magic happens!
4. Spread It Out: Take your colorful concoction and spread it evenly in a single layer on a rimmed sheet pan. This is important—if everything’s piled up, it won’t get that nice char we’re after.
5. Bake It Right: Slide the sheet pan into your preheated oven and let it bake for 18–20 minutes.
It’s hard to resist the smells wafting from the oven, but patience is key. You want the meat to cook through and veggies to roast to tender perfection.
6. Get That Char: After the baking time, switch the oven to broil and let it go for another 2–3 minutes.
This step is vital for getting that slightly charred, smoky flavor that makes fajitas so addictive. Just keep an eye on it; broilers can be tricky little devils.
7. Rest the Meat: Once done, pull out the pan and let the meat rest for 5–10 minutes.
This little waiting game is your golden ticket to juicy strips of chicken or steak. Chop those up against the grain for that tender texture we’re all aiming for.
8. Warm Up Tortillas: At the last 5 minutes of that resting time, pop your tortillas in the oven to warm them up.
Soft, warm tortillas are a must for any good fajita experience.
9. Serve and Enjoy: Now it’s time to assemble your fajitas!
Serve everything with fresh lime wedges, and don’t skimp on the toppings—after all, guacamole and sour cream make everything better.
Load up your tortilla with the savory filling, add your favorite toppings, and indulge.
And there you have it—fire grilled fajitas made right at home, bursting with flavor and ready to impress. Enjoy every bite!
Tips & Variations
While I’ve shared the basic recipe for these fire grilled fajitas, let’s explore some tips and variations that can really elevate your dish.
For instance, marinating your meat overnight not only saves time but enhances that flavor explosion—trust me, you won’t regret it. If you’re feeling adventurous, toss in some spices like cayenne for heat or herbs like oregano for a twist.
You can even mix up the veggies; throw in zucchini or mushrooms for extra fun.
Don’t forget to let the meat rest before slicing—no one wants dry fajitas, right?
And personally, I love finishing them with fresh cilantro. It’s like a little party in each bite. Who doesn’t want that?
How to Serve?
Serving up your fire grilled fajitas is where the fun really begins.
Imagine this: sizzling strips of chicken or steak, vibrant bell peppers, and warm tortillas all laid out on the table. I like to set up a fajita bar—everyone can create their own masterpiece.
Start with a scoop of meat and veggies, then pile on toppings like sour cream, guacamole, and fresh cilantro. Don’t forget the lime wedges; they add that zing!
I swear, watching friends mix their creations can be the highlight of the night. Just make sure you have enough napkins on hand because things can get messy—deliciously messy.
Storage & Reheating Guide
After you’ve enjoyed your delicious fire grilled fajitas, you might find yourself wondering how to store those tasty leftovers. I know I always have that little dilemma.
First, let everything cool down a bit before diving into storage. Grab some airtight containers—trust me, they’re lifesavers—and split up the meat, veggies, and tortillas. This way, your tortillas won’t become sad and soggy.
Keep them in the fridge for up to four days. When it’s time to reheat, pop the meat and veggies in the microwave or skillet. Just warm them gently, okay? You want to revive that juicy goodness, not dry it out.
And for the tortillas? A quick blast in the microwave, wrapped in a damp paper towel. Perfect!
For optimal freshness, consider using soup freezer containers, which can also be useful for storing similar dishes.
Final Thoughts
When you take a moment to savor those fire grilled fajitas, you realize just how special they are. The smoky flavor, vibrant colors, and blend of spices come together in a way that feels like a warm hug.
I mean, who doesn’t love a good fajita experience? Gathering friends or family around the table, everyone’s partaking, laughter filling the air—it’s pure joy.
Plus, it doesn’t take long to whip these up, which is a win in my book. Honestly, I might’ve eaten the whole pan alone once or twice (let’s keep that between us).