
When I think about summer snacks, shrimp-filled fresh spring rolls always pop into my mind. They’re light, invigorating, and packed with flavors that practically scream sunshine. I mean, who doesn’t love a tasty roll loaded with juicy shrimp, crunchy veggies, and those delightful rice vermicelli noodles? Let’s be real—rolling them up is surprisingly fun, even if I might end up with a few, shall we say, artistic attempts. Ready to try your hand at creating these beauties?
Why You’ll Love This Recipe
When the sun is shining, and I’m craving something fresh, I can’t help but turn to these shrimp-filled spring rolls. They’re light and bursting with flavor—like a little bite of summer.
Seriously, who doesn’t love a snack that makes your taste buds dance? The combo of crunchy veggies and succulent shrimp wrapped in soft rice paper is just perfection.
Plus, they’re super easy to customize. Want more herbs? Go for it. Not a fan of bell pepper? Skip it.
Trust me, once you’ve rolled your first fresh spring roll with shrimp, you’ll feel like a culinary master.
And when paired with a savory dipping sauce, oh boy, you’ll be making these all summer long. They’re simply irresistible.
Equipment List
You know, making shrimp-filled spring rolls isn’t just about the ingredients; it’s also about having the right gear on hand. Trust me, I’ve gone the hard way before.
First off, grab a large mixing bowl for all those colorful veggies. You’ll also need a shallow dish filled with warm water to soak those rice paper wrappers so they’re pliable. A cutting board and sharp knife? Essential for slicing your veggies to perfection.
Having a good variety of kitchen tools makes it easier to prepare fresh shrimp-filled spring rolls and ensures consistent results. And let’s not forget a clean kitchen towel for dabbing excess moisture. I’ve learned the hard way that a non-stick surface or bamboo mat helps too—rolling those beauties can get messy. Plus, having a collapsible colander on hand can make draining and rinsing ingredients easier than ever.
Having the right tools means less headache and more tasty spring rolls, right?
Our Ingredients
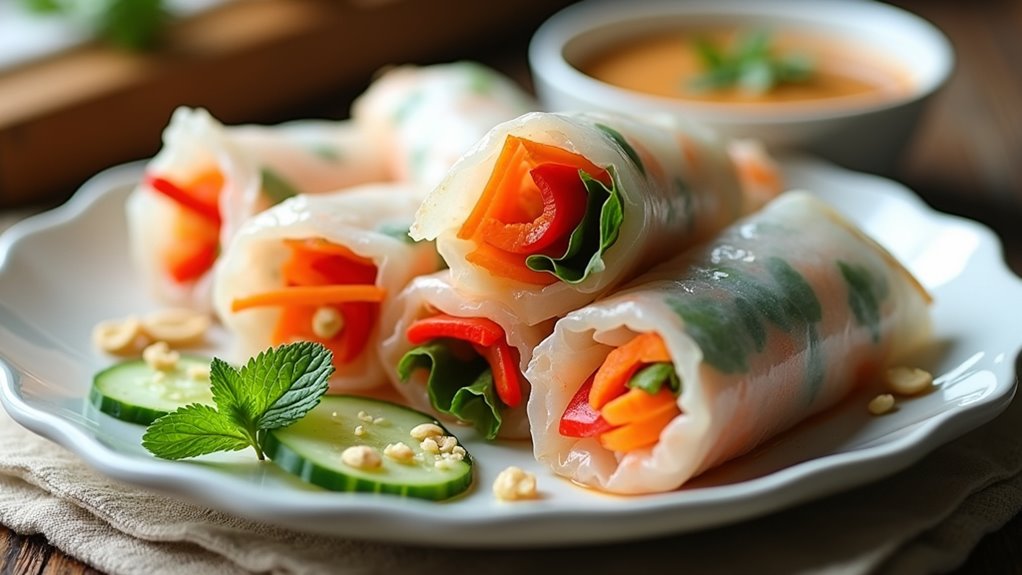
When it comes to making shrimp-filled spring rolls, the ingredients really make the dish sing. Picture those vibrant colors—crunchy veggies and bright herbs all wrapped up snug with tender shrimp. It’s not just food; it’s like a little bundle of joy you can hold in your hand.
And let’s be honest, who doesn’t love a tasty treat that’s also pretty to look at? Plus, these spring rolls are fresh and light, perfect for an appetizer or even a light lunch. You’ll feel like you’re eating something healthy… and they’re way more fun than a boring salad.
Here’s what you’ll need to create these delightful wraps:
- 18 medium shrimp, cooked and peeled
- 3 oz rice vermicelli noodles, cooked
- 1 large carrot, julienned
- 1 cucumber, julienned
- 1 red bell pepper, julienned
- 1/2 cup mint leaves
- 12 butter lettuce leaves
- 12 rice paper wrappers
- Warm water for soaking wrappers
Let’s talk about the ingredients for a second. The shrimp are the star of the show and should be fresh or perfectly cooked to avoid that rubbery texture we all dread. As for the veggies, julienned means long, thin strips—like the perfect little sticks of goodness that add crunch and color.
Oh, and don’t skimp on those fresh herbs! Mint adds a vital zing that takes the flavor up a notch. When it comes to the rice paper, make sure you’re getting the good stuff. You want those wrappers to be pliable and able to hold everything together without tearing—trust me, I’ve had my fair share of spring roll fails where things just fell apart, and, well, it wasn’t pretty.
Step-by-Step Instructions
Making shrimp-filled spring rolls is a fun adventure in the kitchen—trust me, you’ll be rolling with joy, literally! With fresh vegetables, succulent shrimp, and a touch of herbs, these wraps aren’t just eye-catching; they’re delightful to munch on. So, let’s dive right into the step-by-step guide to creating these gorgeous bites.
1. Prepare Your Shrimp:
Start off with 18 medium shrimp that are already cooked and peeled. If you’re feeling ambitious, you can cook your shrimp until they’re a beautiful pink, but if you’ve got pre-cooked shrimp, just give them a quick glance and set them aside. They’ll be your star players!
2. Get Those Noodles Ready:
Take 3 oz of rice vermicelli noodles and soak them in hot water until they become soft, usually around 5-7 minutes should do the trick. Drain them well and set aside, because nobody likes soggy noodles in their spring rolls. Consider investing in high-quality gourmet kitchen tools for the best results in food prep.
3. Soften the Rice Paper:
Now, grab your rice paper wrappers (you’ll need 12 of them) and a plate filled with warm water. Dip each rice paper in the water for just a few seconds until it’s soft but not mushy—like that sweet spot between al dente and overcooked pasta. Lay the soft wrapper flat on a clean surface. This is where the magic happens.
4. Assemble Your Rolls:
Start by placing a butter lettuce leaf on the bottom third of the rice paper. Next, layer on your fresh herbs—about 1/2 cup of mint leaves goes in now—followed by a sprinkle of those lovely noodles you prepped.
Then, add 1-2 shrimp, some crunchy julienned carrots (from 1 large carrot), cucumber (from 1 cucumber), and red bell pepper (from 1 red bell pepper). Don’t be shy; pile them in just enough to keep it full but not overstuffed, or you’ll be wrestling with the rice paper in a way that would make a toddler proud.
5. Roll It Up:
Here comes the folding fun. First, fold the bottom of the rice paper over the filling. Then, tuck in the sides like you’re wrapping a cozy blanket around it. Roll tightly towards the top while keeping everything snug—think of it like giving a warm hug to all those colorful ingredients.
Repeat for all 12 wrappers.
6. Keep Them Moist:
If you’re not serving them right away, keep those freshly rolled spring rolls covered with a damp cloth or plastic wrap to prevent them from drying out. Nobody wants a crusty spring roll, do they?
And there you have it! Your fresh shrimp spring rolls are ready to be devoured. Serve them up with your favorite dipping sauce, like peanut or hoisin, and prepare for the compliments to flow as fast as the taste in your mouth. Enjoy rolling and indulging in these special treats! Plus, to elevate your culinary experience, consider acquiring gourmet cheese equipment that can enhance your cheese pairings with these delightful rolls.
Tips & Variations
While diving into the domain of shrimp spring rolls, it’s not just about following the recipe—it’s all about making the dish your own. If you’re feeling adventurous, try swapping shrimp for chicken or tofu. Trust me, it’s surprisingly good.
I once forgot to buy mint and used basil instead—let’s just say I won’t do that again. Another fun tweak? Season your shrimp with a hint of lime or chili for a kick.
And don’t skimp on the dipping sauce; a drizzle of peanut or hoisin sauce makes a world of difference.
Oh, and here’s a tip: keep those rice papers moist while rolling—nobody likes a tear or two in their wraps. Happy rolling!
How to Serve?
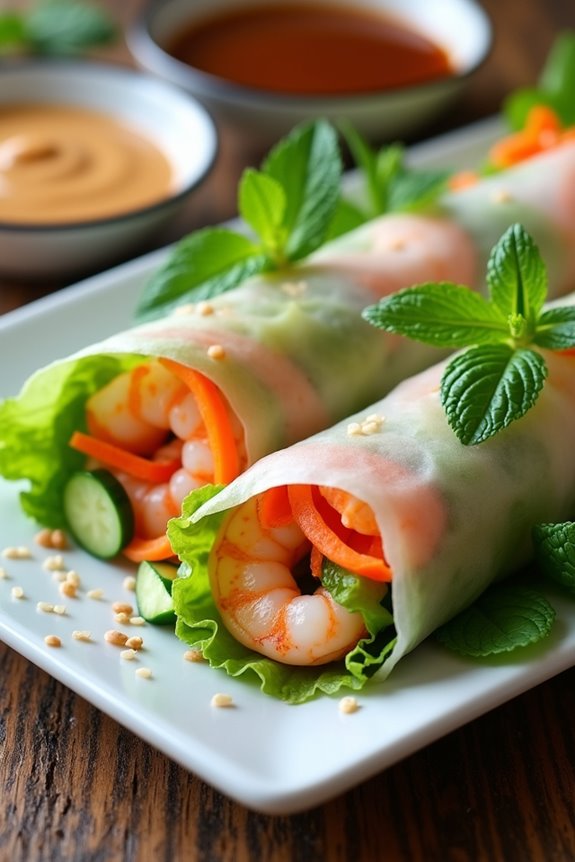
Serving shrimp spring rolls is all about the presentation and the experience! I love to arrange them on a large platter, showcasing their vibrant colors. Honestly, it’s like art on a plate.
And let’s not forget the dipping sauce! Peanut or hoisin sauce is a must; I usually put a small bowl right in the center.
I also like to add a few fresh herbs on top for that extra pop. Who doesn’t enjoy a little aromatic flair?
When it comes time to serve, I remind my guests to dip them carefully. Because trust me, there’s nothing more embarrassing than a messy spring roll situation.
Sharing these delightful bites with friends makes the experience even better—who’s ready to roll?
Storage & Reheating Guide
When it comes to storing leftover shrimp spring rolls, I can’t help but feel a twinge of sadness, knowing those beautiful bites mightn’t be as perfect tomorrow.
First, wrap them tightly in plastic wrap or place them in an airtight container. They’ll keep in the fridge for up to two days, but I recommend eating them sooner rather than later.
As for reheating, don’t! Just serve them fresh.
If I must, I’d dip them in a warm, moist paper towel before tossing them in the microwave for a few seconds—but they lose their charm. Honestly, straight from the fridge has its own cool appeal.
In any case, avoid sogginess, and savor every last crunchy bite. While enjoying your spring rolls, consider investing in proper seafood cooking equipment to elevate your culinary skills for future meals.
Final Thoughts
Although I know it’s tough to resist the temptation of diving into those fresh shrimp spring rolls right away, taking a moment to appreciate them can make all the difference.
Picture it: vibrant colors, crunchy veggies, and those juicy shrimp just waiting for a dip! Honestly, when I first made them, I mangled a few rolls and thought, “What am I doing?” But hey, they still tasted great.
Trust me on this—these rolls will impress friends or family, or simply satisfy your cravings. So, gather your ingredients, roll them up, and savor each bite. You won’t regret it.
And if one breaks? Just grab a fork. Life’s too short to worry about perfect rolls! Happy cooking!