
I’ve got to tell you, making heart-shaped cinnamon rolls is one of those things that feels like a hug in pastry form. Who wouldn’t want to whip up something so charming and delicious? There’s just something about that gooey cinnamon filling, nestled cozily inside soft dough, topped off with cream cheese frosting. Isn’t it the ultimate way to show someone you care? Stick with me, and I’ll walk you through every step, with some tips to make them even sweeter.
Why You’ll Love This Recipe
When it comes to comfort food, cinnamon rolls definitely hold a special place in my heart—literally.
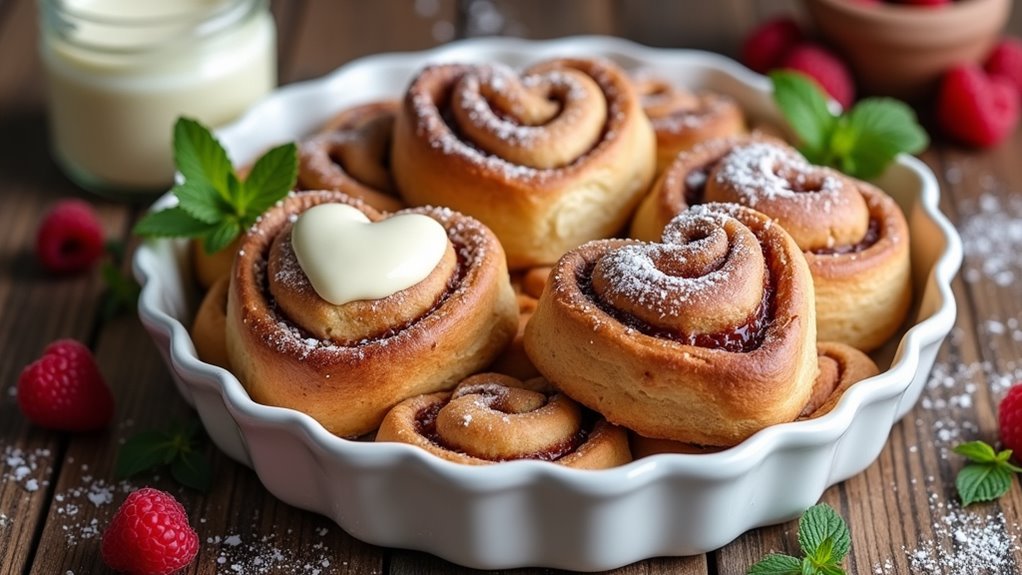
I mean, who doesn’t melt at the sight of heart shaped cinnamon rolls? They’re not just adorable; they taste like a hug in pastry form. The warm, gooey cinnamon filling, paired with that creamy frosting, transports me straight to my childhood kitchen.
Honestly, they’re easy to make, and the recipe is forgiving—perfect for kitchen novices like me. I didn’t even burn anything on my first attempt!
Plus, shaping them into hearts adds a personal touch that’s so sweet, even my dog gives me approving looks. Seriously, if you want to impress your friends or just treat yourself, these rolls are the way to go.
Equipment List
To whip up these delightful heart-shaped cinnamon rolls, you’ll want to gather a few essential tools that make the whole baking process smoother.
First off, a mixing bowl will be your best friend—you can’t start without it. A rolling pin is vital for rolling out the dough evenly, and a sharp knife or pizza cutter will help you slice those cute heart shapes without a fuss.
Don’t forget a 9×13 inch baking pan, preferably greased to avoid sticking. A dough hook can save your arms if kneading by hand sounds like a workout.
Finally, some measuring cups and spoons are non-negotiable. Trust me, guessing won’t lead to cinnamon roll perfection. To elevate your baking experience, consider investing in premium cocktail shakers which can add a fun twist to your gatherings.
Speaking of which, can we just get to the sweet part already?
Our Ingredients
When it comes to making those adorable heart-shaped cinnamon rolls, the secret to success lies in having the right ingredients on hand. Trust me, nothing ruins the joy of baking like scrambling to find something only to realize you’re out of key items.
Whether you’re whipping these up for a special breakfast, a cozy brunch, or just because they make your heart flutter, having everything prepped and organized makes a world of difference.
Here’s a list of what you’ll need to bring this delicious recipe to life:
- 2¼ cups all-purpose flour
- ¼ cup sugar
- ½ teaspoon salt
- 1 packet yeast
- ¾ cup milk
- 3 tablespoons butter, melted
- 1 egg
- 2 tablespoons melted butter (for spreading)
- ½ cup brown sugar
- 1 tablespoon cinnamon
- Cream cheese frosting or icing for drizzling
Now, let’s talk about those ingredients a little more. Not all flours are created equal! While all-purpose flour works like a charm for these rolls, if you happen to have cake flour or bread flour lurking in your pantry, they can give different textures, though all-purpose is the most reliable.
And when it comes to the butter—oh, sweet butter—try to use unsalted for more control over the sweetness of your rolls.
Oh, and if you’re a cinnamon lover (who isn’t?), feel free to sprinkle a bit more on top; it’s like wrapping your heart in a warm, spicy hug.
Step-by-Step Instructions
Baking heart-shaped cinnamon rolls is a delightful way to brighten your day, and the best part? It’s surprisingly easy! You’ll be mixing, rolling, shaping, and of course, savoring these tasty treats in no time. Let’s explore the step-by-step instructions to create these adorable delights.
- Warm the Milk and Butter: Start by gently heating ¾ cup of milk and 3 tablespoons of melted butter in a small saucepan until everything is melted and combined. Then, let it cool slightly—just long enough that you don’t end up scrambling the egg when you mix it in.
- Combine the Dry Ingredients: In a large mixing bowl, whisk together 2¼ cups of all-purpose flour, ¼ cup of sugar, ½ teaspoon of salt, and 1 packet of yeast. This step helps distribute the yeast evenly, so don’t skip it.
- Make the Dough: Pour the warm milk and butter mixture into your bowl of dry ingredients. Then, crack in 1 egg and stir until everything is combined. You’re aiming for a sticky dough. If it’s too sticky, add a bit more flour, a tablespoon at a time, until the dough pulls away from the sides of the bowl.
- Knead the Dough: Turn the dough out onto a lightly floured surface and begin kneading. Knead for about 5-7 minutes, adding flour as needed, until the dough becomes smooth and elastic. (Show-off alert: that’s how you know you’re doing it right.)
- Let the Dough Rest: Pop the dough into a greased bowl, cover it with a towel, and let it rest for about 10 minutes. This little break helps the dough relax, making it easier to roll out.
- Roll Out the Dough: After the dough has rested, roll it out onto a floured surface into a rectangle, roughly 12 inches wide and 18 inches long. Aim for that gorgeous, even thickness so that your rolls bake uniformly.
- Add the Goodies: Spread 2 tablespoons of melted butter over the rectangle. Then, whisk together ½ cup of brown sugar and 1 tablespoon of cinnamon. Sprinkle this mixture evenly over the buttered surface, making sure it reaches all the edges because, honestly, who wants a sad, un-sweetened bite?
- Shape the Hearts: Cut the dough into strips, about 1-inch wide. Now comes the fun part—take a strip and roll both ends toward the middle until they meet. Pinch the bottom to form a heart shape. Repeat with the remaining strips. They mightn’t all look perfect, and that’s okay—love comes in all shapes and sizes, right?
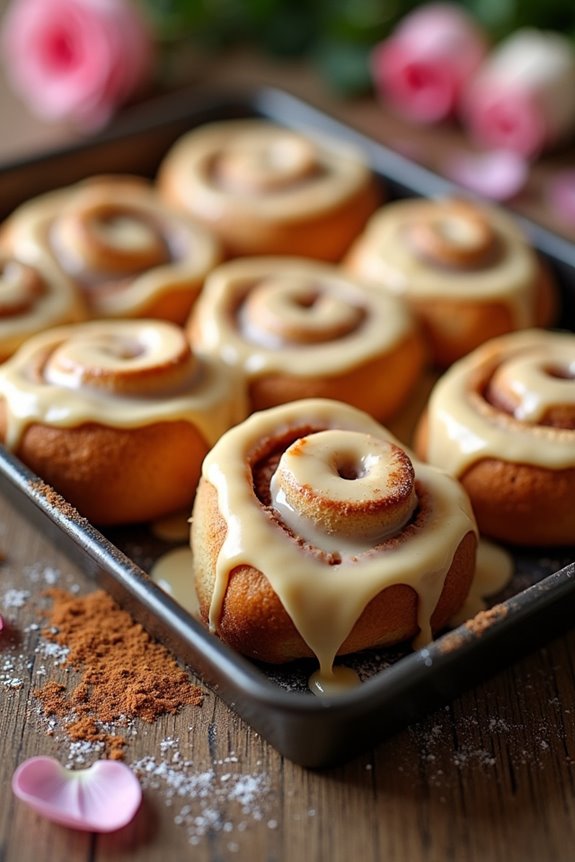
- Let Them Rise Again: Arrange the heart-shaped rolls in a greased pan. Cover them with a clean towel and let them rise in a warm oven for about 25 minutes. Just imagine how amazing your kitchen will smell during this time!
- Bake to Perfection: Preheat your oven to 350°F while your rolls are rising. After 25 minutes, pop them in the oven and bake for 10-12 minutes, until they turn a beautiful golden brown. It might be hard to wait, but trust me, it’s worth it.
- Finish with Frosting: Once baked, remove the rolls from the oven and let them cool slightly. Drizzle with cream cheese frosting or icing. A little extra drizzle and you’ll kiss the day goodbye.
Making these cinnamon rolls reminds me that sometimes the best moments are those you share with sweet treats. You’ll want to grab one (or two) for breakfast, brunch, or whenever you feel like celebrating with a little love in every bite.
Elevating your baking experience can be just as delightful as enhancing your home bar with a high end cocktail making set. Enjoy your freshly baked heart-shaped cinnamon rolls; you’ve earned it!
Tips & Variations
Although I can’t promise you’ll achieve bakery-level perfection with your heart-shaped cinnamon rolls, there are definitely some handy tips and fun variations to elevate your baking game.
First, don’t be shy about using a dough hook or kneading by hand—whichever makes you feel like a pro. When shaping the hearts, I pinch them firmly; this helps keep their shape while baking.
Want a twist? Try adding some chocolate chips or nuts when you sprinkle the filling. It’s a game-changer. And for an extra hug of flavor, drizzle a bit of maple syrup into your icing.
Honestly, my first attempts looked more like squished blobs than hearts. With practice, you’ll nail it—and enjoy the delicious rewards.
How to Serve?
Serving your heart-shaped cinnamon rolls is just as fun as making them, and trust me, they’ll turn some heads when they hit the table.
I love to arrange them on a lovely platter, maybe even dusting a bit of extra cinnamon on top for flair. Present them warm, with that delicious cream cheese frosting drizzled on top, melting slightly into those cozy rolls.
Place a few fresh berries alongside for a pop of color—your guests will be amazed! You could even serve them with a side of coffee or hot chocolate. Just imagine the smiles.
And hey, if they don’t turn out perfectly shaped, who cares? They taste fantastic, and that’s what really counts, right?
Storage & Reheating Guide
When it comes to storing those tasty heart-shaped cinnamon rolls, I’ve got a couple of go-to tips that’ll keep them fresh and delicious. First, I let them cool completely, then wrap them tightly in plastic wrap. I swear, nothing’s worse than a dry cinnamon roll.
If I’m feeling fancy, I pop them into an airtight container too. Storing them in the fridge is nice, but for longer freshness, the freezer’s my best friend. Just remember to label them—trust me, I’ve forgotten what’s in there before!
Now, when it’s time to reheat, I use the microwave for about 10-15 seconds. Or, if I’m feeling patient, I’ll warm them up in the oven at 350°F for about 5 minutes. They’ll be soft, gooey, and totally worth it!
Final Thoughts
Wrapping up our heart-shaped cinnamon roll adventure, I can’t help but feel a little nostalgic about the whole process.
These rolls aren’t just about the sweet aroma filling your kitchen; they’re a delightful way to share love—or at least, sugar—with family and friends.
The joy of rolling dough into heart shapes, especially when it doesn’t quite work out as planned (I swear I made a couple of odd-looking blobs), is all part of the fun.
Plus, who doesn’t love the satisfaction of drizzling cream cheese frosting on top?
I encourage you to try these rolls for any occasion, or just because.
Trust me, they’ll bring smiles and maybe a few giggles.
Happy baking, my friends. You’ve got this.