
I’ve gotta say, if you’re looking to satisfy those dessert cravings, this Blueberry Dream Cheesecake might just be the answer. It’s creamy, tart, and sweet—like a hug for your taste buds. I remember the first time I made it; I was a total mess in the kitchen, flour everywhere. But once I took my first bite, I knew it was worth it. Ready to whip up this luscious treat? Let’s get started, and I promise you won’t regret it.
Why You’ll Love This Recipe
Have you ever tasted something that feels like a hug in dessert form? That’s what you’ll experience with this irresistible blueberry dream cheesecake.
Imagine a creamy, dreamy filling made from rich cream cheese, mixed just right with sweet blueberries swirling through it. It’s like your taste buds are throwing a party. The graham cracker crust? It’s the perfect crunch to balance all that smoothness.
I remember the first time I made this; I accidentally added too much butter to the crust. Spoiler alert: it was still amazing—it just tasted like a buttery dream.
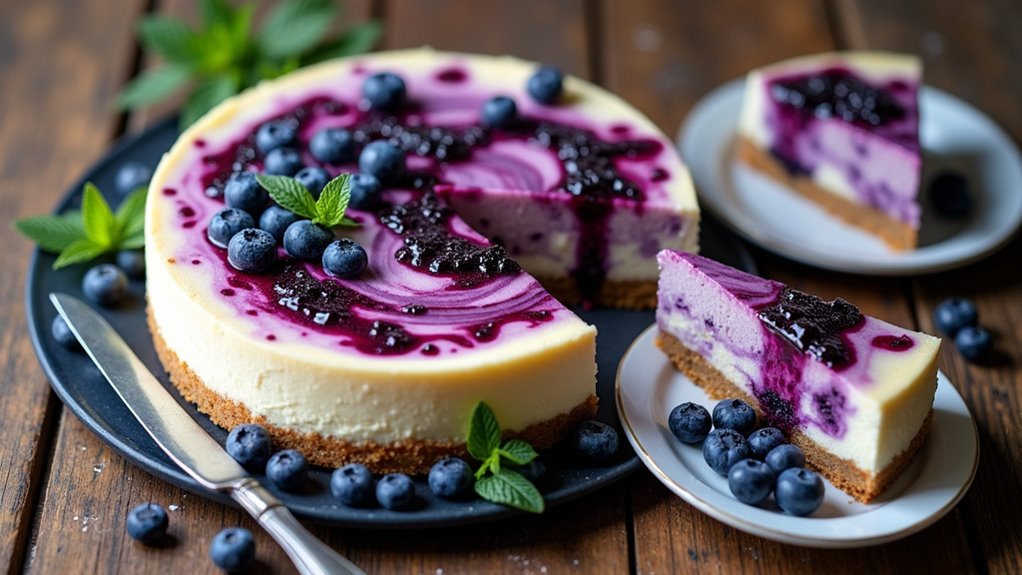
Plus, it looks stunning with those fresh blueberries and mint leaves on top, turning any gathering into a celebration. You won’t regret trying this recipe.
Equipment List
Creating a delicious Blueberry Dream Cheesecake is as much about the ingredients as it’s about the tools you use along the way.
First, you’ll need a trusty springform pan—believe me, it’s a game-changer when it’s time to slice that creamy goodness. A good quality pan will prevent leaks and ensure even baking of your cheesecake.
Grab a mixing bowl for combining all the yumminess, and a whisk or hand mixer to beat everything together (my arms can only take so much).
A saucepan is essential for that dreamy blueberry sauce, and a spatula will help you scoop out every last bit of batter.
Don’t forget measuring cups; without them, my kitchen turns into a mad-scientist lab.
And let’s be real, no one wants a watery cheesecake disaster. Plus, a pastry brush can come in handy for evenly applying the blueberry sauce on top, ensuring a beautiful finish.
Our Ingredients
When it comes to whipping up a decadent Blueberry Dream Cheesecake, the ingredients are your best allies. They come together to create a dessert that’s not just a treat for the taste buds, but also a feast for the eyes. I mean, who can resist a cheesecake topped with luscious blueberries and a vibrant hue of color? Actually, no one I know.
So let’s plunge into what you’ll need to gather and make this dreamy dessert a reality.
- 1½ cups graham cracker crumbs
- ½ cup melted butter
- 2 cups fresh blueberries
- ¾ cup sugar (for blueberry sauce)
- 2 tbsp cornstarch
- 1 tbsp lemon juice
- 3 packages (8 oz each) cream cheese, softened
- 1 cup sugar (for cheesecake filling)
- 1 tsp vanilla extract
- 3 large eggs
- ½ cup sour cream
- Fresh blueberries and mint leaves (for garnish)
Now that you have your shopping list, it’s worth mentioning a couple of things about these ingredients. For starters, using fresh blueberries will give you that burst of flavor that really elevates the cheesecake, but if they’re out of season or too pricey, frozen blueberries can work just fine—just make sure to thaw them first.
And the cream cheese needs to be softened; if it doesn’t, your arm will get quite the workout trying to mix it. Trust me, I’ve been there—foxing with a stubborn block of cold cream cheese isn’t fun.
Step-by-Step Instructions
Making the Irresistible Blueberry Dream Cheesecake isn’t just about baking; it’s a joyful experience filled with delicious anticipation. Mixing the batter is quick and simple—just follow these easy steps to create a dessert that will impress everyone. Let’s jump into it!
- Prepare the crust: In a bowl, mix together 1½ cups graham cracker crumbs and ½ cup melted butter until combined. It should feel like damp sand. Press this mixture firmly into the bottom of a springform pan to create a solid crust. Confirm it’s evenly distributed—this is what holds all the creamy goodness together.
- Make the blueberry sauce: In a saucepan over medium heat, combine 2 cups fresh blueberries, ¾ cup sugar, 2 tbsp cornstarch, and 1 tbsp lemon juice. Cook this mixture while gently stirring it until it thickens, which should take about 5–7 minutes. Once thickened, set it aside to cool. (By the way, don’t be afraid to taste it—just to verify it’s as sweet and tangy as you desire.)
- Prepare the cheesecake filling: In a large mixing bowl, beat together 3 packages (8 oz each) of softened cream cheese and 1 cup sugar with an electric mixer until smooth and creamy. This part is heavenly—it’s like a fluffy cloud! Remember, you don’t want any lumps, so take your time. Then, add 1 tsp vanilla extract and mix it in.
- Add the eggs: Beat in 3 large eggs, one at a time. Make sure you mix well after each egg—this will help to create that velvety texture we’re aiming for. Finally, fold in ½ cup sour cream gently. (This is when you can catch a hint of that dreamy cheesecake flavor coming together.)
- Layer your cheesecake: Pour half of the cheesecake batter over the crust in your springform pan, smoothing it out carefully. Now, take your cooled blueberry sauce and swirl it into the batter with a knife—just a few swirls to create pretty patterns. Pour the rest of the cheesecake batter on top, making sure it’s evenly spread.
- Bake to perfection: Preheat your oven to 325°F (163°C) and bake the cheesecake for 55–65 minutes. You’ll know it’s ready when the edges look set but the center still has a slight jiggle. (Keep an eye on it—too much wiggle means it needs more time.) Remember that having premium baking equipment can lead to better results in your baking endeavors.
- Cool and chill: After baking, let the cheesecake cool in the pan for about an hour. Once it’s at room temperature, transfer it to the fridge to chill overnight. Yes, it’s tough to wait, but this step is essential for the flavors to set beautifully!
- Garnish and serve: Right before serving, garnish your cheesecake with fresh blueberries and a few mint leaves for a pop of color. This is where it really shines. Just look at it; doesn’t it just make you smile?
There you have it! You’ve crafted a stunning Blueberry Dream Cheesecake that’s sure to wow your friends and family. Remember, the best part is sharing it (or not, no judgment here)—just enjoy every creamy, blueberry-infused bite! Also, don’t forget that having the right professional baking tools at hand can make your baking process even easier and more enjoyable.
Tips & Variations
Even if you follow the recipe to a T, there are always ways to put your own spin on this Blueberry Dream Cheesecake. For instance, swap out blueberries for other fruits like raspberries or strawberries if you’re feeling adventurous.
I sometimes add a splash of almond extract for a nutty twist that surprises folks. And hey, if you’re in a hurry, graham crackers can be replaced with Oreo crumbs for a chocolatey vibe—yum, right?
If you want to get fancy, consider a lemon zest sprinkle for extra brightness. And let’s be real, I’ve even been known to add dollops of whipped cream on top—who doesn’t love that?
Just have fun with it; it’s cheesecake after all.
How to Serve?
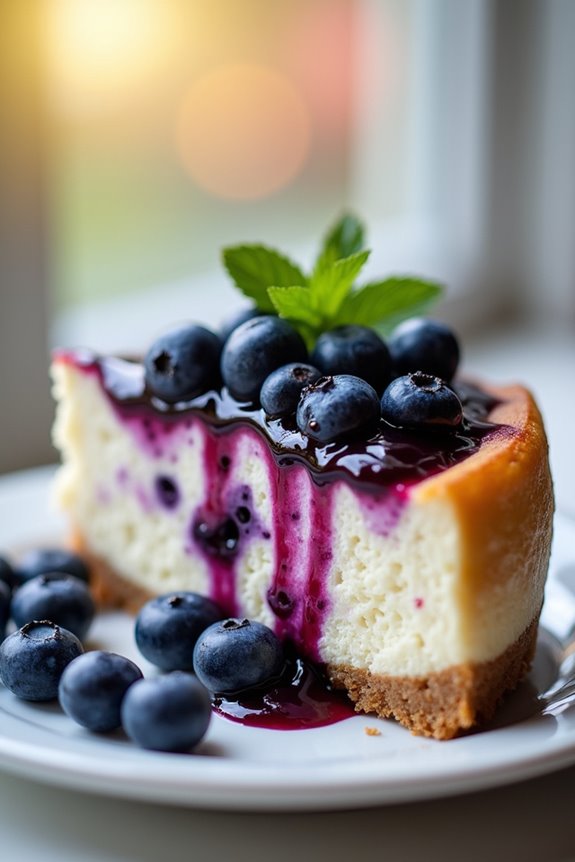
Serving my Blueberry Dream Cheesecake feels like a special occasion, even if it’s just for a quiet night at home. When I slice into that creamy goodness, it’s like a little party on my plate.
I usually top each slice with a dollop of whipped cream and a sprinkle of those gorgeous, fresh blueberries. The mint leaves? They’re not just for looks—they add a zing that makes every bite pop.
I like to serve it chilled; it brings out the flavors perfectly. And did I mention the fun of watching family and friends’ faces light up? It always gets a reaction.
Storage & Reheating Guide
While it might be tempting to gobble up the entire Blueberry Dream Cheesecake in one sitting—trust me, I’ve been there—storing it properly can actually make those delicious slices last longer.
Slice it up, and wrap each piece in plastic wrap or pop it into an airtight container. In the fridge, it’ll stay fresh for about five days, but good luck making it last that long.
If you need it to last even longer, consider freezing. Just wrap those slices tightly and stash them in a freezer-safe container. Using soup freezer containers is a great way to ensure long-term storage without freezer burn.
When you’re ready to enjoy a piece, let it thaw in the fridge overnight. It’s like a little cheesecake gift waiting for you. Who doesn’t love that?
Final Thoughts
As you stand back and admire your beautiful Blueberry Dream Cheesecake, it’s hard not to feel a little bit proud of yourself, isn’t it?
I mean, just look at that incredible swirl of blueberry sauce on top. It’s like art on a plate. Plus, you’ve definitely earned bragging rights. Trust me, I’ve had my share of kitchen disasters, so nailing this cheesecake feels like a personal triumph.
Remember, it’s all about the balance of creamy and fruity flavors—like a delicious hug.
When you serve it to friends or family, those happy faces will make every minute spent in the kitchen worth it.