
When I first tried Peach Cobbler Cheesecake Cones, I couldn’t believe how delightful they were. I mean, who wouldn’t love creamy cheesecake mingling with the sweet, warm flavors of peach cobbler? It’s like a party in a cone. Trust me, you’ll want to impress your friends with this simple yet fabulous treat. Now, let’s get into how to whip these up, because I can already hear your taste buds cheering for what’s next.
Why You’ll Love This Recipe
When you think about dessert, don’t you want something that’s not just good but also downright irresistible? Trust me, peach cobbler cheesecake cones hit all the right notes.
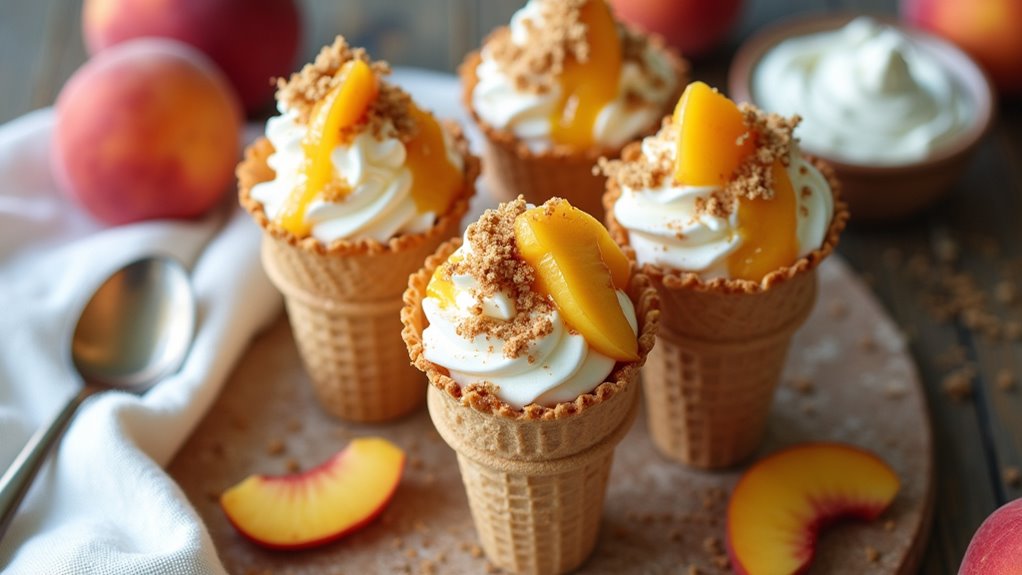
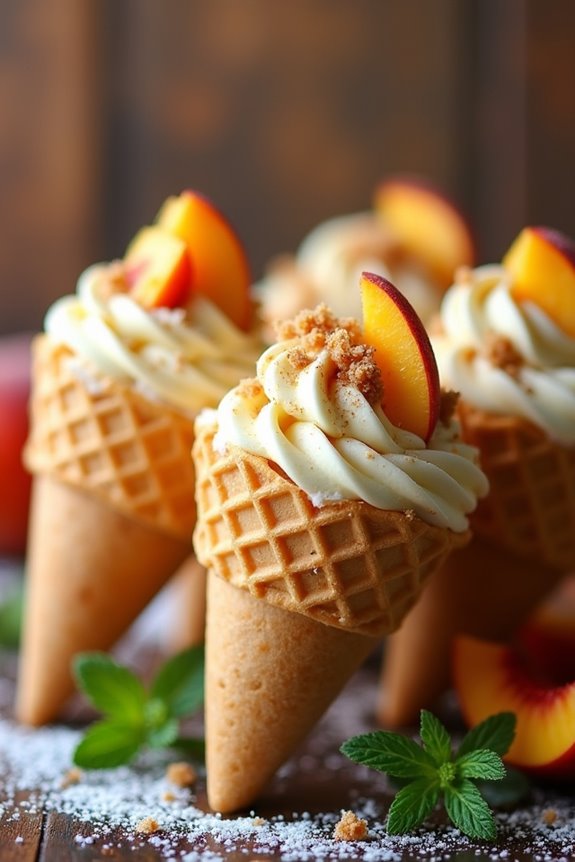
Imagine this: a crunchy waffle cone filled with a creamy, dreamy cheesecake layer topped with sweet, juicy peach cobbler. It’s a heavenly combination that’ll make your taste buds dance.
Making these cones is easier than you’d think, and you know what? They look super fancy, even if you’re a kitchen newbie like me.
Plus, they’re great for summer gatherings, and let’s be honest, who wouldn’t want to impress friends with these treats?
Equipment List
Before you plunge into making those delicious peach cobbler cheesecake cones, let’s make sure you’ve got the right equipment lined up.
You’re gonna need some basic stuff, like a mixing bowl and a whisk—nothing too fancy. I always grab my electric mixer, too; it makes whipping cream feel like a breeze.
Waffle cone holders? A total game-changer if you don’t want your cones toppling over like my baking confidence sometimes does.
You’ll need a baking sheet for chilling, and a spatula for scooping that creamy goodness into those cones.
And hey, if you’ve got an apron, wear it! It’s not just for looks; it’s for catching the inevitable splatters. Trust me, I’ve worn my fair share of cream. Having a measuring spoon set on hand will help you accurately measure your ingredients to perfection.
Our Ingredients
Alright, let’s talk ingredients for our Peach Cobbler Cheesecake Cones. You’re going to love how simple and sweet this list is, just like the cones themselves. Imagine creamy cheesecake mingling with warm peach cobbler in that delightful crunchy cone. It’s just one of those desserts that feels like a warm hug on a plate. So, let’s gather everything we need.
Ingredients:
- Waffle cones (6-8)
- Cream cheese
- Sweetener (to taste)
- Vanilla extract
- Lemon juice
- Heavy whipping cream
- Keto or homemade peach cobbler (which includes peaches, flour, butter, sugar, cinnamon, baking powder, and milk)
Now, before you dive headfirst into the mixing bowl, it’s worth mentioning a couple of things about these ingredients. First up, if you’re lucky enough to have fresh peaches, grab them. They bring so much flavor and sweetness.
But if you’re in a pinch, canned peaches work too, just drain ‘em well to avoid a soggy cone situation. Let’s talk cream cheese: make sure it’s softened so you don’t end up with lumps that could rival a bumpy road.
And your sweetener? Well, that’s all about your taste. Whether you like it sweeter than your charming neighbor or prefer a more subtle hint, you do you.
And don’t forget, when we whip that heavy cream, we’re aiming for stiff peaks. Think of it like curling your hair; you want it to hold its shape beautifully, but not be as stiff as a board.
Step-by-Step Instructions
Making Peach Cobbler Cheesecake Cones is like giving yourself a sweet little gift every time you take a bite. It sounds fancy, but trust me—it’s super easy to whip up and oh-so-delicious. So, grab your ingredients, and let’s get mixing. Here’s how you can create these delightful cones step by step.
1. Prepare the Peach Cobbler: First, you’ll want to make sure your peach cobbler is ready to go. Whether it’s keto or homemade, get it baked and let it cool down completely (this will keep your cones from turning into a gooey mess).
Once it’s cooled, set it aside while we work on the cheesecake filling.
2. Mix the Cream Cheese: In a mixing bowl, beat 8 ounces of softened cream cheese** with your choice of sweetener**, adjusting to taste. Use a hand mixer or stand mixer to whip it until it’s light, fluffy, and looks like clouds on a sunny day—about 2-3 minutes should do.
3. Add Flavors: Toss in a teaspoon of vanilla extract and a splash of lemon juice. Mix again until everything is combined. The lemon juice adds a little zing that balances the sweetness, and who doesn’t love a good balance?
4. Whip the Heavy Cream: Now, grab 1 cup of heavy whipping cream****. Pour it into another bowl and whip it until *stiff peaks form*—this means it should hold its shape when you lift the beater out (think feathered hairstyles, but for your dessert).
This step is vital for that dreamy, creamy texture.
5. Combine Everything: Gently fold the whipped cream into your cream cheese mixture, working carefully to keep that airy texture. Don’t go all Hulk on it. You want to retain that fluffiness we just created.
It’s like a gentle hug for your cheesecake.
6. Fill the Waffle Cones: Now comes the fun part—filling those 6-8 waffle cones. Spoon in about 2-3 tablespoons of the cheesecake filling into each cone. Be generous, but make sure to leave some room for the cobbler.
7. Add the Peach Cobbler: Grab that cooled peach cobbler and heap about 3-4 tablespoons right on top of each cheesecake-filled cone. If you’re feeling adventurous, repeat the layers: more cheesecake, more cobbler—just keep it neat enough that you don’t end up with a splattered kitchen.
8. Chill to Set: Place your filled cones on a baking sheet and pop them into the refrigerator to chill. Let them set for at least 30 minutes—this will help everything meld together and keep your cones crisp.
Serve them cold for the best texture.
And there you have it! Super straightforward, right? Enjoy each crispy, creamy, and fruity mouthful as you revel in your dessert-making triumph. Don’t worry if your cones look a little messy—some of the best things in life are deliciously imperfect. Happy cone-making! Remember, using premium baking supplies can elevate your baking experience, making it even more enjoyable and successful.
Tips & Variations
While you’re preparing those delightful Peach Cobbler Cheesecake Cones, it’s a great idea to think about some handy tips and fun variations to really make this dessert your own.
First, I like to use a firm cobbler so the cones don’t turn soggy—nobody wants a mushy mess, right? Also, chilling the cones before serving can really enhance that creamy texture.
As for variations, why not swap out peaches for berries or apples? You can even sprinkle some nuts for a little crunch. And if you’re feeling adventurous, a dash of cinnamon in the cheesecake mix adds a warming twist.
Trust me, I learned the hard way to experiment—my kitchen’s a reflection of that. So, have fun with it!
How to Serve?
Serving Peach Cobbler Cheesecake Cones is where the real fun begins. Imagine this: you’re at a gathering, and you pull out these delightful cones. You can almost hear the oohs and aahs.
Just grab a cone, and be careful—these can get a little messy, but isn’t that part of the charm? I’ll admit, I’ve had a mishap or two when the filling decided to escape, but who doesn’t love a little chaos in the kitchen?
When you hand them out, don’t forget to let your guests know they’re best enjoyed cold. And trust me, they’d make a perfect end to any meal.
Storage & Reheating Guide
After the delightful excitement of serving those Peach Cobbler Cheesecake Cones, you’ll definitely want to think about how to keep the leftovers from going to waste.
First, if you’ve got any cones left, cover them tightly with plastic wrap or aluminum foil. Trust me, no one wants a soggy cone disaster.
For the cheesecake filling, I usually store it in an airtight container in the fridge. It’ll last a few days, but the sooner you eat it, the better the taste.
As for reheating, I don’t recommend it—cold is the way to go. I tried reheating once, and let’s just say, it wasn’t my finest moment. Plus, using reusable glass water bottles is a great way to stay environmentally friendly while enjoying your treats!
Final Thoughts
When it comes to dessert, I’ve to admit, Peach Cobbler Cheesecake Cones are a game changer. They combine two classics into one delightful treat, and trust me, your taste buds will thank you.
Honestly, who wouldn’t want a crunchy cone filled with fluffy cheesecake and warm peach cobbler? It’s like summer in every bite. Plus, the ease of making them keeps me from feeling like a crazy chef in the kitchen.
I love how you can customize the layers, and let’s be real, the more cobbler, the better. So, if you’re in the mood to impress or just want a sweet treat after dinner, these cones are where it’s at. Go ahead, give them a try; you won’t regret it.