
I’ve been obsessed with this Sweet Pomegranate Caramel recipe lately, and trust me, it makes those cozy moments even richer. Who knew you could turn pomegranate juice into chewy, buttery caramels? My kitchen’s become a bit of a sticky disaster, but it’s worth it. Seriously, imagine the sweet-tangy explosion in your mouth. What’s even better? These treats make perfect gifts or a special surprise at gatherings. Want to know how to whip them up?
Why You’ll Love This Recipe
You’ll love this recipe because it turns an ordinary ingredient—pomegranate juice—into sweet little jewels of caramel that are surprisingly easy to make.
Honestly, who knew a simple fruit juice could create something so rich and chewy? When I first tried making pomegranate caramels, I expected a disaster. Instead, I was met with a sticky and delicious triumph.
The blend of tangy pomegranate and buttery sweetness dances on your taste buds, leaving you craving more. Plus, how cool is it to whip up homemade candies?
You just boil the juice down, mix in a few other goodies, and voilà—gourmet treats right at your fingertips.
You’re going to savor every little gem that comes from this recipe.
Equipment List
When diving into the world of pomegranate caramels, a few key pieces of equipment make all the difference. First, you’ll definitely need a large, heavy-bottomed pot. Trust me, a flimsy one just won’t cut it when you’re trying to boil down that juice.
You’ll also want a good candy thermometer to watch those temperatures—it’s like a trusted buddy, making sure you don’t overdo it.
A sharp knife will be your best friend when it’s time to cut the caramels, and don’t forget some parchment paper for lining your pan; it saves you from scrubbing later.
Oh, and a wooden spoon is a must for stirring. Believe me, those little details are what help transform your caramel dreams into reality. Additionally, using premium tools can elevate your baking experience and ensure perfect results every time.
Our Ingredients
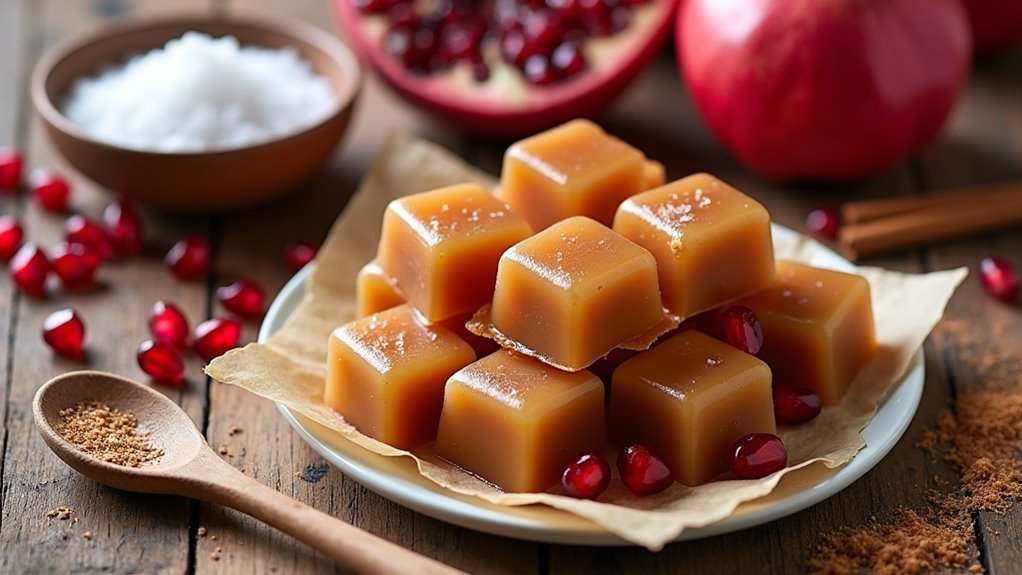
When it comes to making pomegranate caramels, the magic really starts with your ingredients. You see, each component plays a vital role in delivering that rich, tangy sweetness we all crave. I mean, just think about the vibrant color and flavor pomegranate juice brings to the party. It’s like the life of the dessert table.
So, let’s not delay any longer. Here’s what you’ll need to whip up this delightful treat.
- 4 cups of pomegranate juice
- 4 oz of room temperature butter
- 1 cup of granulated sugar
- ½ cup of light brown sugar, packed
- 1 teaspoon of sea salt
- ½ teaspoon of ground cinnamon
- ¼ teaspoon of cardamom (optional)
- ⅓ cup of heavy cream
Now, about those ingredients—let’s chat for a second. Using fresh pomegranate juice is quite the treat, but if you don’t feel like juicing all those little seeds yourself (and who does when it can get messy?), store-bought works just fine. Just check labels to avoid added sugars and preservatives; we want this to be all-natural goodness.
The butter? Oh, it’s essential for that creamy texture that makes your caramels melt in your mouth. And while the spices like cinnamon and cardamom add depth, feel free to skip the cardamom if that’s not your thing, or dial it back a bit if it’s a touch too fancy for your tastes.
Cooking should be a joy, not a chore—so customize those flavors to what you love. Now, let’s get cooking!
Step-by-Step Instructions
Making pomegranate caramels is an exciting kitchen adventure that combines the sweet and tangy flavor of pomegranate juice with luscious buttery richness.
Don’t worry, you don’t need to be a candy-making expert to pull this off; just follow these straightforward steps, and you’ll be well on your way to whipping up a batch of these delightful treats.
Step 1: Begin with the juice.
Start by pouring 4 cups of pomegranate juice into a large pot. Bring it to a boil over medium heat. As it bubbles away, you’ll want to reduce it until you have about ⅓ to ½ cup of syrup.
This will take around 30 to 45 minutes. Keep an eye on it so it doesn’t boil over; it’s a sticky situation, trust me.
Step 2: Add the goodies.
Once you’ve achieved that lovely, thick syrup consistency, remove the pot from the heat. Now it’s time to add in the magic ingredients: 4 ounces of room temperature butter, 1 cup of granulated sugar, ½ cup of packed light brown sugar, and ⅓ cup of heavy cream.
Stir everything together until it’s well combined. Get ready for a delicious aroma that will make your kitchen feel cozy!
Step 3: Heat it up.
Return the pot to medium-high heat. Clip on a candy thermometer — you’ll need it to reach the perfect temperature. Keep everything boiling until the mixture hits a sizzling 248°F.
This is where patience pays off. Just imagine how great those caramels will taste once they’re done.
Step 4: Spice it up.
When you’ve hit that magic temperature, remove the pot from the heat again. Stir in 1 teaspoon of sea salt and, if you’re feeling adventurous, ½ teaspoon of cinnamon and ¼ teaspoon of cardamom.
The spices will add a wonderful depth of flavor, but don’t feel pressured if you want to skip the cardamom; it’s optional for a reason.
Step 5: Pour and set.
Next, grab a parchment-lined pan (an 8×8 inch works great) and pour your caramel mixture into it. Make sure to spread it out evenly.
Let it set for about 2 hours at room temperature, or you can speed things up by chilling it for 30 minutes in the fridge.
Step 6: Cut and store.
Once your caramels are set, use a sharp knife to cut them into bite-sized pieces. Trust me, this is easier said than done—sometimes they don’t want to break apart nicely, but don’t take it personally.
Once cut, wrap each piece tightly in wax paper or parchment paper to keep them fresh. Store them in an airtight container, and make sure you keep them somewhere cool.
Premium baking equipment can also enhance your cooking experience!
There you have it! You’re all set to impress friends and family with these scrumptious homemade pomegranate caramels.
Just remember to enjoy the process, and don’t stress too much if things don’t go perfectly. After all, often it’s the sweet moments in the kitchen that turn into the most cherished memories.
Happy cooking!
Tips & Variations
A few clever tips can make your pomegranate caramels even more delightful and personal. First off, try adding a splash of fresh lemon juice to the mix. It brightens the flavor surprisingly well.
If you’re feeling adventurous, toss in some crushed nuts for a crunchy surprise. Who doesn’t love a little texture?
Now, let’s talk about the sea salt—don’t skip it! It really amplifies that sweet-tart profile.
Oh, and if you find the caramel getting too hard, just pop it in the microwave for a few seconds. It’ll soften right up.
Finally, I’ve learned the hard way: using a sharp knife is essential for clean cuts. No one wants a caramel massacre, right?
Enjoy your sweet experiments!
How to Serve?
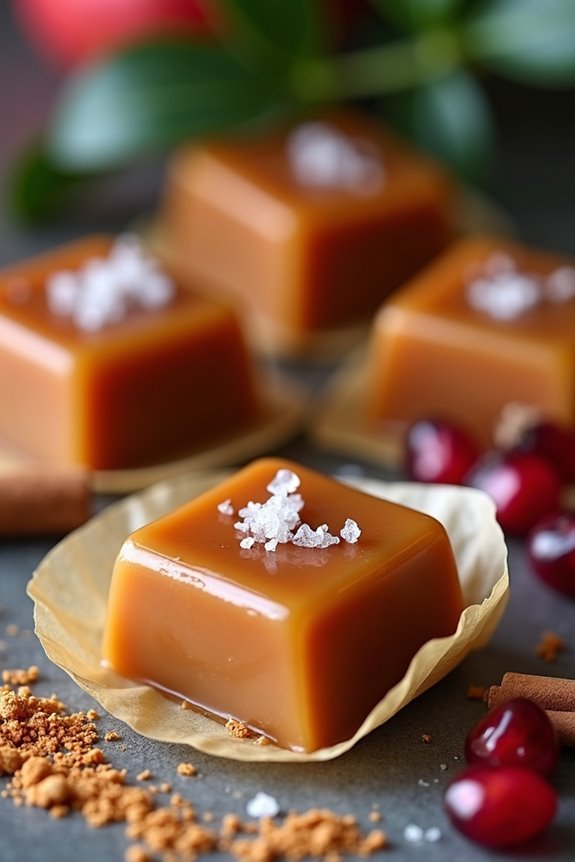
Serving pomegranate caramels can be just as enjoyable as making them. Once you’ve cut these little delights, I like to arrange them on a pretty platter.
A colorful array not only looks fancy but encourages everyone to grab one—trust me, they won’t be able to resist! You can sprinkle some sea salt or even a dash of pomegranate seeds for that pop of color; it adds a lovely touch.
I sometimes pair them with a hot cup of tea or a rich coffee, which complements the sweet tartness perfectly. And let’s be real, a bit of lighthearted banter while indulging always enhances the experience.
Storage & Reheating Guide
While it’s easy to get caught up in the excitement of making pomegranate caramels, knowing how to properly store and reheat them is just as important because we want those delicious treats to stay fresh and tasty for as long as possible.
I usually store my caramels in an airtight container at room temperature. That way, they stay nice and pliable, which makes slicing easier. To keep a variety of treats in your kitchen, consider investing in soup freezer containers, as they are perfect for ensuring freshness.
If you find them getting a bit hard, just pop them in the microwave for a few seconds—like magic. Seriously, it works. But don’t overdo it, or you’ll end up with a sticky mess. I’d rather not relive that disaster.
Final Thoughts
Storing those pomegranate caramels at room temperature keeps them soft and easy to slice, and honestly, who wants a hard-to-cut treat?
I’ve learned that letting them sit for a bit enhances the flavors, making every bite delightful. Plus, wrapping them in parchment adds a cute touch when you share them with friends.
Trust me, nothing beats gifting these little treasures on a chilly evening. They’re perfect for those “just because” moments when you want to treat yourself or someone special.
And hey, if they don’t turn out perfectly? Who cares? Sometimes the best stories come from culinary mishaps.