
I’m telling you, there’s something magical about biting into a warm, gooey red velvet cinnamon roll. The blend of soft dough, rich cocoa, and that swirl of cinnamon – it’s like a hug for your taste buds. I’ve had my fair share of kitchen mishaps, trust me, but these rolls are surprisingly forgiving. Want to wow your friends at brunch or just treat yourself to something special? Let’s get into the details, because trust me, you won’t want to miss out on this.
Why You’ll Love This Recipe
One of the best things about these Red Velvet Cinnamon Rolls is that they combine two delightful treats into one blissful experience. Seriously, who doesn’t love a good cinnamon roll?
Then, add that irresistible red velvet flavor, and you’ve got magic. The vibrant color alone makes them a showstopper, right? Plus, when you bite into that soft, gooey goodness, it feels like a warm hug on a chilly day.
You’ll want to serve these for breakfast, dessert, or just because it’s Thursday (we all deserve a treat). And let’s be real—who doesn’t want to impress friends with their baking skills?
These red velvet cinnamon rolls aren’t just tasty; they’re a fun adventure in the kitchen. Immerse yourself, and let the magic happen.
Equipment List
When you’re about to whip up those glorious Red Velvet Cinnamon Rolls, having the right equipment can make all the difference. Trust me; I’ve tried making them with a flimsy mixing bowl, and let’s just say, it didn’t end well.
You’ll need a sturdy mixing bowl for combining your ingredients, a measuring cup for precision, and a rolling pin to get that dough just right. Don’t forget a sharp knife or dough cutter to slice those rolls evenly.
A greased baking pan is vital for achieving that perfect rise, and parchment paper can be a lifesaver for easy cleanup. Finally, a whisk and spatula? Essential. I always keep mine close, feeling like they’re my cooking sidekicks on this delicious journey. Additionally, using a high end outdoor grill can elevate your cooking experience, allowing for unique flavor profiles in your baking.
Our Ingredients
Making Red Velvet Cinnamon Rolls is like a warm hug from the inside out. Just thinking about the combination of soft, fluffy dough and rich, chocolatey filling makes my heart flutter a little. It’s the kind of treat that can turn an ordinary morning into a special occasion—even if that occasion is just, you know, getting out of bed.
Before we engage in the step-by-step instructions, let’s talk about the ingredients you’ll need to make this delicious dream a reality.
Here’s what you’ll need:
- 2 1/4 tsp active dry yeast
- 1/2 cup granulated sugar
- 1 cup whole milk, warmed
- 1/2 cup unsalted butter, melted
- 2 large eggs, room temperature
- 4 1/4 cups all-purpose flour
- 3 tbsp Dutch-process cocoa powder
- 1 tbsp nonfat milk powder
- 1 tsp kosher salt
- 2–3 tsp red food coloring
For the filling:
- 1/4 cup unsalted butter, softened
- 1 cup dark brown sugar
- 2 tbsp ground cinnamon
- 1/4 tsp kosher salt
And for the heavenly vanilla bean cream cheese icing:
- 1/4 cup unsalted butter, softened
- 4 oz cream cheese, softened
- 1 1/2 cups powdered sugar
- 1 tbsp vanilla bean paste
Now, before you get too excited and start tossing ingredients together, let’s consider a few things. First off, using fresh yeast is essential. Nothing dampens the spirit of baking like realizing your yeast is past its prime—trust me, I’ve been there.
And while we’re at it, room temperature ingredients are your friends; they help create that light, airy dough we’re all dreaming about. If your butter is still sporting a chill, it’ll give you a denser roll than you want.
Finally, don’t skimp on the red food coloring—this is a red velvet treat, after all! You’ll want those rolls to have that gorgeous, festive hue. With your ingredients ready to go, we’ll be on our way to some cinnamon roll heaven soon.
Step-by-Step Instructions
Making Red Velvet Cinnamon Rolls is a delightful journey of aromas and tastes that you won’t want to miss out on. Mixing the batter is quick and simple—just follow these easy steps, and you’ll have your kitchen filled with the warm scent of cinnamon and chocolate in no time. Ready to plunge into this sweet adventure? Let’s get rolling!
- Activate the yeast: Start by taking 1 cup of warmed whole milk and adding in 2 1/4 tsp of active dry yeast along with 1/2 cup of granulated sugar. Give that a gentle stir and let it sit for about 5–10 minutes until it becomes frothy. This is when the magic begins. The yeast is waking up, and you’ll want to make sure it’s alive and well—otherwise, it’s like starting a party and no one shows up.
- Mix the dough: In a large bowl, combine 4 1/4 cups of all-purpose flour, 3 tbsp of Dutch-process cocoa powder, 1 tbsp of nonfat milk powder, and 1 tsp of kosher salt to create that beautiful dry mix. Slowly add your frothy yeast mixture to this bowl, along with 1/2 cup of melted unsalted butter and 2 large room temperature eggs. Mix everything until it starts to come together into a soft dough.
- Knead the dough: Dust your countertop lightly with flour and turn out your dough. Knead it with love—about 5–7 minutes—until it’s smooth and elastic. Just imagine you’re giving that dough a good, gentle workout. Don’t rush—this is where the fluffiness comes from.
- Let it rise: Place your kneaded dough in a lightly oiled bowl, cover it with a clean kitchen towel, and let it sit in a warm spot until it doubles in size—this should take about 1–2 hours. It’s like watching your dough grow and thinking, “Look at all that potential.”
- Prepare the filling: While your dough is rising, let’s mix up the scrumptious filling. In a bowl, combine 1/4 cup of softened unsalted butter, 1 cup of dark brown sugar, 2 tbsp of ground cinnamon, and a pinch of 1/4 tsp kosher salt. This mixture is going to take your rolls to the next level, bringing that warm, comforting flavor everyone loves.
- Roll it out: Once your dough has risen, punch it down (yes, you can take out a little frustration here) and roll it out on a floured surface into a large rectangle—about 16×24 inches. Spread your filling all over the dough, leaving a little border around the edges, so the filling doesn’t spill out everywhere when you roll it up.
- Roll it tight: Starting from one long edge, carefully roll the dough tightly into a log. Seal the edges by pinching them closed. Now, cut this log into 12 equal pieces using a sharp knife or dental floss (yes, you can use that if you want clean cuts without squishing your rolls).
- Second rise: Place your sliced rolls into a greased baking pan (they can be snug, they’ll expand) and cover them again with a towel. Let them rise for another 30–40 minutes, until they’ve puffed up and filled the pan.
- Bake: Preheat your oven to 375°F (190°C). When ready, bake your rolls for 25–30 minutes until they’re golden brown on top and your kitchen smells like a bakery. Yum! Just be sure to keep an eye on them—the visual cue of their color is essential when determining if they’re done.
- Make the icing: While they bake, whip up the heavenly vanilla bean cream cheese icing. In a bowl, beat together 1/4 cup of softened unsalted butter, 4 oz of softened cream cheese, 1 1/2 cups of powdered sugar, and 1 tbsp of vanilla bean paste until smooth. The texture should be creamy and spreadable, perfect for slathering on hot rolls.
- Ice and enjoy: Once your rolls come out of the oven, let them cool for just a few minutes before generously drizzling or spreading that delicious icing on top. Trust me, it’s hard to wait, but a little cooling keeps the icing from melting all away.
And there you have it, your very own batch of Red Velvet Cinnamon Rolls. Next time you rise to the challenge of a morning treat, you’ll know you have these beauties waiting to make your day just a little sweeter. Enjoy them fresh, share with friends, or perhaps keep them all to yourself—no judgment here. Happy baking! Remember, having the right premium baking equipment can elevate your baking experience even further.
Tips & Variations
While you might think the red velvet cinnamon rolls are perfect as is, there’s always room for a little creativity in the kitchen.
I love playing around with the filling. If you’re feeling adventurous, toss in some chopped pecans or dark chocolate chips for an extra delicious surprise.
Sometimes, I even switch out the spices—cardamom can add a lovely twist. And if you want to make them extra special, why not drizzle on some white chocolate?
Don’t forget, letting the rolls cool a bit before icing is key; I’ve learned that the hard way, trust me.
Finally, remember to use room temperature ingredients; it really makes a difference. You’ll appreciate the results, I promise.
How to Serve?
After whipping up those delicious red velvet cinnamon rolls and experimenting with creative fillings, I bet you’re itching to serve them in style.
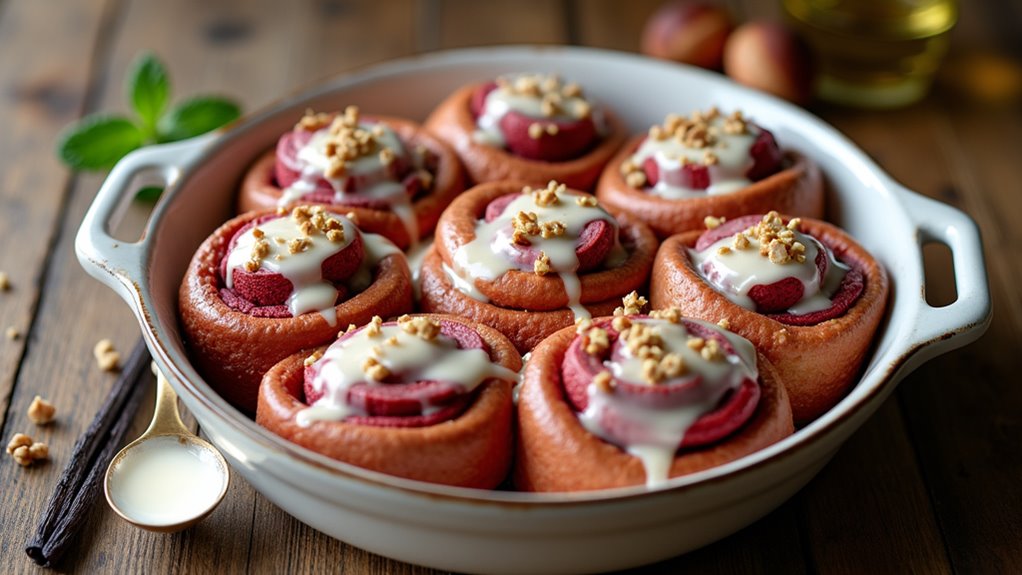
First, I like to arrange the rolls on a cute platter, drizzling that luscious vanilla bean cream cheese icing over the top. It’s all about presentation, right? If you’ve got some fresh berries lying around, toss those on for color and a fruity contrast to the sweetness.
When it’s time to indulge, I usually warm them slightly in the microwave—just 10 seconds—because nothing beats a gooey cinnamon roll.
And don’t forget to offer napkins; trust me, the icing can get a little messy. Enjoy every bite—these rolls definitely deserve a spot at any brunch table.
Storage & Reheating Guide
Although I sometimes wish these red velvet cinnamon rolls could last forever, they actually store pretty well if you know what you’re doing.
I recommend putting any leftovers in an airtight container and sliding them into the fridge. They’ll usually stay fresh for about three days, but honestly, they rarely last that long at my house.
When you’re ready to enjoy them again, just pop them in the microwave for about 15-20 seconds—trust me, it makes them feel like they just came out of the oven! A fresh batch of these rolls can be easily made in a premium slow cooker, making preparation a breeze.
If you want them even toastier, try reheating them in a toaster oven for a few minutes. Just don’t blame me if you end up eating a few more than you planned.
Final Thoughts
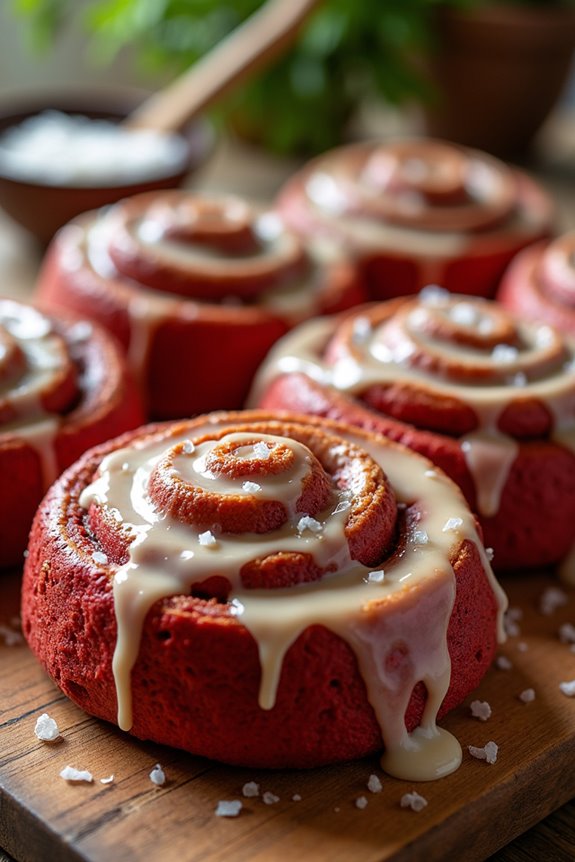
When you finally pull those warm red velvet cinnamon rolls out of the oven, it’s hard not to feel a little proud of yourself. The sight of those gooey, cinnamon-swirled treats is just heavenly, right? Plus, they smell like a cozy hug.
Don’t worry if they’re not perfect; I’ve had my fair share of lopsided rolls, and they always taste amazing. Just grab that icing and slather it on while they’re still warm. Trust me—you won’t regret it.
Think of it as a messy masterpiece, or as I like to call it: “culinary abstract art.” Sharing them with friends? Well, that’s just pure joy. You might want to keep a few to yourself, though.
Happy baking!