
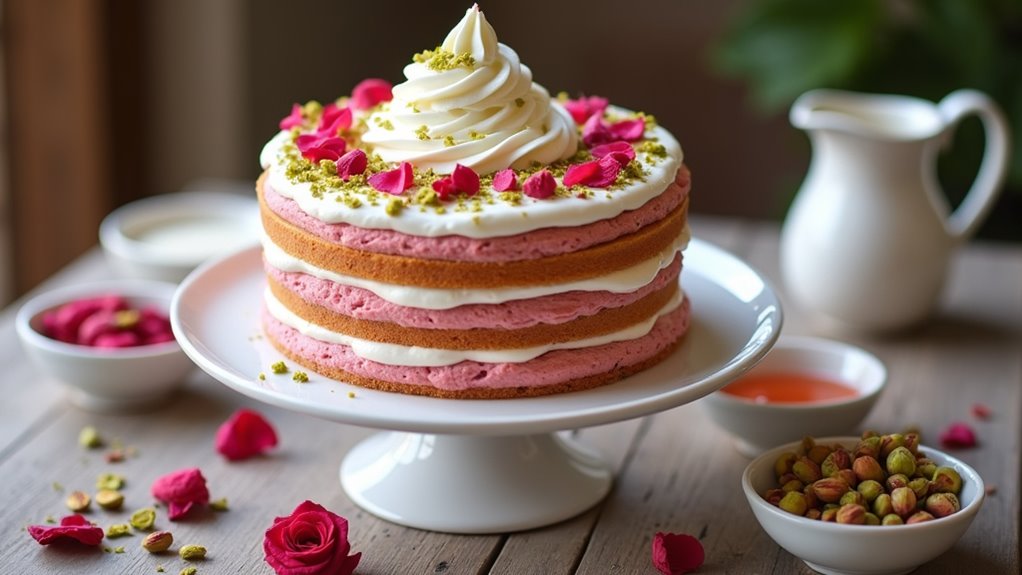
You know how sometimes you just crave something special? That’s when I whip up my Delightful Rose Milk Cake. It sounds fancy, but trust me, it’s pretty simple, and the results are dreamy. The layers of fluffy cake infused with floral rose syrup and the creaminess of whipped topping? Amazing. Plus, those crunchy pistachios add a perfect touch. So, are you ready to impress your friends and family—or just treat yourself? Let’s plunge into the details.
Why You’ll Love This Recipe
You know, when I first stumbled upon the idea of making Rose Milk Cake, I was a bit skeptical. I mean, a cake soaked in milk sounds messy, right?
But let me tell you, every bite’s like magic. It’s soft, creamy, and that hint of rose syrup? Pure bliss. Not to mention the joyous swirls of whipped cream and those crunchy pistachios.
You’ll wonder how something so simple can taste so fancy. Plus, it’s a delightful project—think of it as a fun baking adventure. Friends will be impressed, and you might just become the Rose Milk Cake superstar in your circle.
Trust me, once you try it, you’ll be falling in love, one slice at a time.
Equipment List
Baking the Rose Milk Cake isn’t just about the ingredients; it’s also about having the right tools at your side.
First, you’ll need a 9×13 inch baking pan—trust me, it makes a big difference. A mixing bowl is essential for combining everything, and, oh, don’t forget a whisk for that smooth texture. I usually keep measuring cups handy for accuracy—flour can be a sneaky ingredient.
You’ll need a sifter, too; it really helps to incorporate air. A spatula is perfect for folding the batter gently, and I swear by a sharp knife for trimming the cake neatly.
Finally, grab some parchment paper—it prevents sticking and makes cleanup a breeze. That’s equipment for the win, right? Investing in premium baking equipment can elevate your baking skills to the next level.
Our Ingredients
When it comes to making a delicious Rose Milk Cake, the ingredients play a huge role in bringing out that unique flavor and delightful texture.
Trust me, these aren’t just any old ingredients; they come together to create a cake that’s both decadent and invigorating. Plus, who doesn’t want a cake that sounds as dreamy as it tastes?
Grab your shopping list, because here’s what you’ll need:
- 1 ½ cups all-purpose flour (maida)
- 1 tsp baking powder
- ½ tsp baking soda
- 1 cup yogurt
- ¾ cup castor sugar
- ½ cup vegetable oil
- ¼ tsp kewra extract (optional, but oh-so-fancy)
- 1 tbsp Rooh Afza rose syrup
- Red food coloring, because we’re making it pretty!
- ½ cup condensed milk
- ½ cup fresh cream
- 1 ½ cups milk
- 4 tbsp Rooh Afza (yes, more rose syrup for that extra pizzazz)
- Whipping cream, chopped pistachios, and dried rose petals for garnish, because we want our cake to look just as good as it tastes.
Now, regarding the ingredients: some of them might be lurking in your pantry, but others could be new to your shopping cart—especially that Rooh Afza syrup.
If you haven’t tried it before, it’s a floral delight that adds a beautifully sweet rose flavor to the cake. Kewra extract is a nice touch too, giving a slightly aromatic essence, but it’s totally optional if you want to keep it simple.
Remember, the beauty of baking is that you can personalize flavors, so feel free to adjust the amount of rose syrup to get the sweetness just right for you.
Baking is an adventure, and every ingredient helps to tell a unique story!
Step-by-Step Instructions
Making a Rose Milk Cake is an enchanting journey into the world of flavors. Mixing the batter is quick and simple—just follow these easy steps to whip up your dreamy cake, and soon enough, you’ll be diving into a slice of rose-flavored delight! Let’s get started.
1. Preheat your oven to 180°C (350°F). This is super important—getting your oven nice and hot before baking helps the cake rise beautifully.
2. Prepare your baking pan** by lining a 9×13 inch pan with parchment paper**. This prevents sticking and makes for easy removal later on. Ah, the magic of parchment paper.
3. In a bowl, take 1 cup of yogurt and mix in ½ tsp baking soda. This little combo will help your cake rise.
Now toss in ¾ cup castor sugar, ½ cup vegetable oil, 1 tbsp Rooh Afza rose syrup, and ¼ tsp kewra extract (if you’re feeling fancy). Don’t forget a dash of red food coloring—just a couple of drops will do.
Now, mix it all together until it’s well combined and looking cheerful (this is the fun part!).
4. Sift 1 ½ cups all-purpose flour and 1 tsp baking powder directly into your wet mixture. Gently fold the flour into the batter until just combined.
Be careful, don’t overmix—nobody wants a tough cake! A few lumps are perfectly fine; it gives character.
5. Pour the batter into your prepared pan. Spread it out evenly so it can rise uniformly.
Now it’s time for the oven! Bake for about 30–35 minutes. You’ll know it’s ready when a skewer inserted in the center comes out clean. Trust me, the aroma while it’s baking will have you drooling.
6. While the cake is baking, let’s whip up an indulgent milk mixture. In a bowl, combine 1 ½ cups milk, ½ cup fresh cream, ½ cup condensed milk, and 4 tbsp Rooh Afza.
Give it a good whisk until it’s all blended together. Set this new creation aside; it’s about to work its magic on your cake.
7. Once the cake is baked and cooled for a few minutes, carefully trim it if needed (you want a nice flat top).
Now, take that beautiful milk mixture and pour it over the cake. Tilt the pan gently to guarantee the milky goodness covers the entire surface. It’s like giving your cake a cozy blanket!
8. Chill the cake in the refrigerator for at least 2 hours, but if you can, leave it overnight.
This helps the cake soak up that delicious milk mixture—the longer, the better!
9. Before serving, take the cake out and top it with whipped cream, chopped pistachios, and dried rose petals for that elegant finish.
Just look at it—so pretty, right?
And there you have it, a Rose Milk Cake that’s not only heavenly in flavor but also a feast for the eyes. The right tools can elevate such baking adventures to a new level, and you might want to make two because one slice is never enough! Happy baking!
Tips & Variations
You might think that once you’ve nailed the Rose Milk Cake recipe, there’s nothing more to explore, but trust me, there’s always room for a little creativity in the kitchen.
Want to add a twist? Try using flavored yogurt, like strawberry or coconut, for a fun surprise. Not a fan of rose syrup? I’ve swapped it out for mango or even cardamom extract, and it’s just delightful.
If you want more texture, toss in some finely chopped nuts or dried fruits. Oh, and if you’re feeling extra fancy, drizzle some chocolate sauce on top.
Just remember, the more you experiment, the more you’ll discover what makes your heart flutter with joy. Cooking’s all about having a little fun, right?
How to Serve?
Serving the Rose Milk Cake is where the real magic happens, especially since it’s not just about the taste, but also about the presentation.
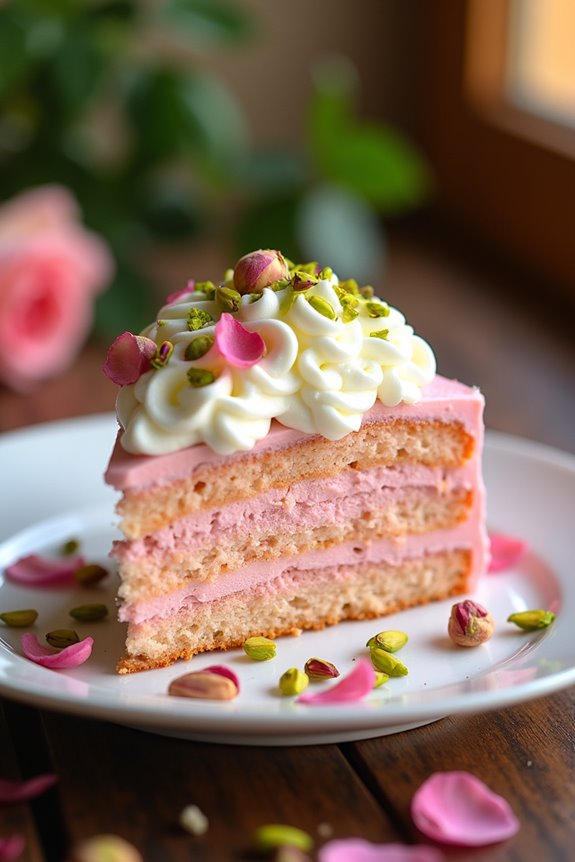
I like to cut the cake into neat squares or rectangles, revealing that gorgeous pink hue inside. Then, I gently drip any leftover milk mixture over the top. It’s like a delicious milk bath for the cake.
Just before serving, I indulge in a bit of garnish—the whipped cream, a sprinkle of chopped pistachios, and those delicate rose petals really make it pop.
When you place it on a beautiful platter, trust me, it draws everyone in. Everyone’s always curious about the flavor. And honestly? Nothing makes me happier than seeing their delighted faces.
Storage & Reheating Guide
While it’s tempting to devour the Rose Milk Cake right after you make it—trust me, I get it—figuring out how to store it properly can really make a difference in keeping it fresh and tasty.
First, cover any leftover cake with plastic wrap or pop it in an airtight container. Refrigeration is your friend here, keeping it moist and flavorful for up to five days.
If you want to save some for later, consider freezing slices. Just wrap them tightly, and they’ll last a couple of months.
When you’re ready to enjoy, thaw it in the fridge overnight. A quick pop in the microwave for a few seconds can warm things up nicely. Trust me, it’s worth the wait.
Additionally, using an organized spice rack organizer can help streamline your baking process by ensuring your ingredients are easily accessible, making it simpler to whip up delightful treats like this cake.
Final Thoughts
As you wrap up your baking adventure with this Rose Milk Cake, it’s hard not to feel a little proud, isn’t it? You made something special.
I mean, sure, I may have accidentally spilled some flour, but that just means I’m a true baker, right?
This cake’s got that lovely rose flavor, and when it absorbs that creamy milk mixture, oh boy, it’s magic.
Remember, patience is key; letting it chill overnight really does make a difference.
So, gather your loved ones, slice into that beautiful cake, and savor every bite.
And if you share—kudos to you, but no judgment here if you decide to keep it all to yourself. You deserve it.
Happy baking!