
Let me tell you about shrimp cakes with garlic aioli. They sound fancy, but they’re surprisingly easy to whip up. Imagine crispy bites of shrimp, infused with green onions, and finished off with a creamy, garlicky dip. Trust me, I’ve messed up enough recipes to appreciate when things come together effortlessly. Plus, who wouldn’t want to impress family and friends with such a delightful dish? Stick around, because I’ll show you how to get this deliciousness on your plate.
Why You’ll Love This Recipe
When you realize how easy it’s to whip up these shrimp cakes, you’ll be hooked.
Seriously, it’s one of those recipes that feels fancy but comes together in a snap. You’ll love how tender the shrimp are, mixed with green onions and a hint of soy sauce—total flavor bomb.
And let’s not forget the star of the show: the garlic aioli. It adds that creamy, zesty kick you didn’t know you needed.
I still remember the first time I served these shrimp cakes with garlic aioli to friends. The looks on their faces were priceless, pure joy.
Trust me, you’ll want to make these again and again, either for a laid-back dinner or a little gathering. So delicious!
Equipment List
Getting everything ready before you jump into cooking is half the fun, don’t you think? For these shrimp cakes, you’ll need a few trusty pieces of equipment.
First, grab a decent mixing bowl; trust me, you don’t want ingredients flying everywhere. You’ll also want a knife for chopping shrimp and green onions—careful, those knives can be sneaky.
A skillet is essential for cooking; a non-stick one is my favorite, so I can avoid the epic battle of shrimp cakes sticking. Finally, don’t forget a spatula to flip those golden treats without losing your masterpieces.
Also, consider getting a digital kitchen scale to ensure your ingredient measurements are precise. Easy peasy, right? Just this little setup, and you’re all set to whip up something delicious. Let’s get cooking!
Our Ingredients
Let’s immerse ourselves in the delicious world of shrimp cakes! The star of this dish, of course, is our lovely shrimp, offering a sweet, briny flavor that’s hard to resist. Paired with a zesty garlic aioli, these shrimp cakes are perfect for everything from a casual dinner to impressing guests.
It’s all about getting the right ingredients together, so let’s make sure you have everything you need before we start this culinary adventure.
Here’s what you’re going to need for those scrumptious shrimp cakes:
- 1 lb raw shrimp, peeled and deveined
- 1 large egg
- 1/4 cup mayonnaise
- 3 tbsp panko breadcrumbs
- 2 stalks green onions, chopped
- 1 tsp soy sauce
- 1 tbsp olive oil
- 1 clove garlic, grated
- 1 tsp lemon juice (for the aioli)
- 3 tbsp mayonnaise (for the aioli)
Now, let’s talk a bit about our ingredients. Fresh shrimp are key here, as they offer the best flavor and texture, so don’t skimp on quality. If you’re feeling adventurous—or if shrimp is a bit too pricey—you could even experiment with crab or fish for a twist.
And when it comes to the mayonnaise, a good quality brand can elevate the taste, so choose wisely. The panko breadcrumbs? They’re essential for that crunchy goodness; regular breadcrumbs just won’t cut it.
Oh, and don’t forget about the garlic. The grated kind can make a world of difference in flavor; let’s not be shy about putting some love in our aioli.
Step-by-Step Instructions
Mixing the batter is quick and simple—just follow these easy steps and you’ll have delicious shrimp cakes ready to enjoy in no time. Let’s dive right into the fun and get those tasty morsels sizzling in your kitchen.
1. Make the Garlic Aioli**: In a small bowl, combine 1 clove of grated garlic**, 3 tablespoons of mayonnaise, and 1 teaspoon of lemon juice. Mix them together until smooth and creamy. Set this aside because this zesty goodness will complement our shrimp cakes perfectly.
2. Prepare the Shrimp Mixture: Grab your 1 pound of raw shrimp and chop it finely—don’t worry about being perfect, but aim for small pieces for even cooking. In a mixing bowl, combine the chopped shrimp with 1 large egg, 1/4 cup of mayonnaise, 1 teaspoon of soy sauce, 2 stalks of chopped green onions, and 3 tablespoons of panko breadcrumbs. Stir everything together until it’s nicely mixed.
(Remember not to overwork it; we want those shrimp pieces to still shine.)
3. Heat the Skillet: Heat 1 tablespoon of olive oil in a skillet over medium heat. You want the oil shimmering, not smoking. This is where the magic happens, so be patient.
4. Form and Cook the Cakes: Now, using a spoon, scoop up generous spoonfuls of the shrimp mixture and carefully drop them into the hot skillet. Flatten them slightly with the back of the spoon. Cook for about 1 to 3 minutes on each side, or until they turn a delightful golden brown.
(Feel free to flip them gently; we want them browning, not splattering.)
5. Serve and Enjoy: Once cooked, place the shrimp cakes on a plate lined with paper towels to absorb any extra oil. Serve them hot with your homemade garlic aioli drizzled on top or on the side. They’re irresistible, and you might even want to make an extra batch—trust me, leftovers are a welcome surprise.
These shrimp cakes are so delightful, you’ll find it hard to stop at just one. Plus, with that creamy garlic aioli, you’ll be feeling like a top chef in no time. Additionally, using essential kitchen appliances can elevate your cooking experience and help you achieve gourmet results effortlessly.
Tips & Variations
After you’ve whipped up those delicious shrimp cakes, you might be excited to put your own spin on this tasty dish. One of my favorite hacks is swapping shrimp for crab or scallops—who knew that could be so fancy?
Don’t forget about spices; adding a pinch of cayenne or Old Bay elevates the flavors dramatically. If you’re feeling adventurous, toss in some finely chopped bell peppers or even corn for a bit of sweetness.
And here’s a fun tip: if you’re like me and always forget where you put your cooking spray, a bit of parchment paper saves you from sticky situations.
Finally, don’t be afraid to experiment with the aioli; a dash of sriracha can give your sauce a spicy kick. Happy cooking!
How to Serve?
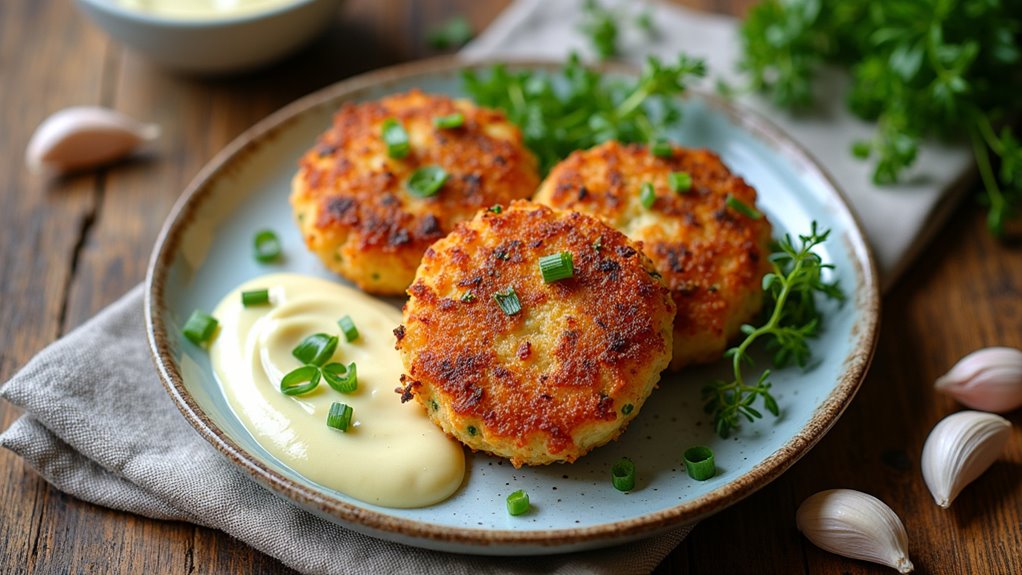
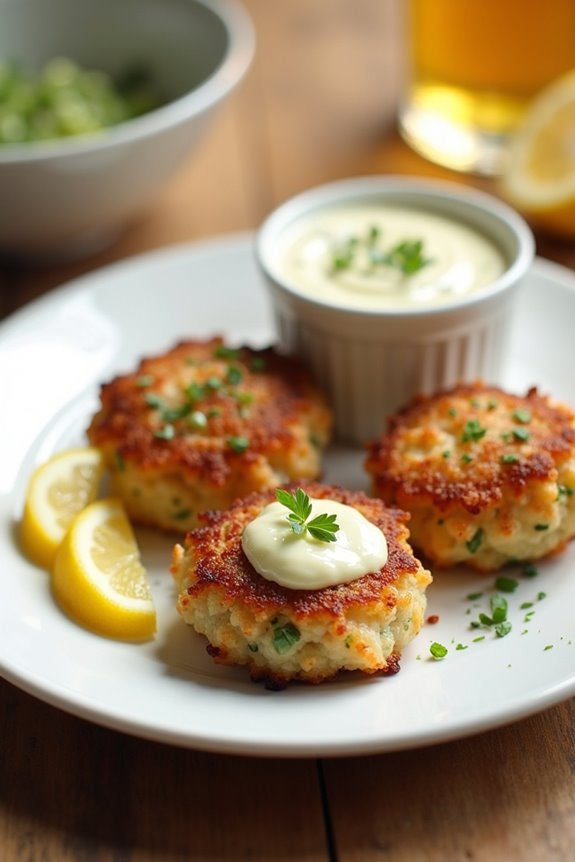
Serving shrimp cakes is where the magic happens. I love plating them up hot, crispy, and inviting. Imagine this: a golden-brown shrimp cake, just waiting to be devoured.
I like to arrange them on a beautiful plate, with a generous dollop of garlic aioli right in the center. It’s such a mouth-watering sight, trust me.
You could also garnish with a sprinkle of fresh herbs or a slice of lemon for some pop. As I serve these, I often get a few curious glances from friends. Want a bite? I always ask, because who can resist these delicious cakes?
Pair them with a light salad or crusty bread. It’s pure joy on a plate, and trust me, they’ll disappear fast!
Storage & Reheating Guide
When it comes to storing those delectable shrimp cakes, I get it – you wanna savor every last bite.
First things first, let them cool completely to avoid a mushy disaster. Once they’re cool, pop ‘em in an airtight container – I’ve learned the hard way that moisture is the enemy. Store them in the fridge for up to three days.
Want to be a meal-prepping superstar? You can freeze them too. Just stack them with parchment paper in between, and they’ll last for up to three months.
When it’s time to reheat, a skillet is your best friend. Just a splash of oil, a few minutes per side, and you’ll have that crispy perfection back. Trust me, it’ll be worth it. Plus, having the right tools like a colander set can make draining and rinsing ingredients a breeze.
Final Thoughts
Even if you’re just dipping your toes into the world of cooking, these shrimp cakes will have you feeling like a culinary rock star. Seriously, they’re that easy.
I remember the first time I made them; I almost burned the kitchen down trying to multitask. But with a little patience, you’ll be dishing out deliciousness in no time.
The crunchy outside, the tender shrimp inside, paired with that garlic aioli—it’s a match made in heaven. Plus, who doesn’t love impressing friends with tasty homemade bites?
Give these cakes a shot, and don’t fret if they don’t come out perfect. Just keep experimenting.
Most importantly, enjoy the process! After all, cooking should be fun, not a chore.