
Let’s talk about smash burgers with baconnaise sauce. Honestly, who doesn’t love a burger that’s crispy on the outside and juicy inside? The baconnaise takes it to another level with its rich, smoky flavor. I remember the first time I made these; my kitchen was a mess, but the smiles around the table made it worth it. Just wait till I share how to whip up this creamy goodness—trust me, you won’t want to miss out on this.
Why You’ll Love This Recipe
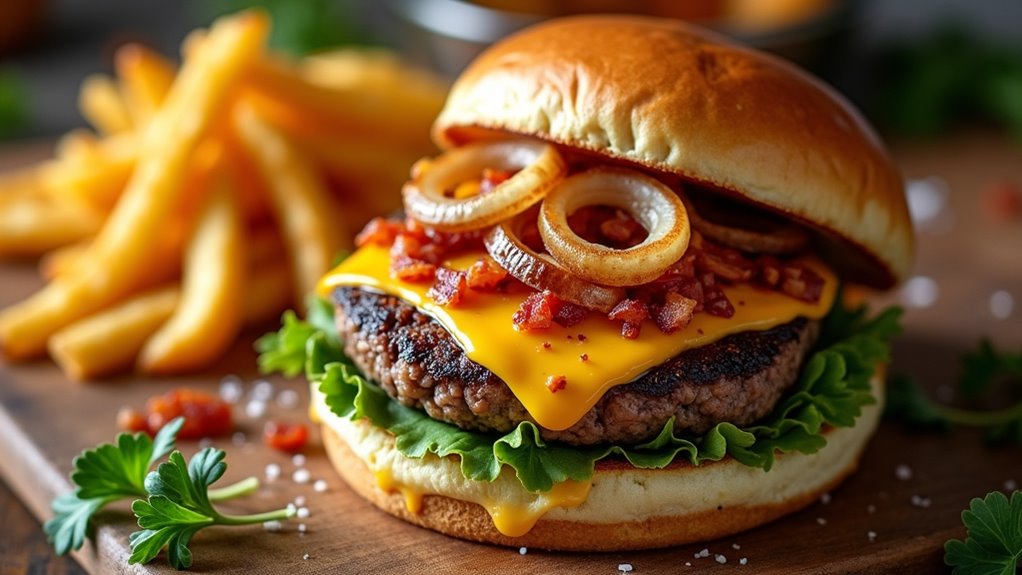
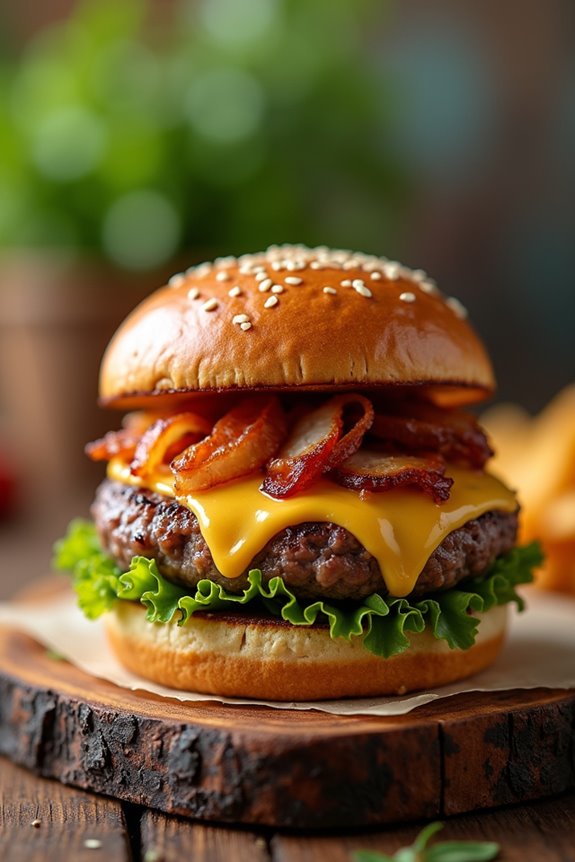
You know how sometimes you just crave a burger that hits all the right notes? That’s exactly what smash burgers with baconnaise sauce deliver. Imagine this: juicy beef, crispy bacon, and zesty sauce, all packed between warm, toasted buns. You’ll find every bite downright heavenly.
I remember the first time I made these; the smell of sizzling meat and onions had my family hovering like hungry hawks. Seriously, who could resist? The baconnaise adds a creamy, smoky twist that transforms an ordinary burger into something magical.
Plus, they’re easy to make, so you won’t feel like a chef from a reality show. Next time the burger cravings hit, trust me, this recipe will be your go-to.
Equipment List
You’ll need a good griddle or heavy skillet—trust me, non-stick isn’t cutting it here. A flat spatula is essential for that perfect smash; I’ve learned the hard way that flimsy tools just don’t cut it.
You also want some cooking oil, like avocado or olive oil, to keep things from sticking.
If you’re like me and love your onions thin, a mandoline will save you some time, and it’s fun to use, too!
Don’t forget about a meat thermometer; overcooked burgers are a tragedy. For mixing ingredients effortlessly, a set of stainless steel mixing bowls is invaluable in any kitchen.
Our Ingredients
When you’re ready to make some seriously delicious smash burgers, having the right ingredients is a big part of the game. It’s not just about the beef; the toppings, sauces, and seasonings are what elevate a good burger to something truly unforgettable. Trust me, you’ll want to gather all these goodies to get the full flavor experience.
Here’s what you’ll need to get started:
- 1 lb ground chuck (formed into 1/3 lb balls)
- Thinly sliced white onions
- 6 slices bacon, cooked and chopped
- ½ cup mayonnaise
- 2 tbsp ketchup
- 1 tbsp mustard
- 1 tsp Worcestershire sauce
- 1 tsp apple cider vinegar
- 1 tbsp all-purpose rub (salt, pepper, garlic)
- 1 tsp red pepper flakes
- Pepper jack cheese slices
- Burger buns
- Avocado oil (or olive oil)
Now, let’s talk about some ingredient considerations. First off, when it comes to ground chuck, the fat content is key—aim for an 80/20 mix. This gives you that juicy burger you dream about.
And don’t skimp on the bacon; it brings a smoky crunch that’s hard to resist. The Baconnaise sauce is where things get a little saucy; it pulls everything together with a creamy, zesty punch. Seriously, if you forget to make it, your burgers will feel like they’re missing their favorite jacket.
And don’t forget the cheese—opting for pepper jack adds a nice kick, perfect for those who enjoy a little spice in their life. Last but not least, picking the right bun is essential. You want something that can hold all those delicious ingredients without falling apart, because no one likes a messy burger situation.
Step-by-Step Instructions
Making smash burgers is a fun and flavorful experience that’s perfect for any cookout. The secret lies in the juicy beef, perfectly cooked bacon, and that creamy Baconnaise sauce that ties it all together. Don’t worry, it’s easier than it sounds! Just follow these simple steps to create your mouthwatering smash burgers.
Step-by-Step Instructions
1. Chill Your Ingredients: Start by taking your 1 lb of ground chuck, forming it into 1/3 lb balls, and placing them in the fridge for about 30 minutes. This not only keeps the burgers firm but also makes them easier to smash later.
While you’re at it, thinly slice your white onions and toss them in the fridge too.
2. Make the Baconnaise Sauce: Grab a bowl and mix together ½ cup of mayonnaise, 2 tablespoons of ketchup, 1 tablespoon of mustard, 1 teaspoon of Worcestershire sauce, and 1 teaspoon of apple cider vinegar.
Add in the 6 slices of cooked and chopped bacon, along with 1 tablespoon of your all-purpose rub and 1 teaspoon of red pepper flakes. Give it a good stir and pop it into the fridge to chill while you cook. This creamy goodness is what takes your burgers to the next level.
3. Heat the Griddle****: Get your griddle nice and hot—medium-high heat is just right. Once it’s heated up, drizzle a little avocado oil (or olive oil) on the surface so the burgers don’t stick.
4. Cook the Burgers: Place the chilled burger balls on the griddle, leaving about 2-3 inches between them. Now, it’s time for the fun part—using a spatula, smash each burger ball flat!
Don’t go wild; you want enough pressure to create a nice crust, but not so much that you squish all the juices out. Season with a sprinkle of salt, pepper, and garlic—just enough to enhance all those flavors.
5. Add the Onions: As the burgers cook for about 3-4 minutes, scatter those thinly sliced onions on top. You want them to get super tender and add that sweet onion flavor.
6. Flip and Cheese: After 3-4 minutes, you’re ready for the flip! Give each burger a generous spread of mustard on the cooked side before flipping.
Add a slice of pepper jack cheese on top as soon as you flip them, and let it cook for another 3 minutes until the cheese is all melty and gooey.
7. Toast the Buns: While the burgers are finishing, toss your burger buns on the griddle for a minute or so until they’re toasty, golden brown—just enough to add a nice crunch without burning them.
8. Assemble Your Burgers: Now, let’s bring it all together. Spread a thick layer of that tasty Baconnaise sauce on the bottom bun, then place the cheesy burger on top.
If you’re feeling saucy, add a little more Baconnaise on the burger before topping it off with the top bun.
And there you have it, your smashing burgers ready to be devoured. Don’t be shy about taking a big bite—this burger is meant to be enjoyed.
It’s juicy, crispy, and oh-so-satisfying. Who knew making burgers could be this easy and fun? Enjoy the compliments from friends and family—trust me, they’ll be lining up for seconds, if not thirds. Adding a gourmet food processor can help streamline your cooking prep, making it even easier to whip up delicious sauces and ingredients.
Tips & Variations
After you’ve mastered the smash burger process, you’ll find there’s always room to spice things up a bit. For instance, try adding jalapeños for a kick or swapping the pepper jack with cheddar if you’re feeling traditional.
Want to elevate that Baconnaise? Sometimes, I sneak in a dash of hot sauce or smoked paprika to jazz it up. And don’t underestimate the power of toppings—crispy fried onions or guacamole can change the game.
Oh, and if you’re feeling lazy about slicing onions, a mandoline works wonders. Trust me, I’ve faced my fair share of onion-crying sessions and this tool is a game-changer.
Experimenting is half the fun, so don’t stress—just enjoy the cooking journey!
How to Serve?
Serving up smash burgers is where the real fun begins, and trust me, it’s an art as much as it’s a science. First, I like to place those glorious burgers on a plate, each one dripping with cheesy goodness.
Then, I slather the bottoms of the buns with that divine Baconnaise sauce because who doesn’t love a little extra flavor? I pile on fresh toppings like crispy lettuce or slices of tomato—just to pretend I’m being healthy. And don’t forget the pickles! Every burger needs that zing.
Now, for the pièce de résistance: a side of crispy fries or onion rings. Honestly, watching my friends jump in is the best part. It’s messy, it’s delicious, and it’s an experience you won’t forget.
Storage & Reheating Guide
You know what’s almost as satisfying as devouring a delicious smash burger? Storing those leftovers for later.
Here’s how I handle it: I always wrap my smash burgers in foil or tuck them in an airtight container—it keeps them nice and juicy. Just pop them in the fridge if you’re planning to eat them within a few days. If I want to save them longer, I freeze them. No one likes a dried-out burger, right? Investing in airtight food storage solutions can significantly enhance your leftovers’ longevity.
When I’m ready to reheat, I can’t help but feel like a master chef. I toss them on a hot skillet for a few minutes, flipping carefully. It’s the best way to revive that glorious, crispy crust. And don’t forget to warm the buns too.
Final Thoughts
Even though I’m no culinary genius, I can’t help but feel a little proud when I make smash burgers at home.
There’s just something magical about that sizzle when the beef hits the griddle. I mean, who doesn’t love a good burger?
And that Baconnaise sauce—wow. It takes everything to a whole new level. Seriously, if you haven’t tried it yet, you’re missing out.
Don’t stress if things seem messy; I’ve had my fair share of kitchen disasters too. Just remember, the point is to enjoy the process.