
I’ve got to tell you about this Rich Turtle Cheesecake recipe. It combines cream cheese, chocolate, caramel—you get the picture, right? Talk about a crowd-pleaser. My friends always beg me to whip it up for gatherings. I mean, who wouldn’t want that velvety filling and crunchy pecans? Plus, it’s surprisingly easy to make, even for a kitchen klutz like me. Stick around to see how you can impress everyone with this dessert that tastes fancy but feels like home.
Why You’ll Love This Recipe
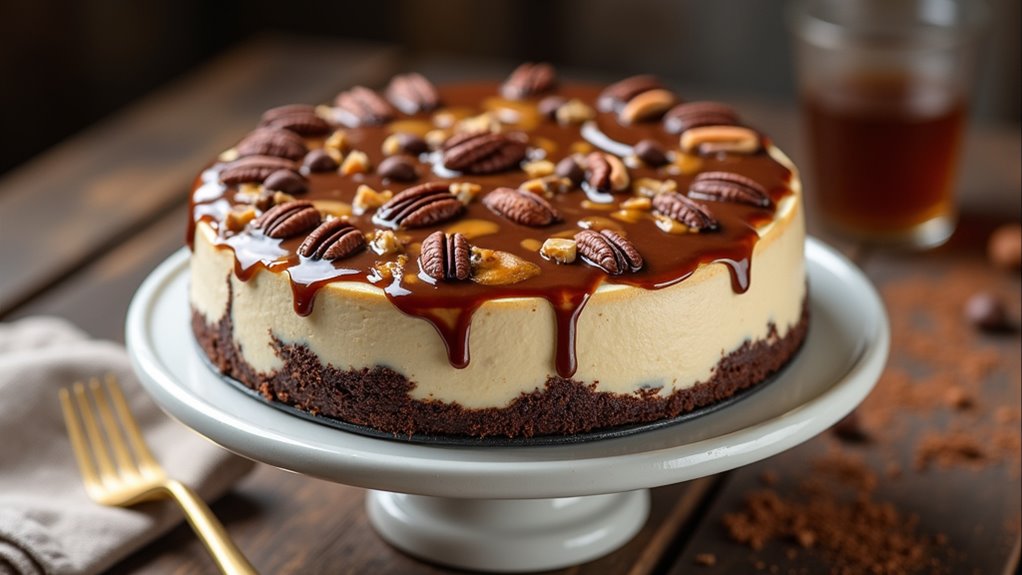
When you take the first bite of this rich turtle cheesecake, you’ll realize why I can’t stop raving about it.
Imagine velvety cream cheese swirled with rich chocolate, topped with gooey caramel and crunchy pecans.
It’s like a party in your mouth, and everyone’s invited. I mean, who wouldn’t love layers of flavors dancing around?
This turtle cheesecake isn’t just a dessert; it’s a celebration of all things delicious.
I’ve had friends practically beg for the recipe, claiming it’s the best thing they’ve ever tasted.
Honestly, it’s that good. Plus, it looks so fancy, but you and I both know it’s surprisingly easy to whip up.
Trust me, once it’s in front of you, you’ll never want to share.
Equipment List
To whip up this rich turtle cheesecake, you’ll need a few essential tools that will make your baking experience smoother than a well-blended batter.
First off, grab a 9-inch springform pan; trust me, it’s a game changer for easy removal. You’ll also want a mixing bowl, preferably a large one, to accommodate all those creamy ingredients. For the best results, consider using a non-stick omelette pan, which allows for even heating and prevents sticking.
A hand mixer makes the beating process easier, but a whisk works too—if you’re feeling energetic. And don’t forget a spatula for scraping every final bit of goodness out of that bowl.
Ultimately, have measuring cups and spoons on hand; precise measurements really do make a difference. Honestly, I sometimes just toss things in—let’s say I’m “creatively interpreting” the recipe. Also, consider having grill barbecue smoker accessories to add a delicious smoky flavor to your cheesecake during baking.
Our Ingredients
When you’re ready to plunge into creating the rich and creamy turtle cheesecake, you’ll find that gathering the ingredients is just the first step in your sweet adventure.
There’s nothing quite like standing in your kitchen, surrounded by all the goodies you’re about to mix, and imagining how amazing that final dessert is going to taste. Gather these ingredients, and you’ll be well on your way to a dessert that’s sure to impress even the toughest critics, like that friend who always brings store-bought treats to gatherings.
So, let’s get started!
- 1 3/4 cups chocolate graham cracker crumbs
- 1/3 cup melted butter
- 3 (8 oz) packages cream cheese, softened
- 1 (14 oz) can sweetened condensed milk
- 1/2 cup granulated sugar
- 3 large eggs
- 3 tbsp lime juice
- 1 tbsp vanilla extract
- 3/4 cup milk chocolate chips
- 2 tbsp chocolate syrup
- 2 tbsp caramel syrup
- 1/2 cup chopped pecans
- 1/4 cup semi-sweet chocolate mini morsels
Now that you have your shopping list ready, let’s chat a little about these ingredients.
First off, if you’re like me, you might be tempted to substitute, say, regular graham crackers for chocolate ones because they’re probably sitting in your pantry from that long-forgotten s’mores party. But trust me, the chocolate graham cracker crumbs add that delicious depth of flavor that makes this cheesecake sing.
Also, be sure to use fresh cream cheese—nobody wants a lumpy cheesecake, right? And speaking of fresh ingredients, don’t skimp on the lime juice; it gives just the right zing to balance the sweetness.
Step-by-Step Instructions
Making a turtle cheesecake is like wrapping yourself in a cozy blanket, filled with sweet chocolatey goodness. Mixing the batter is quick and simple—just follow these easy steps, and soon, you’ll have a rich, creamy dessert that will wow your friends and family. Ready to get started? Let’s plunge into the decadent world of cheesecake creation.
1. Prepare Your Crust: In a bowl, combine 1 3/4 cups of chocolate graham cracker crumbs with 1/3 cup of melted butter. Mix them together until you get a sandy texture like beachside bliss. Then, press this mixture firmly into the bottom of your pan to form a nice crust. It’s like making a little chocolate blanket for your cheesecake. Now, set it aside while we work on the filling. Utilizing quality kitchen appliances can help streamline this process.
2. Beat the Filling: In a large mixing bowl, add 3 packages (8 oz each) of softened cream cheese. Whip that up with 1 can (14 oz) of sweetened condensed milk and 1/2 cup of granulated sugar until it’s smooth and creamy. If you feel like a pro, you might even dance a little as you whisk!
Next, add in 3 large eggs, 3 tablespoons of lime juice, and 1 tablespoon of vanilla extract, and continue to beat until everything is well combined. (You should end up with a luscious, velvety batter—yum.)
3. Create the Chocolate Swirl**: Now, scoop out 1 cup of that rich filling and put it in a separate bowl. In the microwave, melt 3/4 cup of milk chocolate chips**—about 30 seconds should do it. Stir it until smooth and then fold it into the reserved filling. This creates that glorious chocolate batter that brings the turtle cheesecake to life.
4. Layer the Batter: Time to assemble this deliciousness! Pour half of your plain batter over the crust, followed by the chocolate batter. Then, pour the remaining plain batter on top.
To create a beautiful swirl effect, use a knife or a skewer and gently swirl through the layers—be careful not to overdo it; we’re aiming for marbled, not mix-tape chaos.
5. Bake to Perfection: Preheat your oven to 325°F. Bake your cheesecake for 60 to 75 minutes. Keep an eye on it; you’ll know it’s done when the edges are set, but the center still has that lovely jiggle (it’s like a little dance party in the oven).
Once baked, cool it for 10 minutes, then run a knife around the edges to loosen it. Let it cool completely before refrigerating it for several hours (or overnight, if you’re really patient, which I sometimes am… but not always).
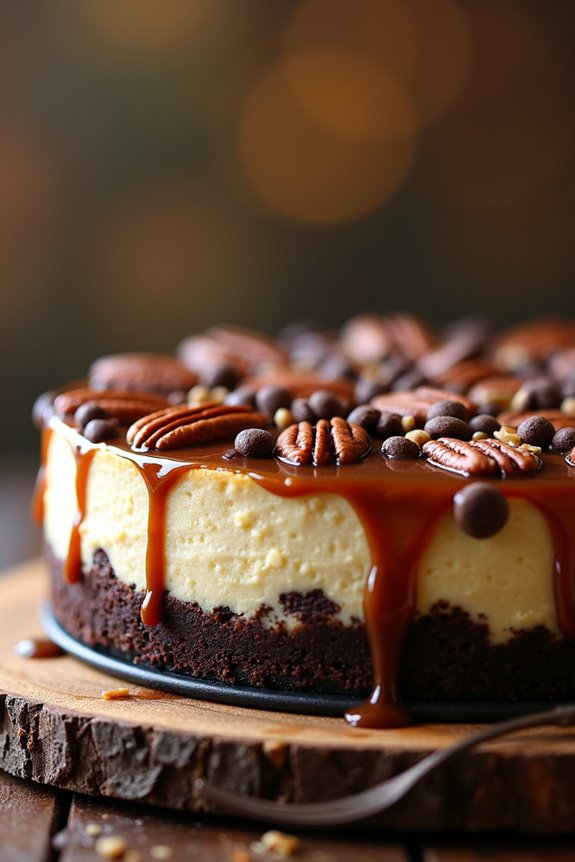
6. The Finishing Touches: Before you serve your masterpiece, drizzle 2 tablespoons of chocolate syrup and 2 tablespoons of caramel syrup over the top—those are the little jewels on your cake.
Then, sprinkle 1/2 cup of chopped pecans and 1/4 cup of semi-sweet chocolate mini morsels like you’re decorating a magical culinary crown.
And there you have it, your very own turtle cheesecake, ready to be devoured. Just remember to slice it carefully and maybe save yourself a slice for later… if you can resist the temptation. Happy baking! Additionally, consider investing in essential seafood cooking equipment to enhance your culinary adventures beyond desserts.
Tips & Variations
The process of creating a turtle cheesecake doesn’t just end with baking; that’s where the fun truly begins. I love experimenting with toppings!
If you’re feeling adventurous, swap the pecans for walnuts or try adding some sea salt to enhance the sweetness. Ever thought about a pumpkin twist? Add some pumpkin puree and spices during fall. Trust me; it’s delicious.
Don’t forget about the chocolate syrup drizzle—sometimes I go a bit overboard, but who’s counting calories when cheesecake is involved?
For that perfect marbled look, don’t over-swish the layers; gentle twists work wonders.
Oh, and chilling is key! Letting it sit overnight makes all the flavors come alive, so patience is your friend here.
Happy baking!
How to Serve?
Serving turtle cheesecake is all about making that first slice count. I like to grab a sharp knife and dip it in hot water, wiping it off after each cut. You want clean edges, right? It’s like giving your cheesecake a fresh haircut.
Once you slice it, place it on a dessert plate, and don’t forget to drizzle extra chocolate and caramel sauces on top. A sprinkle of chopped pecans gives it that perfect crunch.
When I’m feeling fancy, I add a dollop of whipped cream, too. It’s all about the presentation!
And hey, if anyone asks for seconds, you just smile and say, “Of course, it’s just like hugs in cheesecake form.” Perfect, isn’t it?
Storage & Reheating Guide
After devoting all that time and love to making your rich turtle cheesecake, you’d want to store it properly, right?
I mean, we didn’t spend hours mixing and baking just for it to go bad.
First, cover it tightly with some plastic wrap or foil. It’ll stay fresh in the fridge for up to a week. If you’re feeling adventurous, you can freeze it! Just slice it up, wrap each piece, and pop them in an airtight container. Thaw in the fridge when you’re ready to indulge again.
As for reheating, I usually just let it sit at room temperature for about 30 minutes.
Trust me, nothing is quite as delightful as that gooey goodness waiting for you.
Final Thoughts
When you finally slice into that rich turtle cheesecake after all the hard work you put in, it almost feels like a little celebration, doesn’t it?
I mean, who wouldn’t want to plunge into a creamy, chocolatey delight topped with sweet caramel and crunchy pecans? It’s a treat that’s well worth the effort.
And let’s be honest, if I can manage not to eat half the batter before it hits the oven, anyone can do this.
As your friends gather around, their eyes lighting up at the first bite, you’ll know all those mixing and swirling moments were totally worth it.