

I’m excited to share my Ultimate 7 Layer Dip Recipe with you. It’s such a crowd-pleaser, and honestly, who doesn’t love layers of goodness? I remember making this for a gathering once, and I was practically the dip hero of the day. This dip’s colorful, tasty layers are a feast for both the eyes and the palate. So, what’s in this masterpiece? Well, let’s explore the ingredients and get into the fun part—making it.
Why You’ll Love This Recipe
You know, if you’ve ever been to a gathering where 7 Layer Dip is present, you understand why it’s such a crowd-pleaser.
This ultimate 7 layer dip recipe is a game changer. Trust me, once you plunge into those layers of flavor, you’ll wonder how you ever served chips with plain salsa. The creamy guacamole, zesty sour cream, and spicy salsa all work together like a dream.
Honestly, my friends can’t get enough! I still remember the first time I made it—everyone forgot I was there, they were so focused on the dip.
And let’s be real, who doesn’t love a recipe that’s as fun to make as it’s to eat? You’ll be the star of the party, guaranteed.
Equipment List
When diving into the world of 7 Layer Dip, having the right equipment makes all the difference. First, you’ll need a 9×13-inch dish to showcase those glorious layers.
A mixing bowl is essential for whipping together the refried beans and spices; trust me, it gets messy otherwise. I also recommend a spatula for even spreading—those layers need to look fabulous.
A trusty measuring cup will help when portioning out the guacamole and sour cream, while a sharp knife is perfect for slicing green onions and olives.
Finally, don’t forget some good chips for serving; they’re like the supporting cast in a great movie, ready to elevate your dip to stardom. Let’s just say, snacks are life. Additionally, a premium slow cooker can enhance your cooking experience by providing even heat distribution and versatility for any gathering.
Our Ingredients
Alright, let’s talk about the superstar ingredients in the Ultimate 7 Layer Dip!
These components come together like best friends at a party, each bringing their unique flavor and personality to the table. You might be thinking, “But what do I need to make my dip a hit?” Well, you’re in the right place.
Here’s what you’ll need to make this delightful dip:
- 32 oz refried beans
- 1 tsp salt
- 1 tsp garlic powder
- 1 tsp cumin
- ½ tsp cayenne pepper
- 2 cups guacamole
- 2 cups sour cream
- 2 cups salsa
- 2 cups shredded cheese (cheddar or Mexican blend)
- 1 cup sliced green onions
- ½ cup black olives (drained)
- Optional: diced tomatoes, jalapeños, cilantro, tortilla chips
Now, let’s chat about those ingredients for a moment.
The refried beans are like the sturdy base of a house—without them, everything would just fall apart, and who wants a pile of goo?
The spices, oh the spices! They’re like the flair at a party; just the right amount can take your dip from “meh” to “wow.”
And the guacamole? Seriously, do yourself a favor—go for fresh. It makes a world of difference and will add that creamy goodness that everyone craves.
Plus, those optional toppings aren’t just for decoration. They add color, crunch, and kick—so don’t be shy! Toss ‘em on and let your creativity flow.
After all, what’s life if you can’t have a little fun with your food?
Step-by-Step Instructions
Creating the Ultimate 7 Layer Dip isn’t just a task; it’s a flavorful adventure that can make you the star of any gathering. It’s all about stacking those delicious layers to build the perfect dip—so let’s get started with these easy steps. Grab your ingredients, and let’s have some fun!
- Mix the Beans: In a large bowl, take 32 oz of refried beans and add 1 tsp of salt, 1 tsp of garlic powder, 1 tsp of cumin, and ½ tsp of cayenne pepper. Mix well until combined and smooth. This will be the sturdy base of your dip—think of it as the strong foundation of a roller coaster ride.
- Spread the Beans: Grab a 9×13 dish and spread the bean mixture evenly across the bottom. Use a spatula to smooth it out, making it nice and flat. This layer is essential, so make sure it’s even—you want every scoop to have that bean goodness.
- Layer the Guacamole: Next up, take those 2 cups of creamy guacamole and spread them over the beans. Be generous; it’s the green gold of your dip. A little tip: if you have fresh guacamole, now’s the time to flaunt it.
- Add Sour Cream: Now it’s time for the 2 cups of sour cream. Carefully spread it over the guacamole layer. Take your time here; nobody wants a messy dip. Layer it gently for a beautiful presentation—like icing on a cake.
- Pour on the Salsa: Time to add some zest! Pour 2 cups of salsa over the sour cream layer, spreading it gently to guarantee even coverage. Visual cue: you want to see that beautiful red color peeking through.
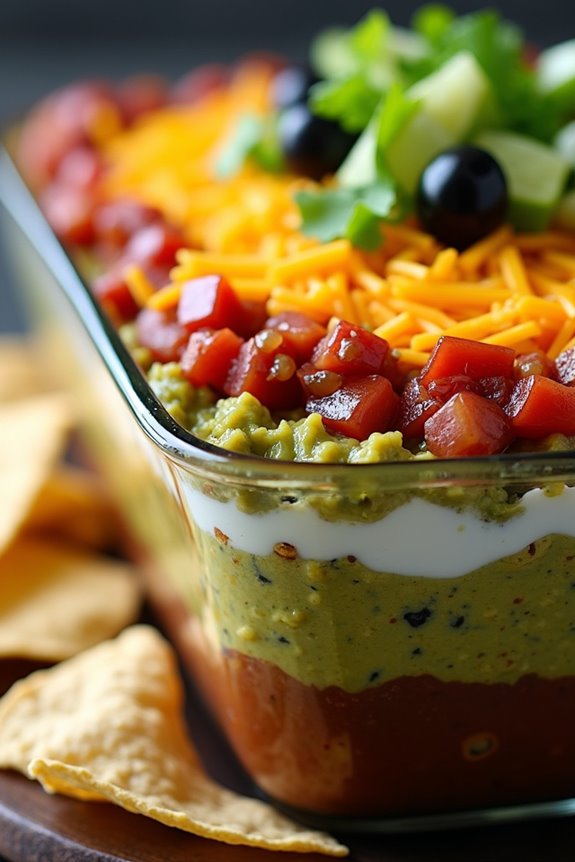
- Cheesy Delight: Sprinkle 2 cups of shredded cheese—either cheddar or a Mexican blend—on top of the salsa. Make sure you cover the salsa completely; this cheese will melt marvelously if you decide to bake the dip later.
- Garnish with Green Onions and Olives: Sprinkle 1 cup of sliced green onions and ½ cup of drained black olives over the cheese layer. These toppings not only add a burst of color but also a delightful crunch.
- Chill or Bake: At this point, you have two choices. You can refrigerate the dip for about an hour to let those flavors meld beautifully—trust me, it’s worth the wait. Alternatively, if you need that warm, gooey goodness right away, preheat your oven to 350°F and bake for 20 minutes. Just until the cheese is bubbling and turning golden, which will make your kitchen smell heavenly. In addition, using quality kitchen grill outdoor equipment can enhance your outdoor cooking experience.
- Top It Off: If you’d like, feel free to add diced tomatoes, jalapeños, or cilantro on top after it cools slightly. These extras give a lovely pop of freshness and flavor, plus they look stunning.
- Serve with Chips: Get your favorite tortilla chips ready because it’s time to dig in. Serve the dip warm or cold—no judgment here. Just remember, you might want to think about getting a bigger bowl; this dip is likely to vanish quicker than you think.
That’s it! You’ve just created the Ultimate 7 Layer Dip. Just remember, whether it’s game day, a family gathering, or simply a snack for one while binge-watching your favorite show, this dip will certainly steal the spotlight (and your heart). Enjoy!
Tips & Variations
While you might think a classic 7 layer dip is perfect as is, there are so many fun twists you can add to make it your own.
Ever thought of adding some spicy jalapeños? They bring a kick that wakes up your taste buds. Or maybe toss in some fresh tomatoes or cilantro for a burst of color—who doesn’t love a pretty dish?
And let’s not forget about seasoning the sour cream with taco seasoning. Trust me, it elevates the whole dip. I sometimes sprinkle some crumbled feta on top for a tangy surprise too.
Honestly, the options are endless. Just trust your instincts, and don’t be afraid to experiment. If it sounds good, it probably is!
How to Serve?
Serving up your ultimate 7 layer dip is like hosting a mini fiesta right in your living room. Grab your favorite tortilla chips and set them on a cute platter—because presentation matters.
I like to place the dip right in the center, showcasing each colorful layer. Trust me, your guests won’t be able to resist. Don’t forget to set out some extra toppings, like diced tomatoes or jalapeños. This way, everyone can customize their dip just how they like it.
As they dig in, I always joke that we should’ve brought sombreros—things can get a little messy, right? Just embrace the chaos! Ultimately, it’s all about enjoying good food and great company.
Now, who’s ready to dig in?
Storage & Reheating Guide
After the party’s over and the plates are empty, you might wonder what to do with any leftover 7 layer dip—if any makes it to the fridge, that is.
First, cover your dip with plastic wrap or pop it in an airtight container. It usually stays fresh for about three days. Just know, the guacamole might turn a bit brown; it happens.
When you’re ready to dig back in, I suggest skipping the microwave—nobody wants a sad, melty mess. Instead, grab a spoon and enjoy it cold or let it sit at room temperature for about 15 minutes. I mean, who doesn’t love a dip that’s ready to party again?
And remember, those tortilla chips are still your best friend.
Additionally, storing your dip in premium cookware sets can help maintain its flavor and freshness longer.
Final Thoughts
When it comes to parties, what’s better than a crowd-pleasing dip like the Ultimate 7 Layer Dip? Seriously, this dip’s a showstopper. I can’t tell you how many times I’ve whipped it up, only to be asked for the recipe!
Each layer brings its own flavor, and together, they create a flavor explosion. Plus, it’s super easy to make, so even if you’re like me and have the culinary skills of a potato, you can nail this.
Just thinking about it makes me hungry. Don’t forget the chips; they deserve some loving too. Whether you serve it cold or hot, this dip will make you the superstar of any gathering.
Trust me, you’ll want this recipe in your back pocket.