
I’ve gotta say, the Ultimate 7 Layer Dip is like the Beyoncé of party snacks—everyone loves it, and it steals the show every time. When I first whipped this up for a game day, I wasn’t sure what to expect. But once my friends started diving into those layers of guacamole, salsa, and refried beans, they couldn’t stop. It’s a flavor party, and you can totally customize it to match your crowd’s tastes. Want to find out how I make it?
Why You’ll Love This Recipe
If you’ve ever found yourself at a party with a mountain of snacks and thought, “I just need the perfect dip,” you’ll totally get why this 7 Layer Dip is a game-changer.
Seriously, it’s like a fiesta in a dish. Each layer brings something special, from the creamy guacamole to the zesty salsa.
And the best part? It’s super easy to customize. You can throw in extra toppings (hello, jalapeños) or swap out ingredients if you’re feeling adventurous.
I still remember my first attempt, where I forgot the tomatoes—yikes! But even then, everyone loved it.
This ultimate 7 layer dip recipe is all about having fun and letting your creativity shine.
Grab those tortilla chips, and let’s jump in!
Equipment List
Making that 7 Layer Dip you’ve been dreaming about? You’ll need a few key pieces of equipment to make it happen.
First, grab a large mixing bowl; I always start with a big one to mix those delicious layers easily. A 9×13 baking dish is perfect for displaying your masterpiece because who doesn’t love a great presentation?
You’ll need an electric mixer or a sturdy spoon to beat that cream cheese into submission. A spatula makes spreading those layers a breeze.
Don’t forget measuring cups and spoons; accuracy is key, right?
Finally, if you’ve got a knife and a cutting board for those fresh veggies, you’re all set. It’s almost time to let the magic begin.
Investing in premium kitchen appliances can elevate your cooking experience and make prep work even easier!
Our Ingredients
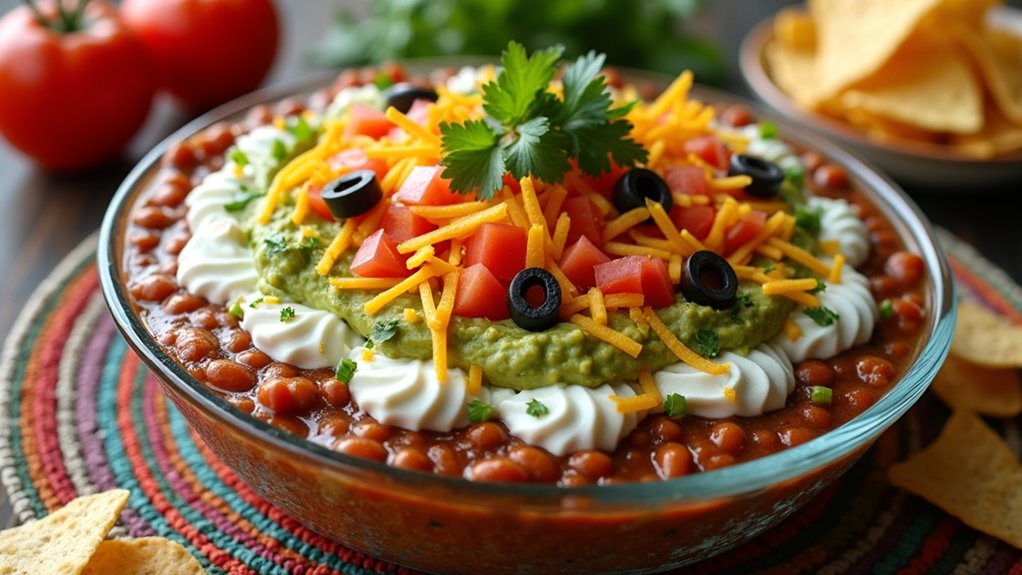
When it comes to party food, the legendary 7 Layer Dip is a household favorite that rarely disappoints. Imagine this: a beautiful, colorful dish layered high with all your favorite flavors, ready for dipping.
It’s easy to whip up, and the best part? You can customize it to fit what you like best or what you have on hand. So, let’s plunge into what you’ll need to create this dreamy dip that will have everyone raving at your next get-together.
Here’s a list of the ingredients you’ll need:
- 16 oz refried beans
- 10 oz diced tomatoes with green chiles, drained
- 8 oz sour cream
- 8 oz cream cheese, softened
- 2-3 tbsp taco seasoning
- 3-4 avocados, mashed with lime juice
- 16 oz chunky salsa, drained
- 1 ½ – 2 cups shredded cheese
- 2 tomatoes, chopped
- 1 small can sliced black olives
- Green onions, sliced
- Cilantro, chopped
- Tortilla chips (for dipping, obviously)
Now that we’ve got our shopping list, let’s chat about some other considerations regarding these ingredients.
If you’re really feeling adventurous, you might want to switch up the cheese – maybe go for pepper jack for that extra kick. And, of course, you can tailor the spice level of the dip by choosing milder or spicier salsa.
If you’re on avocado watch, you might be able to sneak in store-bought guacamole instead of mashing it up yourself. But please, don’t forget the lime juice; it’s essential because it keeps the avocados from turning brown.
Plus, who wouldn’t want that zesty flavor? All in all, the beauty of this dish is its versatility, so don’t hesitate to mix and match to suit your taste buds or pantry contents.
Step-by-Step Instructions
Making a fabulous 7 Layer Dip is a breeze, and trust me, your guests will love every bite (and so will you)! Follow these easy steps, and soon you’ll have a stunning, colorful dip ready for scooping. The best part? It all comes together in just a few moments, and the flavor is worth the hype. Let’s dive right in!
Step-by-Step Instructions
- Prepare the Base: In a mixing bowl, combine 16 oz of refried beans with 10 oz of diced tomatoes with green chiles (make sure they’re drained). Add 2-3 tbsp of taco seasoning into the mix and stir everything together until it’s well combined. This will serve as the delicious foundation of your dip.
- Add the Creamy Layer: In another bowl, mix together 8 oz of sour cream and 8 oz of softened cream cheese until it’s smooth and creamy. This luscious layer will add a delightful richness to your dip. Use a hand mixer if you want to avoid potential arm cramps!
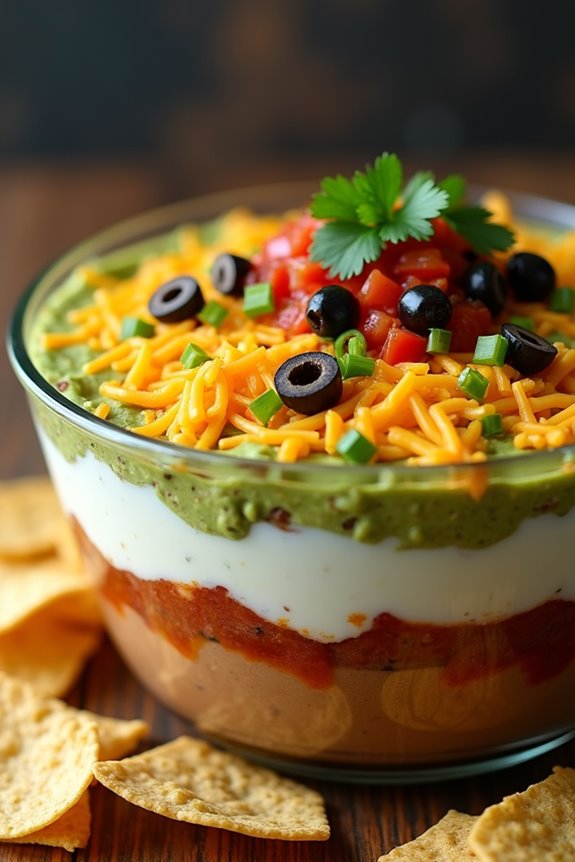
- Layer it Up: Grab your serving dish (a nice glass dish works great for the visual appeal), and carefully spread the refried bean mixture across the bottom. Next, spoon the creamy sour cream and cream cheese mixture over the beans, spreading it evenly with a spatula.
- Make the Guacamole: In a separate bowl, mash 3-4 avocados and mix in some lime juice (don’t skip this; it keeps everything vibrant and green). Once it’s nice and creamy, spread the guacamole over the creamy layer.
- Salsa Time: Now, take 16 oz of chunky salsa, making sure it’s drained well to avoid a soggy dip. Layer it generously over the guacamole, letting the salsa sit comfortably on top.
- Cheesy Goodness: Sprinkle 1 ½ – 2 cups of shredded cheese evenly over the salsa layer. Cheddar, Monterey Jack, or even pepper jack are all excellent choices here. Who can resist that gooey layer of melted cheese?
- Fresh Toppings: Chop up 2 tomatoes and scatter them over the cheese, followed by the sliced black olives from your small can. Add a sprinkle of green onions and a handful of chopped cilantro to finish up that beautiful presentation.
- Serving it Up: Once all your layers are in place, grab some tortilla chips and get ready to dig in. Make sure to cover your dip tightly if you’re not serving it right away, as the guacamole stays fresh that way.
It’s best enjoyed within two days (if it lasts that long). You might find yourself sneaking a chip or two before the guests arrive—no judgment here. Enjoying this dip alongside essential kitchen appliances can make the preparation even simpler!
And there you have it, a stunning 7 Layer Dip that looks as good as it tastes. Just remember, the only thing better than making it’s watching those chips disappear into this delicious creation! Happy dipping!
Tips & Variations
There’s something magical about a 7 Layer Dip; it brings people together, igniting laughter and conversation at any gathering.
Want to spice things up? You can experiment with different beans—try black beans for a twist. If you’re feeling adventurous, add some roasted corn on top for a sweet crunch.
I sometimes toss in jalapeños for a kick; just be careful not to make it too spicy—trust me, no one wants to see a friend guzzle water in distress. You could swap the sour cream for Greek yogurt for a lighter option, too.
And for those who love crunch, crushed chips sprinkled on the top can add flair. Don’t forget, personalization is half the fun. Enjoy getting creative!
How to Serve?
Serving a 7 Layer Dip is where the fun really kicks in. You’ve got that beautiful layered masterpiece, right? I like to set it out with a big bowl of crunchy tortilla chips nearby.
Dip into that creamy goodness, and don’t be shy—it’s all about making those fabulous layers shine.
Sometimes, I even make a mini competition—who can scoop the biggest bite without a chip break? Spoiler alert: it’s harder than it looks.
Also, don’t forget to set out some extra toppings like sliced jalapeños or even more green onions. Trust me, your guests will love personalizing their dips.
And remember, I always need a napkin on hand; things can get a bit messy, but that just adds to the fun, doesn’t it?
Storage & Reheating Guide
When it comes to storing your 7 Layer Dip, I usually have a couple of tricks up my sleeve.
First off, you’ll want to cover it tightly. I mean, really tightly. Guacamole can be a drama queen and brown if it doesn’t get enough love from the air. If you wrap it well, it’ll stay fresh for up to two days. Using airtight food storage solutions can enhance the longevity of your dip.
If you’ve got leftovers, don’t worry; just pop it in the fridge.
Reheating? That’s a no-go for me. I prefer it cold, but if you insist, try just warming up the refried beans first and then layer the chilled toppings again.
Just be sure to add fresh ingredients if they’ve lost their charm. Enjoy your dip!
Final Thoughts
After you’ve tackled the art of storing your 7 Layer Dip, it’s time to contemplate the joy it brings to gatherings, game days, or simply a snacky Friday night at home.
Honestly, there’s something magical about layering those vibrant ingredients. Every scoop is a little taste of heaven. I mean, who doesn’t love a dip that pleases everyone? It’s a crowd-pleaser, that’s for sure.
And let’s face it, if you accidentally eat half before the guests arrive, you might as well claim it’s an artistic pre-taste test. Just be sure to balance those layers—nobody wants too much guacamole on one chip, right?
Trust me, this dip will leave your friends singing your praises, and you’ll be the hero of the night.