
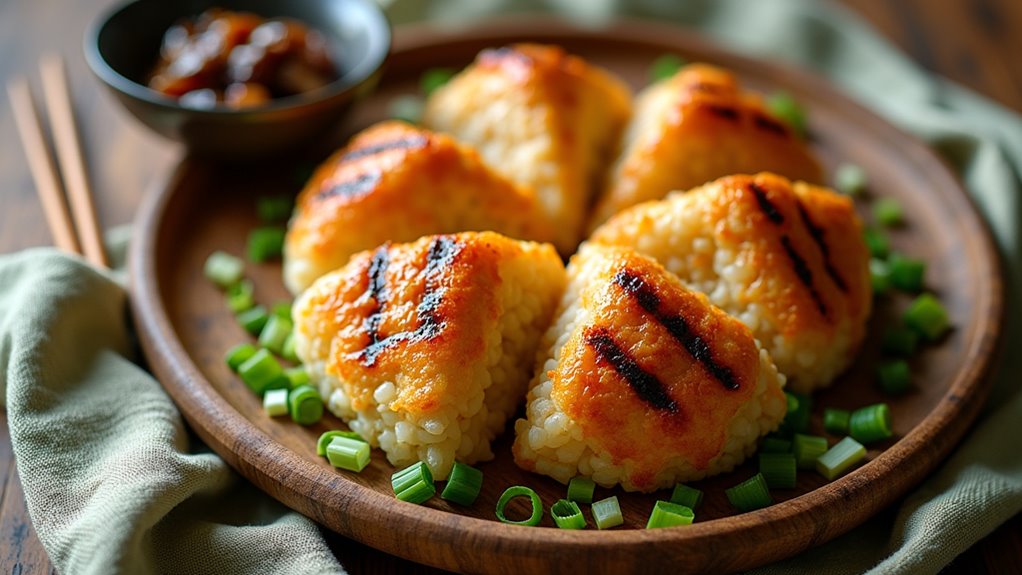
I’ve got to share my new favorite snack: Yaki Onigiri with Pickled Shiitakes. Seriously, these crispy rice balls are just the right mix of chewy and crunchy, plus they pack a flavorful punch with that savory umami goodness. When I first tried making them, I definitely had a few rice explosions in my kitchen, but hey, that’s part of the fun, right? Stick around, and I’ll walk you through the process, so you can avoid my kitchen disasters.
Why You’ll Love This Recipe
Even if you think you’re not a master chef, Yaki Onigiri might just change your mind.
These grilled Japanese rice balls with pickled shiitakes are surprisingly easy to make, and trust me, they’ll impress anyone.
I remember the first time I shaped them into those perfect triangles; I felt like a pro.
The crispy exterior, combined with that warm, sticky rice and savory pickled shiitakes, creates a flavor explosion in your mouth.
Plus, who can resist that golden crust? It’s like a little piece of heaven.
It’s fun, it’s delicious, and it’s way easier than you think.
So go ahead, roll up your sleeves, and let’s get grilling.
You won’t regret it. These will become your new favorite snack.
Equipment List
Once you’ve decided to tackle making Yaki Onigiri, gathering the right equipment can make all the difference. You’ll need a good rice cooker for that perfectly sticky short-grain rice—trust me, it’s a game changer.
Grab a mixing bowl for combining ingredients; I often use my favorite wooden one, it just feels right. A triangle mold can help shape the rice, but let’s be real, your hands work just fine too.
Don’t forget a grill or a pan for that beautiful crispy finish; nothing says “delicious” like a nice char. Finally, a basting brush is essential for applying that lovely glaze. It’s funny, I used to think I could skip it, but sauces just work better this way. Additionally, using grill barbecue smoker accessories can elevate your cooking experience and help achieve outstanding results.
Our Ingredients
When it comes to making those delightful Yaki Onigiri, having the right ingredients is key to achieving that perfect balance of flavors and textures. Trust me, you don’t want to skimp on anything here.
The beauty of this recipe lies in its simplicity, but the ingredients each play a huge role. It’s a mix of savory, sweet, and a hint of nutty goodness that’ll make your taste buds do a little happy dance. You ready? Let’s lay down what you’ll need.
Ingredients:
- 2¼ cups cooked Japanese short-grain rice
- 3 tbsp soy sauce
- 1 tbsp sugar
- 1 tbsp toasted sesame oil
- ¼ tsp kosher salt
- 1 tsp toasted sesame oil (for glazing)
- Pickled shiitake mushrooms (prepared or store-bought)
- Optional: 1 tsp miso paste, 1 tsp garlic paste for glaze
Now, a thing to keep in mind while gathering these ingredients is to focus on quality, especially the rice and soy sauce. For the rice, you really want that short-grain variety—it’s what gives us that delightful stickiness.
And don’t even think about using regular soy sauce if you can get your hands on some high-quality, authentic Japanese soy sauce; there’s a huge difference in taste. The toasted sesame oil? Well, that’s your secret weapon for adding a lovely nutty flavor.
Also, being optional, the miso paste and garlic paste can really elevate the glaze, so consider them if you’re feeling adventurous. Just remember, ingredient choices can really make or break your dishes, so choose wisely!
Step-by-Step Instructions
Making Yaki Onigiri is like playing a delicious game of flavors and textures—it’s all about getting that perfect crust with a soft interior! Plus, the addition of pickled shiitakes takes it over the top. Ready to jump in? Just follow these simple steps, and you’ll be enjoying your own crispy rice triangles in no time.
1. Mix Your Base: Start by taking 2¼ cups of cooked Japanese short-grain rice and mix it in a large bowl with 3 tbsp of soy sauce, 1 tbsp of sugar, 1 tbsp of toasted sesame oil, and ¼ tsp of kosher salt. It’s all about getting that sweet and savory balance here, so mix until the rice is evenly coated.
Feel free to get a little hands-on; I often take a gentle approach to avoid squishing the rice too much.
2. Shape Your Triangles: Now the fun part—shape the rice mixture into firm triangles. To help keep the rice from sticking to your hands, keep a bowl of water nearby and dip your fingers in it.
You want them to be compact but not overly pressed, so they hold together during grilling.
3. Dust for Crispiness: This step is optional, but if you’re up for it, dust lightly with some potato starch. This little trick gives the rice that extra crunch when grilled, adding a delightful contrast to the soft interior.
You’re going to want that crispness—it’s like the cherry on top!
4. Grill Time: Heat up your grill to medium. Once ready, place the rice triangles on, brushing with a mix of 1 tsp toasted sesame oil and some soy sauce.
Grill them for about three to four minutes before flipping, and keep brushing that glaze on. You’re aiming for a beautiful golden color all around—think sun-kissed loved ones rather than burnt marshmallows.
5. Watch for Perfection: Continue grilling until the triangles are crispy and heated through, about 8-10 minutes total.
You’re looking for that golden, crispy outside while still being soft inside. Trust me, the moment you hear a satisfying crunch as you bite in is just pure bliss!
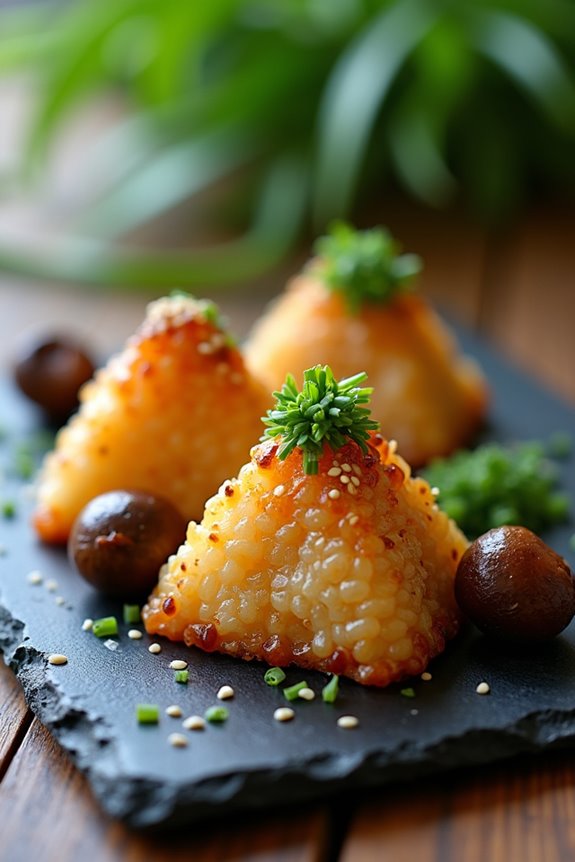
6. Serve with Flair: Once they’re perfect, serve your onigiri topped or stuffed with those delicious pickled shiitake mushrooms.
It’s like a little surprise inside with every bite, and enthusiasm is key here—go big or go home!
And there you have it! Yaki Onigiri that’s warm, inviting, and simply scrumptious. You can elevate your kitchen experience with specialized gourmet cooking equipment that makes the process even more enjoyable.
Give yourself a pat on the back, because you’ve created a dish that’s sure to impress anyone lucky enough to share a meal with you. Enjoy the fruits of your labor with good company and maybe a side of laughter, too. Happy cooking!
Tips & Variations
Even if your Yaki Onigiri turns out a little wonky in shape, don’t sweat it—what truly matters is the flavor and the fun you have while making them.
To avoid sticky fingers, keep your hands wet while shaping. I can’t tell you how many times I wrestled with rice that seemed determined to cling to my fingers like a toddler to candy.
For a crispy exterior, dust the formed rice with a bit of potato starch; it works wonders.
Feeling adventurous? Consider adding miso or garlic paste to your glaze for an extra kick.
And hey, if you’ve got leftover veggies, toss them into the rice mix. Why not get creative? It’s all about making it yours, right?
How to Serve?
Although it might seem challenging to think about how to serve Yaki Onigiri, it’s actually pretty simple and can be a lot of fun.
First, I love to place those perfectly grilled triangles on a colorful plate, adding a pop of freshness with some sliced cucumber or a side salad.
Don’t forget to top them with those tangy pickled shiitakes; trust me, they make all the difference.
If you’re feeling fancy, drizzle a little sesame oil over everything—it adds a nice shine!
I sometimes even toss in some sesame seeds for a little crunch.
Honestly, I could eat these all day. Just grab some chopsticks or your hands, and dig in.
You might want to make extra; I always do!
Storage & Reheating Guide
Once you’ve mastered the art of grilling yaki onigiri, you’ll definitely want to savor those crispy triangles for as long as possible.
To store them, let your onigiri cool completely, then wrap each one tightly in plastic wrap. I usually pop them in an airtight container too—after all, we don’t want them turning into stale bricks.
In the fridge, they should keep for about three days. When you’re ready to indulge again, reheat them in a skillet over medium heat. Just a few minutes on each side, and they’ll be crispy again—thank goodness.
Microwaving’s an option, but they might lose that delightful crunch. Truly, who wants sad rice? Using a professional kitchen torch can also elevate your reheating process, giving your onigiri that perfect crispy finish.
Final Thoughts
After spending some time mastering the grilling technique for yaki onigiri and perfecting that gloriously crispy exterior, it’s time to reflect on the whole experience. Honestly, it feels pretty rewarding to see those golden triangles come to life. You can almost hear them crackle.
What I love most is how versatile they are—stuffed or topped with pickled shiitakes? You really can’t go wrong. And don’t get me started on that umami flavor!
My first attempts were a bit tragic, rice flying everywhere, but the taste? Totally worth it.